Showing posts with label decor. Show all posts

Friday, February 1, 2019

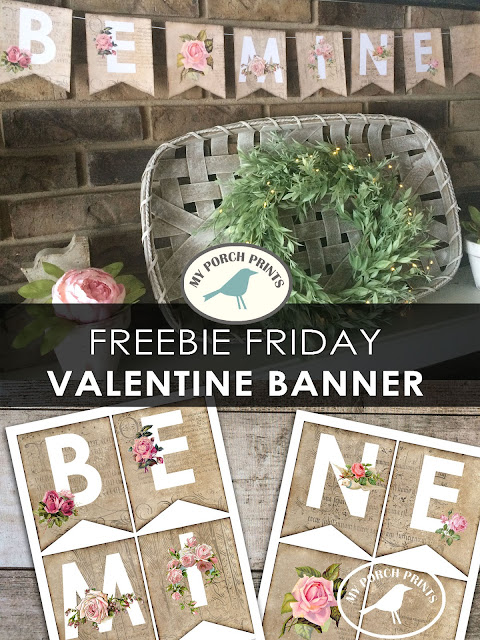
Freebie Friday: Valentine Banner

Free-Download-Be-Mine-Valentine-Banner

Freebie Friday: "Be Mine" Valentine Banner
It's the first Friday of the month which is Freebie Friday here on the Porch! That means another great free download for you. Today's freebie is this vintage style printable "Be Mine" Valentine's Day banner. 
Enjoy!

Free Printable Valentine's Day Banner from My Porch Prints

To Download
Click the image(s) below, then right click and save it to your computer.
Visit my Etsy shop to see more printables.

PERMISSIONS & COPYRIGHT
PLEASE NOTE:
 This image(s) is NOT to be re-used in digital form (as in do not re-post it on your website or anywhere else or try to sell it in digital form).

For PERSONAL use ONLY.

Free Printable Valentine's Day Banner from My Porch Prints

Follow Crafting Ideas by My Porch Prints on Facebook for lots of fun & beautiful paper crafting inspiration.


Saturday, September 15, 2018

Halloween Mini Spell Books Tutorial


Halloween Mini Spell Books
Fall is a time for pumpkin spice, crisp pretty leaves and... Halloween! This set of four mini Halloween spell books makes a fun and bewitching craft project.

Once you see how easy they are to make, you'll want to get your craft on.

1. Start with the printable download: Halloween Mini Books from My Porch Prints on Etsy.


2. Print the covers on cardstock* and the inside pages on regular paper. Cut them out as shown. You should have 3 page strips for each book.

*My printer was low on ink, which I didn't realize at the time. So, my "Book of Spells" cover is a little more "red" than the actual version. 


3. Fold the lighter, inside cover as pictured. Also fold along the "spine" to create a book shape. Secure with adhesive. I use craft glue or glue sticks.


4. You can add depth to your book (and cover up any crease lines) by using a black marker and a make-up sponge to darken the edges & spine.


5. Cut out the page strips and fold them accordion style. Apply glue to the back and glue page 1 to page 2, page 3 to page 4, and page 5 to page 6 as shown. Basically, just scrunch up your "accordion" so the page-backs stick together.


6. Now you have a book cover and a set of three signatures. (A signature is a collection of pages.)
Using a clip or clothespin, line up your three page signatures and hold them tightly together. Apply glue to the edge and push it into the inner spine of your book as shown. Hold for about 30 seconds or until adhesive begins to set.


 7. Finish by clamping the cover and pages together and allowing the adhesive to dry. Repeat process for each mini book.


And that's it! You have a collection of spooky spell books perfect for Halloween!


Monday, February 19, 2018

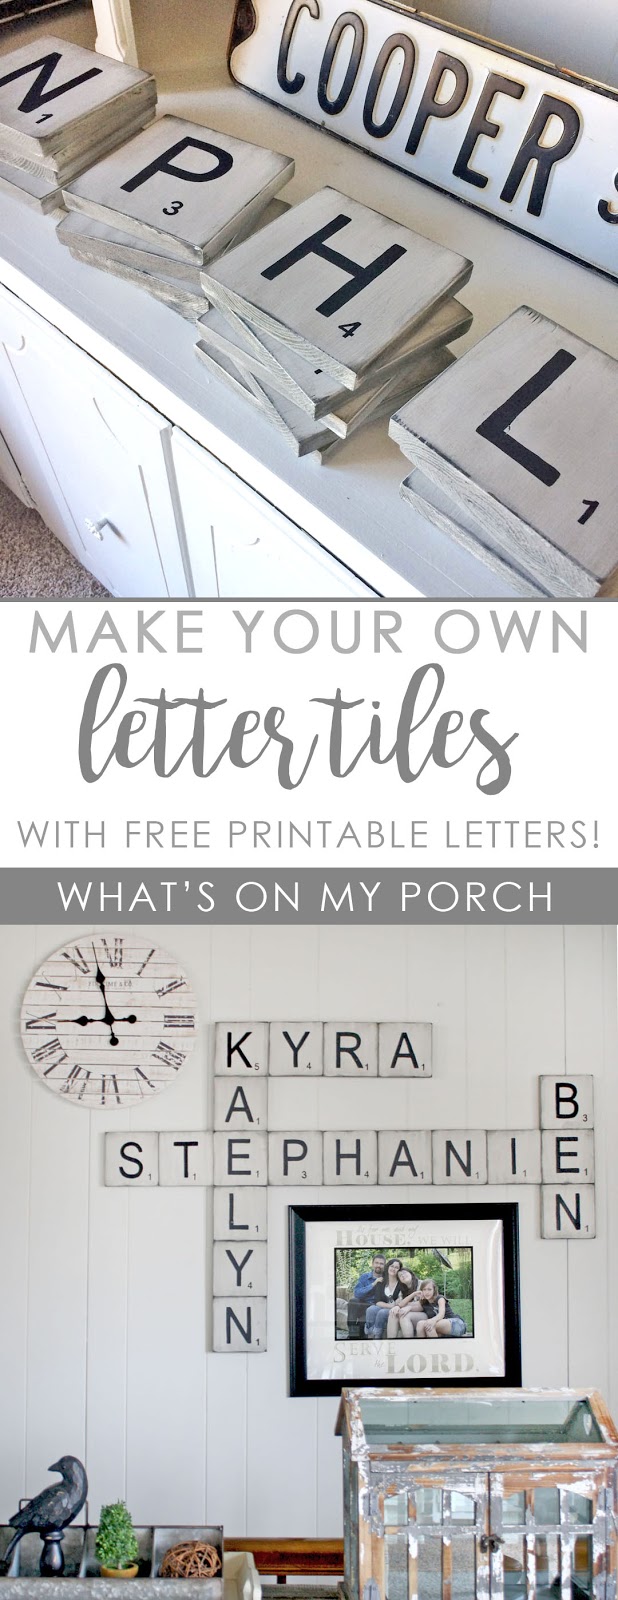
DIY Scrabble Tile Wall Decor


Make your own Scrabble style letter tiles for your family names

*Please note we are not professionals. Projects and products depicted in this blog are not to be taken as advice, but as inspiration only. 

ALSO NOTE: I cannot offer advice about this project. This is just to show you how I created the project for my own personal use.

How I Made My Own Over-Sized Letter Tiles Wall Decor
Hubby and I are recently empty-nesters. Well, not exactly. Our older daughter has moved into her own place in a city about 40 minutes from us. And our younger daughter is currently traveling with a missions group. She will return this summer for a month before leaving again for another year. So, basically Hubby and I are on our own.

It was really hard at first. Both our kids left within a month of each other. We went from being a family of four, to a couple again. As young parents, we'd dreamed of the day when our kids would be independent, and Hubby and I could finally have a chance to travel and "date" again. But I never realized how much a family dynamic changes when the kids grow up.


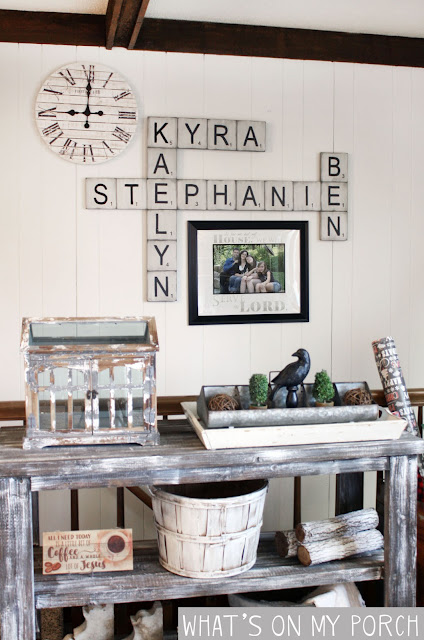
I decided I wanted to celebrate the fact that we're still a family, even if parts and pieces of us are scattered a bit. So, I'm working on a gallery wall above our basement stairs. Part of that wall is our names in over-sized Scrabble style wood letter tiles.

You've probably seen these on Pinterest. If you've thought about doing them, I say go for it! These turned out even better than I'd imagined. Here's how I did it.


Cutting My Tiles
Hubby cut the tiles from 1x6 boards. They measure 5.5 x 5.5 inches. He even sanded the edges for me. Gotta love that man! If you don't have the time or tools to do this, check out these pre-cut wood squares on Amazon.
I goofed on how many tiles we needed. I counted each letter in our names, but forgot that some of the letters would be shared (like the K in the girls' names). So I ended up with a few extra tiles.


Painting The Tiles
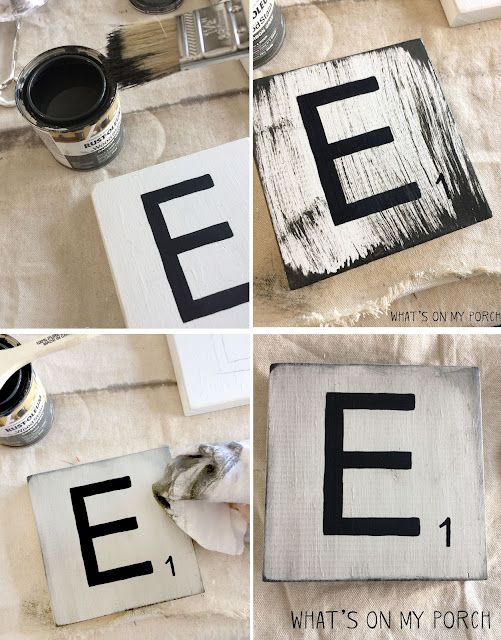
Next, I had a decision to make. I've seen these tiles in many different finishes, and I really like ALL of them. Should I leave the wood natural? Stain it dark brown? Gray? Paint it black with white letters? The possibilities! I decided to do a combination style for a distressed grayish-white look that would match my farmhouse decor. I began by painting the tiles with white SATIN latex paint--just the front and sides. The back I left plain wood.

Make your own Scrabble style letter tiles for your family names

Printing & Tracing
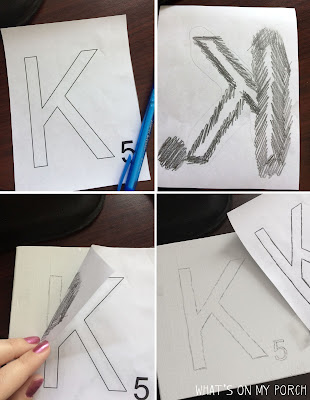
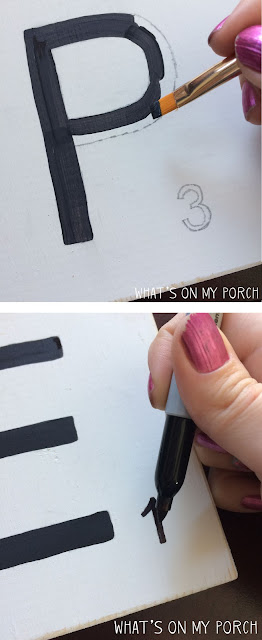
Next, I printed the letters/numbers out on paper and colored on the back with a pencil. (I'll include the printable letters at the end of this post). I then traced these onto my tiles. I filled the letters in with black craft paint. The numbers were so small, I decided to fill these in with Sharpie. The marker dries out pretty fast. Each letter/number takes two coats of paint.


Make your own Scrabble style letter tiles for your family names

Sanding The Edges
The next step was to sand the edges of each tile. I used a sanding block, but you could use an electric sander, too. I wanted just a bit of raw wood on the corners and edges for the next step, which is gray stain.

Make your own Scrabble style letter tiles for your family names

Staining Over The Paint
I used rubber gloves for this next part. I wore an apron, too. Using a brush, I applied wood stain in Carbon Gray to the sanded edges, and all around the sides of the block. With a cotton towel, I wiped the stain away and also rubbed it into the wood, spreading it lightly around for an antiqued finish.

Make your own Scrabble style letter tiles for your family names

Hanging My Tiles
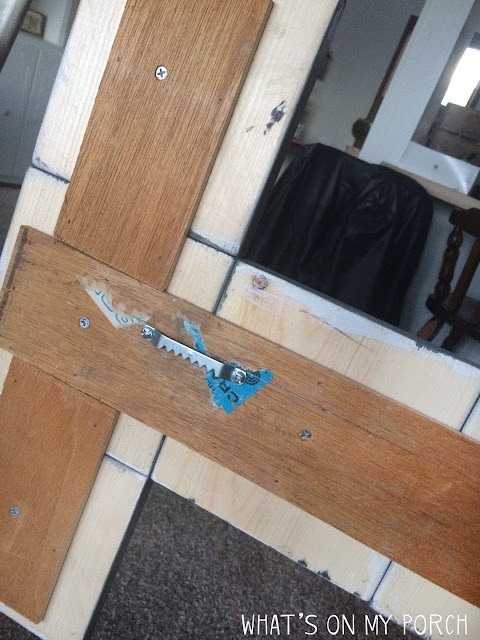
Now I had all my tiles, and they looked even better than I'd hoped! But I had a dilemma. How do people hang these on the wall? One at a time? That seems crazy! I came up with a plan to use a thin piece of wood to connect the tiles and create one giant piece of art. Hubby agreed and did all the hard work. He then attached a couple saw-tooth hangers to the back for hanging. Did I mention I love that man?

Make your own Scrabble style letter tiles for your family names

Make your own Scrabble style letter tiles for your family names

Make your own Scrabble style letter tiles for your family namesAll Done!
I did a quick layout on the floor to see where other pieces would fit with my tiles. I am planning to add a few more things, like the word "family" and maybe the letter S or number 4. But I love how it looks on the wall!

So, what about you? Think you'll give this project a try?


*Please note we are not professionals. Projects depicted in this blog are not to be taken as advice, but as inspiration only. 

Make your own Scrabble style letter tiles for your family names

Make your own Scrabble style letter tiles for your family names

Want more ideas? Check out my post on How to Transfer an Image to Wood.
To download the printable letters, click each one and right click to save the image or print it.
Please note the size. There are 4 letters on each 8.5x11 inch printable sheet. So each letter fits in a space that is approximately 5.5 x 4.25 inch.


Saturday, February 17, 2018

How To Style Industrial Farmhouse Bookshelves

How To Style Industrial Farmhouse Bookshelves

I'm a sucker for what many people call "junk." Give me something old and rusty, and I swoon. So, it's no surprise that I would use it to decorate my bookshelves. Here's a little look at some of my found items.
How To Style Industrial Farmhouse Bookshelves

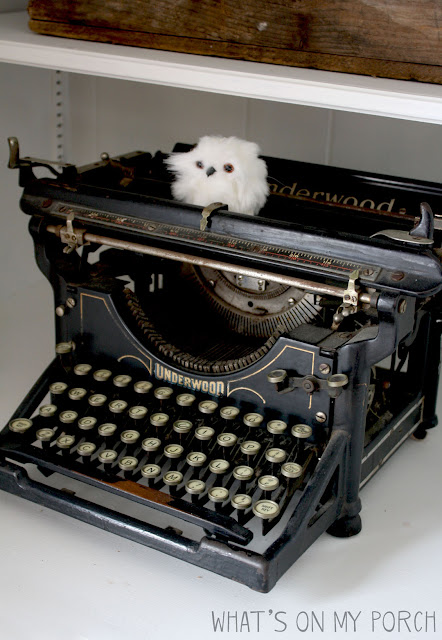
One of my favorite finds, my vintage Underwood typewriter was all but buried in the basement of an antique store. I couldn't pass it up. As a children's author (check out the Villain School Books), typewriters are near and dear to my heart. This one had so much character, too!

How To Style Industrial Farmhouse Bookshelves

The roller skates came from a thrift store, as did the antique books, tackle box and clocks. The wooden crates were junk-day finds... people left them on their curbs with the trash.

How To Style Industrial Farmhouse Bookshelves

The "Cooper" street sign came from a town we lived in for a while. The city was replacing old street signs and had a huge pile! I talked one of the street department employees into giving me one. I asked for the whole pile, but they said it was already promised somewhere else. Bummer!

How To Style Industrial Farmhouse Bookshelves


How To Style Industrial Farmhouse Bookshelves


Do you collect vintage items? What's your favorite "junk" piece?

How To Make A Lake House Sign

How To Make A Lake House Sign

How To Make A Lake House Sign
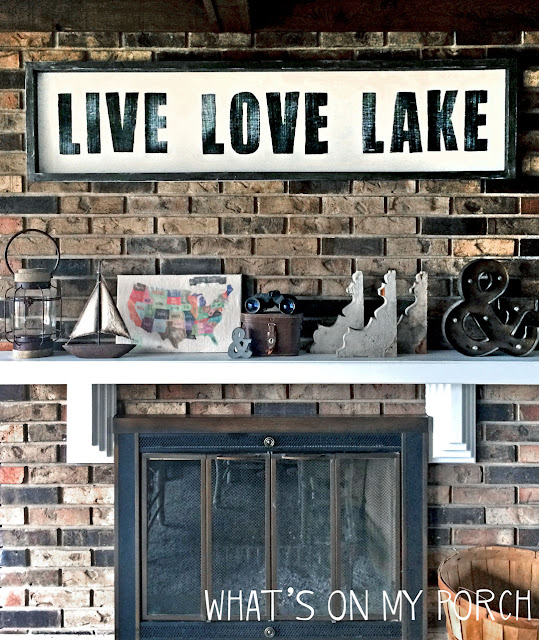
Recently, Hubby and I moved to a house on a lake. It really was a dream come true. We'd always talked about what it would be like to wake up and see the sun on the water, to watch the storms roll in and whip up the waves. Of course, we never believed we could actually afford it. So, when an opportunity came up, we jumped at the chance!

Waking up to lake views is pretty amazing, but there's another element to lake life that I hadn't really thought about until we moved in... decorating! There are so many fun elements to lake house décor. It's like a blend of cabin-y woods and boats and anchors. Of course I don't want to go overboard (pardon the pun). Too much theme-y décor can start to feel cheesy. But a little sailboat here or anchor there can add just the right touch of lakehouse to my usual farmhouse style.

And that is where this sign comes in. I wanted to acknowledge our lake home without painting everything blue and putting up lake themed décor everywhere. I think it's a nice nod to lake life.


To Make This Sign You Will Need:
  • 1x1 wood boards for the frame
  • Flat wood (There are lots of options here. I used old wall paneling that we just flipped over.)
  • Screws, nails or nail gun
  • Picture hanging hardware (such as these)
  • Paint or stain for the frame (I used Rust-Oleum Carbon Gray stain)
  • Acrylic craft paint for the words
  • White latex paint or craft paint for the background
  • Paintbrushes and craft paintbrushes
  • Willow charcoal or pencil

Step 1: Assemble The Frame
Hubby assembled the wood frame. Ours is 4 ft. long to fit our fireplace, but you can make it any size you want. Cut equal top and bottom pieces. Then cut equal side pieces. Screw the side pieces onto the top and bottom pieces of the frame. Cut the flat wood panel to fit behind the frame. Make it just a bit smaller so the frame hides the edges, but so you can still attach it.
DO NOT attach the frame to the paneling yet.


Step 2: Stain the Frame
Using a workspace, stain the frame. I get the weathered wood look by lightly brushing the stain across the wood, leaving some of the wood unstained. It's extremely easy. You  might want gloves for this part. You could also use craft paint. I don't bother staining the back as no one will see it.


Step 3: Paint the Flat Wood Panel Piece
I painted the panel white with latex interior white satin paint. White craft paint would work, too. It took a few coats to completely cover the wood.

How To Make A Lake House Sign

Step 4: The Words
To add the words "Live Love Lake" to the sign, I used Photoshop. But you could probably use Microsoft Word. Just choose a font. I used "You Are Loved" font. And choose a size that makes sense for your sign and the space where it will hang. I printed off the letters a page at a time and then assembled them with tape, laying them out on my sign for a good fit.

Flip the assembled words over and use willow charcoal or a pencil to color on the back. TIP: I hold the sign up to a window so I can see the letters through the paper. Then I only color where the letter is. Once the back of each letter has been colored, flip the words back over and lay them gently on your flat white wood piece.

Tape them into place and trace each letter with a pen or pencil to transfer it to the wood sign. I re-trace the letters with pencil after they've been transferred, then use a cloth to wipe away the charcoal.

Finally, paint the letters with black acrylic paint and a small, flat artist paintbrush. When the letters are dry, I use the white background paint on a large paintbrush. Dip it lightly in the paint and then wipe it almost dry on a paper towel. Lightly pull the brush across the words. This is a "dry brush" technique that makes the words look weathered.


How To Make A Lake House Sign


Step 5: Assemble
Once it is dry, use a nail gun to attach the flat piece to the frame. Attach hanging hardware to the back of the frame, too, one on each side. And you're done!

How To Make A Ginormous Lake House Sign