Showing posts with label craft. Show all posts

Saturday, February 22, 2020

How To Start Your Own Crafting YouTube Channel (For Beginners)

how to start your own crafting channel on youtube for beginners

How To Start Your Own Crafting YouTube Channel (For Beginners)
Do you enjoy crafting? Do you enjoy watching crafting tutorials on YouTube? Have you ever wondered if YOU could make crafting videos that others might enjoy watching? You can! It's really easy to get started. Here are a few ideas and tips for beginners.

Getting A YouTube Channel
First, you need a YouTube channel. There's plenty of info on the Internet about how to do this, so I won't bother repeating it, but here is a link to get your started.

Equipment: The Basics
You don't need lots of fancy equipment and software to make a simple crafting video. However, there are a few basics that will make the process easier and make your videos prettier.

1. Your Phone
2. Good Lighting
3. A Background
4. Video Editing Software (not necessary, but handy)

So, let's talk a little about these.

Making Videos With Your Phone
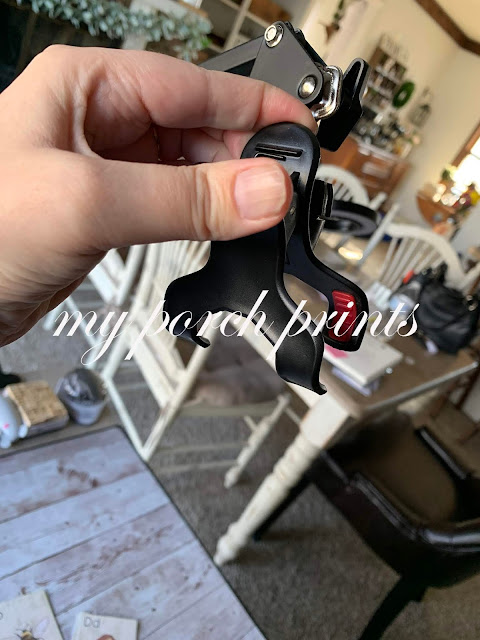
For beginners, a phone is a perfectly adequate way to begin making videos. Most phones today are more than capable of putting out quality video. However, you'll need to mount the phone so your hands are free for crafting. For beginners, I recommend a simple mount stand like this one:


It clamps to the edge of your desk and is easy to move and manipulate. Your phone goes into the squeezable clamp and can be positioned over your work space for easy video-making. Below are some photos of the one I use.

Desk clamp to hold your phone while making videos

desk clamp for phone videos

Lighting Your Videos
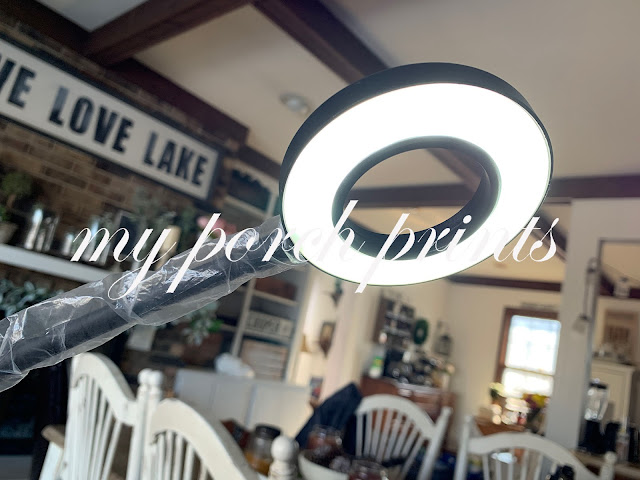
Ideally, I recommend window light for pictures and videos (not direct sunlight). It's soft and natural and always looks good. However, a window isn't always an option. If that's the case, it's good to have at least one bright light source to simulate window lighting as much as possible. An easy way to get some extra light on your work space is to use something like this ring light.


It has a few different settings for warm/cool and level of brightness, plus it's cheap and easy to use. Just clamp it to the side of your desk, plug it into your computer USB port and you're ready to go! Here's a look at how I set mine up on my desk (below).

desk clamp ring light for phone videos

desk clamp ring light for youtube videos

A Nice, Clean Background
Next you'll want a good background for your videos. As a crafter, it's okay to use a craft mat, but if you want to do a flip-through of a pretty junk journal or other project you've created, why not use a nice background? I prefer clean "wood" backgrounds or a similar look. Whatever you choose, make sure it doesn't compete for attention with the project you're trying to showcase. Simple is usually better.

For my desk background (see pics below), I used faux wood wallpaper on the back of my craft mat. See a tutorial video for this here.

pretty wood background for youtube videos

pretty wood background for crafting videos with alphabet cards

Get these Alphabet Cards from My Porch Prints on Etsy.

Video Editing Softare
If you're new to making videos, you don't have to use software. You can just record your video and upload it to YouTube. (Click here for how to upload a video to YouTube.)

However, if you have an iPhone, you can use iMovie software (free for your phone from the Apple app store) to edit your videos and do fun stuff like speeding up/slowing down your video, adding titles, filters, music and more. I won't go into all that, but if you're curious, here's an article I found about it.

So, now you have your phone mounted to your desk with a nice ring light and a pretty background... time to shoot your first crafting project and share it with the world!


Click links on this page at your own risk, as I can't guarantee the safety of any links that go to other pages.

Tuesday, December 10, 2019

"I AM" Mini Book Freebie Printable


I Am statements from Jesus in the Bible

Then Jesus declared, “I am the bread of life. Whoever comes to me will never go hungry, and whoever believes in me will never be thirsty. John 6:35
----------------------------------------------------------

Check out my Etsy shop for more printables!

----------------------------------------------------------
"I AM" Mini Book Printable
Hello Porch people! I've put together this FREE sweet printable mini book featuring the "I AM" statements from Jesus in the Bible. Sometimes I really need help to remember His promises and who Jesus says he is. This little book makes a nice stocking stuffer or gift. I kept the design neutral so it can be gifted to a girl or a guy, but you can decorate it using your own unique style. And the best part? It fits inside a 3.75 x 2.25 inch mint tin.

This is a free download. Just click the link below to download the PDF file. (Includes photo instructions to assemble your mini book.) Please remember this is for personal use only. Enjoy!

Decorate Your Mint Tin
Need some ideas for decorating your mint tin? Watch this video tutorial on my YouTube channel.

I AM free Mini Book from My Porch Prints: Jesus Bible


I AM free Mini Book from My Porch Prints: Jesus Bible

I Am statements from Jesus in the Bible

I AM free Mini Book from My Porch Prints: Jesus Bible

I AM free Mini Book from My Porch Prints: Jesus Bible

I AM free Mini Book from My Porch Prints: Jesus Bible

I AM free Mini Book from My Porch Prints: Jesus Bible

I AM free Mini Book from My Porch Prints: Jesus Bible

Download This Freebie
Download the PDF file for this "I AM" mini book by clicking here.
Includes photo instructions to assemble your mini book.
*Tip: Round the corners for a nice, finished look and easier fit in your mint tin.

See these "mint tins" on Amazon:


YOU MIGHT ALSO LIKE....
You might also like my Tin Box Mini Book from My Porch Prints on Etsy.

My Porch Prints printable Mini Mint Tin Book
Tin Box Mini Book printable available in my Etsy shop: My Porch Prints


Tuesday, August 27, 2019

Halloween Wheel Window Card Tutorial


Halloween Wheel Window Card
This super-cute Halloween Wheel Window Card has a window and a wheel with spinning words. It's cute on its own or as a cover or insert for a junk journal!
To make it you'll need a few supplies:

Supplies:
Black Cardstock
Tim Holtz Ornate Plate
Brass Fastener
Circle Punch
Awl Or Other Sharp Tool
Craft Knife
Mounting Tape
Tape, Glue, Scissors, Etc.

Printables:
Pumpkin Image (I got mine from Jento Design on Etsy)
(Pumpkin image is also available in the cover of my Cozy Autumn Journal Kit Printable)
"Seasons" Journal Words Printable from My Porch Prints
Coffee Stained Book Pages Printable from My Porch Prints


Preparing The Black Card
To begin, cut an 8.5x11 inch sheet of black cardstock in half to create two 8.5x5.5 pieces. Then cut an extra half-inch off the side & bottom of one piece. This will be your main card.


Punch Half-Circle
Punch a half-circle in the center bottom of the smaller, main card.


Bookplate Pumpkin
Next, place your book plate in the center of your pumpkin image and trace the inside, the outside corners, and the fastening holes.


Use your awl or sharp tool to punch the fastener holes.


Using a craft knife, cut out the center tracing.


Next, attach your bookplate to your pumpkin as shown.


Creating Your Wheel
Find a circle shape that is the same size or slightly smaller than your main black card. Trace it onto the larger cardstock piece (NOT the one with the half-circle punched out). Cut it out. This will become your wheel.


Find and mark the center of your circle.
One way to do this is to place the circle on a piece of paper and use a ruler to cut the paper to the same size as the circle. Then, measure each side and mark the halfway point. For instance, my paper was 4x4 inches. So, the center of each side was the 2 inch mark. I drew a line at each 2-inch mark, and where the lines intersected was the center of my paper.

I used my awl to create a hole in the center of my paper, then placed my circle on the paper, lining my circle edges with my paper edges, and flipped it over. Using a pencil, I marked through the hole I created onto my circle. You can also look up "How to find the center of a circle" if that is more helpful.


Create a hole in the center of your circle or wheel. Then align the wheel in the bottom-center of your card (where you punched the half-circle). And mark through the center hole. Use the awl to punch it out.


Creating Your Window
This part is just a little tricky. It took me some trial and error. With the wheel aligned on the center bottom of your card, place the pumpkin over the top edge of the wheel so that your wheel shows through the window. (See photo above.) You'll want to align it carefully. The wheel should show through, but the edges of the wheel should not.


Now that you have your pumpkin and wheel aligned, carefully remove the wheel by sliding it away. Do not move your pumpkin.


Use a pencil to trace inside your pumpkin bookplate onto your card.


Now, remove your pumpkin and use your craft knife to cut out where you marked with your pencil.

Back of card.
Turn your card to the back (see above photo) and use your brass fastener to attach your wheel to the back of the card. Then flip it back to the front again.

Front of card.
 Your wheel should completely cover the window you cut out as shown above.


Adding Seasonal Words
Use glue to attach your cut-out "Seasons" Journal Words to the wheel, using the cut-out hole as a guide for placing the words. (See the above photo.)


When you've glued on a word, spin the wheel until the word disappears and attach another word. Repeat until the wheel is full of words. Try to space them evenly. Note: Be sure to leave plenty of space between the words so no more than one shows up in the window at a time.


When you've finished applying your words to the wheel through the window, use a piece of tape to secure your brass fastener.


Attach Pumpkin
You might also want to secure the fasteners on your pumpkin book plate. Then glue your pumpkin to your card, lining up the window so the words show through and covering your brass fastener.

If your pumpkin isn't large enough to cover your fastener, consider using some cheesecloth or decorative tissue paper underneath your pumpkin to hide the fastener. Just don't cover your window.


Print your Coffee Stained Book Page on cardstock and fold it in half as shown.


Use strips of mounting tape to attach your completed pumpkin card to the folded "Coffee Stained Book Page" card.


Align the pumpkin card with the bottom of the folding card as shown below.


If you want, ink the edges of your card, and you're finished! Now you can use the punched out part at the bottom to move the spinning wheel and change the words in your window. See video below.
If you liked this tutorial, please share!
Thanks!
Stephanie from My Porch Prints


Thursday, December 27, 2018

Valentine Mini Books Tutorial

How To Make Valentine Books

Valentine Mini Books Tutorial *Contains affiliate links
Do you remember Valentine's Day as a kid? The biggest part was the box that we would set on our desks at school for all the other kids to put Valentine's in. I would always plan something really elaborate and cool, trying to be as unique as possible. One year it was a treasure chest. Another year, it was a castle. When my kids were old enough, we made even more elaborate boxes. One was a real, working clock! Another was made entirely out of chocolate.

Then, of course, there were the Valentines themselves. Most kids just bought them at the store, but I liked to make my own.

Things haven't changed much. I still enjoy creating pretty Valentine designs... like these mini books! Here is a quick tutorial. As you can see, they are easy to assemble.

You can purchase these Valentine Mini Books in my Etsy shop.

Cut Out the Covers & Pages
Begin by printing & cutting out your covers. I like to print the covers on cardstock.
Print the pages on regular paper and cut into strips as shown.


Fold the Cover
Fold the covers to create a book shape. A ruler helps to keep them straight.

Valentine's Day Mini Book Tutorial


Glue the Cover
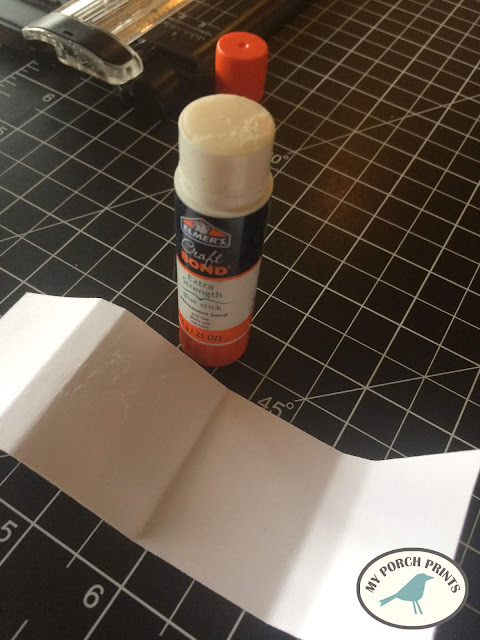
Fold and glue the inside cover as shown. I use craft glue sticks.

Glue the cover

Ink the Edges (optional)
I like to use Distress Ink to cover the edges where the paper shows and also to give the book cover an aged, finished look.
Ink the edges

Fold the Pages
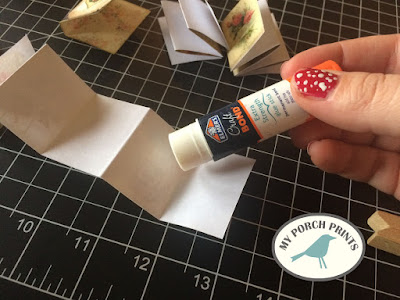
Fold the pages accordion-style as shown. Then glue them together. Glue the first page to the second, second to the third, etc. You will end up with THREE sets of three pages each.

Fold the pages

Valentine's Day Mini Book Tutorial

Glue Pages Into Book
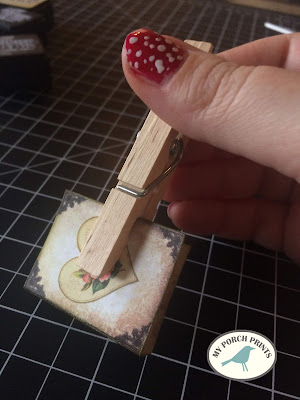
Gather your three sets of pages together & clamp. A clothespin works well for this. Add clear glue to the "raw" edges of your pages and place them inside your book cover, against the spine.

Valentine's Day Mini Book Tutorial

Clam with clothespin
Clamp to Dry
Remove the clothespin and use it to clamp the entire book together while it dries. Repeat the process, printing more book pages as desired.

Valentine's Day Mini Book Tutorial


Valentine's Day Mini Book Tutorial

How to make Valentine's Day Mini Books

Valentine's Day Mini Book Tutorial from My Porch Prints