Showing posts with label scrapbook. Show all posts

Monday, April 29, 2019

Layered Junk Journal Cover Tutorial

Layered Junk Journal Cover Tutorial from My Porch Prints

Do you ever look at journal covers on Pinterest and think, "How do they do that?" I often find myself perusing beautiful, layered journals, wondering how people are so creative?! I imagine some crafty lady in a beautiful studio with shelves of pretty, decorative boxes labeled "papers" and "embellishments" and "lace". She carefully chooses each item: vintage, tea-stained papers and little metal charms. And somehow, magically, a junk journal cover is born.

Okay, I know it's not quite as fantastic as that. How do I know? Because my craft studio is my dining table. And my shelves of boxes are sprawled across numerous cabinets & closets in my home. And labels? Ha ha. They would all have to say, "junk" on them because I'm not the most organized person.

So, how do we mere mortals create beautiful layered journal covers? With tutorials and kits! Ha ha! Seriously, though, I created a pretty little printable kit which you can find in my Etsy shop (My Porch Prints). And I also made this tutorial. So, follow along, and together we'll make some lovely layers worthy of Pinterest!

List of Supplies/Printables:


So, first I cut out a cardboard piece that will serve as my journal cover.* I'm not actually creating an entire journal today, just the cover. If you want a junk journal tutorial, click here. I also cut out all my printables.*You can also create a journal first, and then attach these printables to the cover. 


I rounded the corners of my cardboard cover by creating a template cut from a corner of scrap cardstock. This ensures all my rounded corners are even. Then, I used a makeup sponge to apply Distress Ink around the edges.


I chose the words I wanted to use from my printable kit and carefully tore them out, then inked the edges.


Next, I rounded the corners of my background paper and inked it as well. Then I applied glue, spreading it with a brush and glued my paper to my cardboard. This serves as my background, kind of like a canvas for my layers.


I wanted a lace element, so I added this to the edge of my journal with glue.

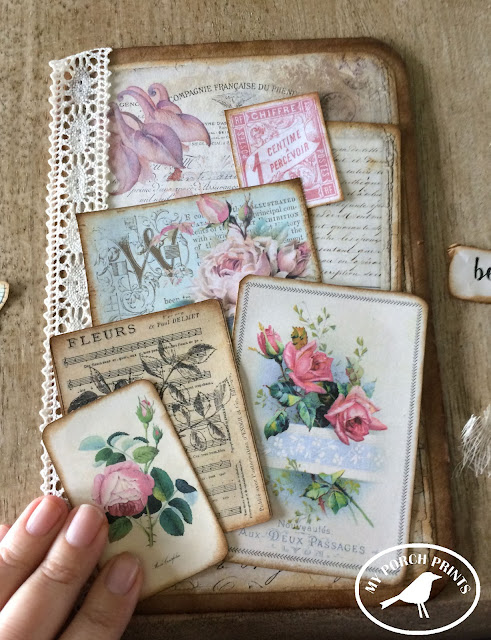
Now it was time to start layering. I inked all the edges of my printable elements and then began placing them on my journal cover background to get an idea of how it would look when it was all finished.


I think the key to layering is not to worry about covering up the layer underneath. I always think, "But I can't cover up this pretty thing! It will ruin it!" Nope! It really is okay to cover up one layer with another. Trust me.

Begin with tall or large items first.


It's okay if items hang off the edges a little.


I inked bits of cheesecloth and used them behind small pieces to add interest, texture & dimension.


To add my journal title, I chose the word "imagine" and cut it out. Then, I placed it behind my book plate and pressed gently. This created indentations in the paper, which I used as a guide when cutting out my title word. I glued the title word to my journal and attached my bookplate. You can use the fasteners provided or glue.


Last, I added a small key charm, attaching it to my lace as shown. I also threaded some pink ribbon through the lace holes.

Layered Junk Journal Cover Tutorial from My Porch Prints


And that was it! The printable kit is designed so the colors and pieces go together for easy layering. Enjoy!

Layered Junk Journal Cover Tutorial from My Porch Prints


Friday, November 30, 2018

Days of December - Daily Journal

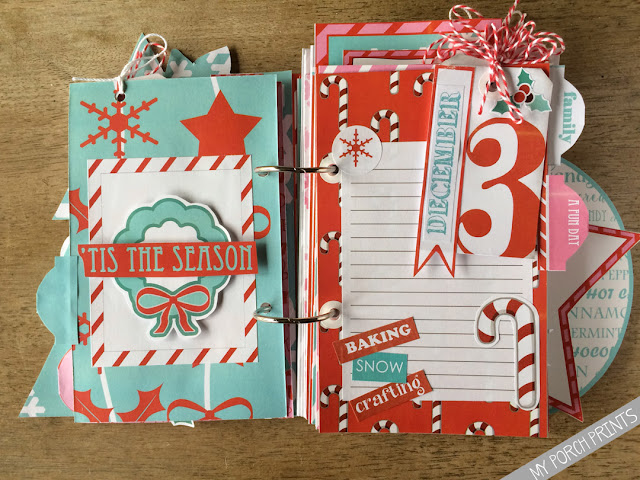
Days of December Daily Journal of Christmas Memories

Days of December - Daily Journal
Ah December. The whisper of soft snow flakes. The magic of twinkling lights. The promise of Christmas Day. But how to capture all of it?


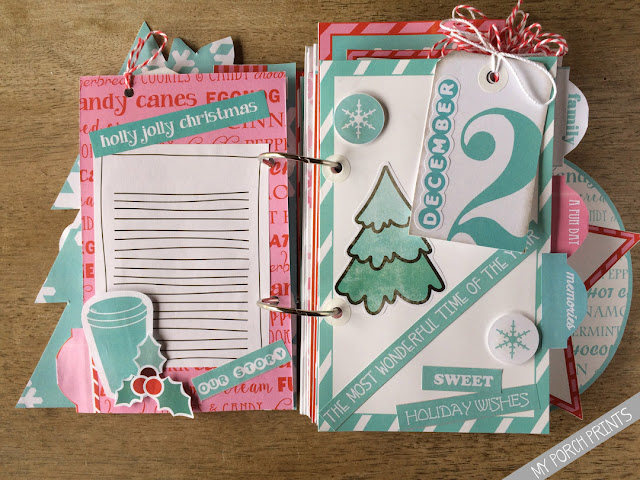
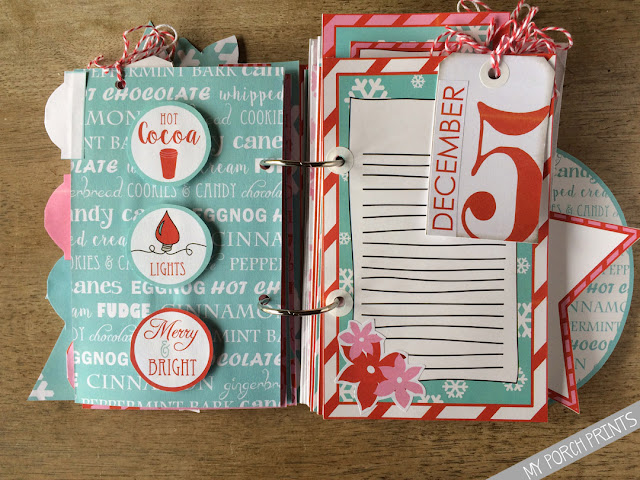
This is my own version based on a design I created. You can buy the journal kit for this Days of December Journal here.

It makes a fun craft project. You can also use the kit to create cards, scrapbook pages and other fun projects. Get the kids involved with crafting, photos, recipes & more. 

Getting Ready
To begin, I printed & cut out all my journal pages and decorative elements. Next, I punched the holes for my binder rings. The kit comes with a handy hole punch guide so they'd all be lined up nicely.


A 1-inch circle punch comes in handy for punching out numbers and snowflakes.


Another handy thing to keep nearby is mounting tape. I use it to give dimension to my decorative elements to raise them up off the background page.


I spread all my elements and papers around my dining table so I could see what I had to work with. Then, I laid out each page to see where things would fit before gluing them.

Days of December Daily Journal of Christmas Memories

Days of December Daily Journal of Christmas Memories


Days of December Daily Journal of Christmas Memories

 When all my pages were finished, I bound them using binder rings.

Days of December Daily Journal of Christmas Memories

Days of December Daily Journal of Christmas Memories


Days of December Daily Journal of Christmas Memories

I used the number tags like daily calendar numbers, adding "December" to each one and tying them to my journal pages with string or bakers twine.

Days of December Daily Journal of Christmas Memories

Days of December Daily Journal of Christmas Memories

Days of December Daily Journal of Christmas Memories

Days of December Daily Journal of Christmas Memories

The kit includes these really cute recipe pages to record all the Christmas recipes our family will bake together!
Days of December Daily Journal of Christmas Memories

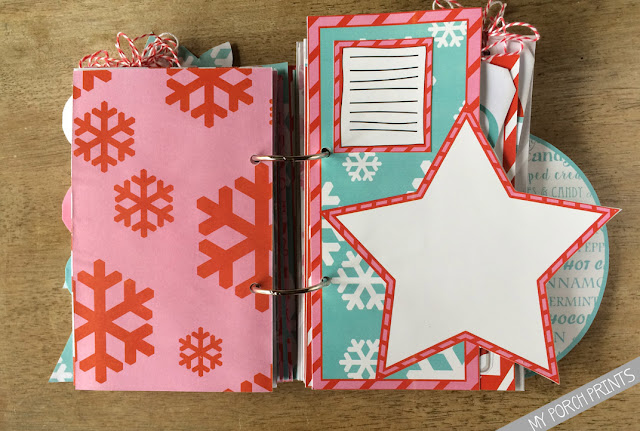
The kit comes with special divider pages in the shapes of a star, an ornament and a tree.

Days of December Daily Journal of Christmas Memories

Days of December Daily Journal of Christmas Memories

Days of December Daily Journal of Christmas Memories

Days of December Daily Journal of Christmas Memories

Days of December Daily Journal of Christmas Memories

Days of December Daily Journal of Christmas Memories

I can't wait to start counting down the memories and adding my own photos, recipes & journal entries! Get this printable kit and make your own Days of December journal.

Days of December Daily Journal of Christmas Memories
Tip: 
Print your papers on the back of your journal pages for a finished look, so the backs of your pages are as pretty as the fronts.

Some Special Supplies I Used:


Saturday, September 15, 2018

Halloween Mini Spell Books Tutorial


Halloween Mini Spell Books
Fall is a time for pumpkin spice, crisp pretty leaves and... Halloween! This set of four mini Halloween spell books makes a fun and bewitching craft project.

Once you see how easy they are to make, you'll want to get your craft on.

1. Start with the printable download: Halloween Mini Books from My Porch Prints on Etsy.


2. Print the covers on cardstock* and the inside pages on regular paper. Cut them out as shown. You should have 3 page strips for each book.

*My printer was low on ink, which I didn't realize at the time. So, my "Book of Spells" cover is a little more "red" than the actual version. 


3. Fold the lighter, inside cover as pictured. Also fold along the "spine" to create a book shape. Secure with adhesive. I use craft glue or glue sticks.


4. You can add depth to your book (and cover up any crease lines) by using a black marker and a make-up sponge to darken the edges & spine.


5. Cut out the page strips and fold them accordion style. Apply glue to the back and glue page 1 to page 2, page 3 to page 4, and page 5 to page 6 as shown. Basically, just scrunch up your "accordion" so the page-backs stick together.


6. Now you have a book cover and a set of three signatures. (A signature is a collection of pages.)
Using a clip or clothespin, line up your three page signatures and hold them tightly together. Apply glue to the edge and push it into the inner spine of your book as shown. Hold for about 30 seconds or until adhesive begins to set.


 7. Finish by clamping the cover and pages together and allowing the adhesive to dry. Repeat process for each mini book.


And that's it! You have a collection of spooky spell books perfect for Halloween!