Showing posts with label idea. Show all posts

Tuesday, December 10, 2019

"I AM" Mini Book Freebie Printable


I Am statements from Jesus in the Bible

Then Jesus declared, “I am the bread of life. Whoever comes to me will never go hungry, and whoever believes in me will never be thirsty. John 6:35
----------------------------------------------------------

Check out my Etsy shop for more printables!

----------------------------------------------------------
"I AM" Mini Book Printable
Hello Porch people! I've put together this FREE sweet printable mini book featuring the "I AM" statements from Jesus in the Bible. Sometimes I really need help to remember His promises and who Jesus says he is. This little book makes a nice stocking stuffer or gift. I kept the design neutral so it can be gifted to a girl or a guy, but you can decorate it using your own unique style. And the best part? It fits inside a 3.75 x 2.25 inch mint tin.

This is a free download. Just click the link below to download the PDF file. (Includes photo instructions to assemble your mini book.) Please remember this is for personal use only. Enjoy!

Decorate Your Mint Tin
Need some ideas for decorating your mint tin? Watch this video tutorial on my YouTube channel.

I AM free Mini Book from My Porch Prints: Jesus Bible


I AM free Mini Book from My Porch Prints: Jesus Bible

I Am statements from Jesus in the Bible

I AM free Mini Book from My Porch Prints: Jesus Bible

I AM free Mini Book from My Porch Prints: Jesus Bible

I AM free Mini Book from My Porch Prints: Jesus Bible

I AM free Mini Book from My Porch Prints: Jesus Bible

I AM free Mini Book from My Porch Prints: Jesus Bible

Download This Freebie
Download the PDF file for this "I AM" mini book by clicking here.
Includes photo instructions to assemble your mini book.
*Tip: Round the corners for a nice, finished look and easier fit in your mint tin.

See these "mint tins" on Amazon:


YOU MIGHT ALSO LIKE....
You might also like my Tin Box Mini Book from My Porch Prints on Etsy.

My Porch Prints printable Mini Mint Tin Book
Tin Box Mini Book printable available in my Etsy shop: My Porch Prints


Tuesday, August 27, 2019

Halloween Wheel Window Card Tutorial


Halloween Wheel Window Card
This super-cute Halloween Wheel Window Card has a window and a wheel with spinning words. It's cute on its own or as a cover or insert for a junk journal!
To make it you'll need a few supplies:

Supplies:
Black Cardstock
Tim Holtz Ornate Plate
Brass Fastener
Circle Punch
Awl Or Other Sharp Tool
Craft Knife
Mounting Tape
Tape, Glue, Scissors, Etc.

Printables:
Pumpkin Image (I got mine from Jento Design on Etsy)
(Pumpkin image is also available in the cover of my Cozy Autumn Journal Kit Printable)
"Seasons" Journal Words Printable from My Porch Prints
Coffee Stained Book Pages Printable from My Porch Prints


Preparing The Black Card
To begin, cut an 8.5x11 inch sheet of black cardstock in half to create two 8.5x5.5 pieces. Then cut an extra half-inch off the side & bottom of one piece. This will be your main card.


Punch Half-Circle
Punch a half-circle in the center bottom of the smaller, main card.


Bookplate Pumpkin
Next, place your book plate in the center of your pumpkin image and trace the inside, the outside corners, and the fastening holes.


Use your awl or sharp tool to punch the fastener holes.


Using a craft knife, cut out the center tracing.


Next, attach your bookplate to your pumpkin as shown.


Creating Your Wheel
Find a circle shape that is the same size or slightly smaller than your main black card. Trace it onto the larger cardstock piece (NOT the one with the half-circle punched out). Cut it out. This will become your wheel.


Find and mark the center of your circle.
One way to do this is to place the circle on a piece of paper and use a ruler to cut the paper to the same size as the circle. Then, measure each side and mark the halfway point. For instance, my paper was 4x4 inches. So, the center of each side was the 2 inch mark. I drew a line at each 2-inch mark, and where the lines intersected was the center of my paper.

I used my awl to create a hole in the center of my paper, then placed my circle on the paper, lining my circle edges with my paper edges, and flipped it over. Using a pencil, I marked through the hole I created onto my circle. You can also look up "How to find the center of a circle" if that is more helpful.


Create a hole in the center of your circle or wheel. Then align the wheel in the bottom-center of your card (where you punched the half-circle). And mark through the center hole. Use the awl to punch it out.


Creating Your Window
This part is just a little tricky. It took me some trial and error. With the wheel aligned on the center bottom of your card, place the pumpkin over the top edge of the wheel so that your wheel shows through the window. (See photo above.) You'll want to align it carefully. The wheel should show through, but the edges of the wheel should not.


Now that you have your pumpkin and wheel aligned, carefully remove the wheel by sliding it away. Do not move your pumpkin.


Use a pencil to trace inside your pumpkin bookplate onto your card.


Now, remove your pumpkin and use your craft knife to cut out where you marked with your pencil.

Back of card.
Turn your card to the back (see above photo) and use your brass fastener to attach your wheel to the back of the card. Then flip it back to the front again.

Front of card.
 Your wheel should completely cover the window you cut out as shown above.


Adding Seasonal Words
Use glue to attach your cut-out "Seasons" Journal Words to the wheel, using the cut-out hole as a guide for placing the words. (See the above photo.)


When you've glued on a word, spin the wheel until the word disappears and attach another word. Repeat until the wheel is full of words. Try to space them evenly. Note: Be sure to leave plenty of space between the words so no more than one shows up in the window at a time.


When you've finished applying your words to the wheel through the window, use a piece of tape to secure your brass fastener.


Attach Pumpkin
You might also want to secure the fasteners on your pumpkin book plate. Then glue your pumpkin to your card, lining up the window so the words show through and covering your brass fastener.

If your pumpkin isn't large enough to cover your fastener, consider using some cheesecloth or decorative tissue paper underneath your pumpkin to hide the fastener. Just don't cover your window.


Print your Coffee Stained Book Page on cardstock and fold it in half as shown.


Use strips of mounting tape to attach your completed pumpkin card to the folded "Coffee Stained Book Page" card.


Align the pumpkin card with the bottom of the folding card as shown below.


If you want, ink the edges of your card, and you're finished! Now you can use the punched out part at the bottom to move the spinning wheel and change the words in your window. See video below.
If you liked this tutorial, please share!
Thanks!
Stephanie from My Porch Prints


Wednesday, January 2, 2019

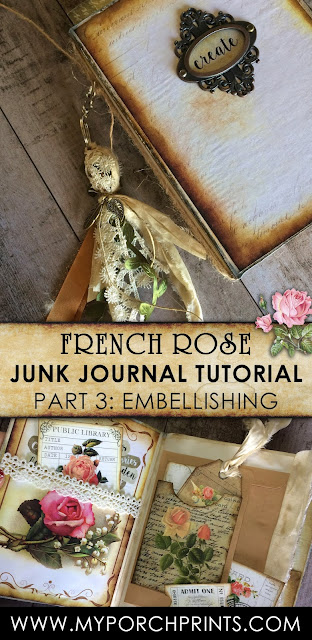
French Rose Junk Journal Tutorial - Part 3: Embellishing

My Porch Prints

French Rose Junk Journal Tutorial *Contains Affiliate Links
Part 3: Embellishing
This tutorial goes through the steps of creating a junk journal using the French Rose Journal Pages from My Porch Prints on Etsy.

In Part 1, we learned how to make a junk journal cover from a cardboard box. In Part 2, we learned how to add binding & pages to our journal. Now in Part 3, we'll wrap up this tutorial by learning how to add embellishments, including a pretty tassel.

Craft Supplies Used:
Glue Stick
Craft Glue
Kraft Envelopes if desired
Distress Ink if desired
Scissors
Sari Silk Ribbon
Various Lace
Green Leaf Ribbon
Twine
Lobster Hooks with Key Rings
Bronze Charms

Printables Used:
French Rose Library Cards
Bicycles & Roses Cards
Romance Writer Scrap Pack
Vintage Rose Tags

Embellishing Pages
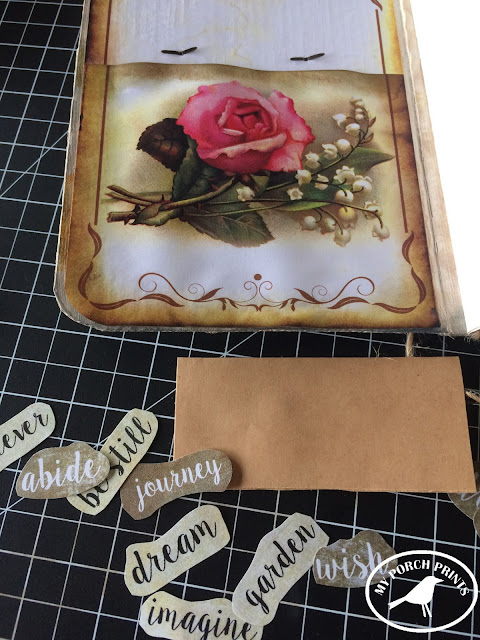
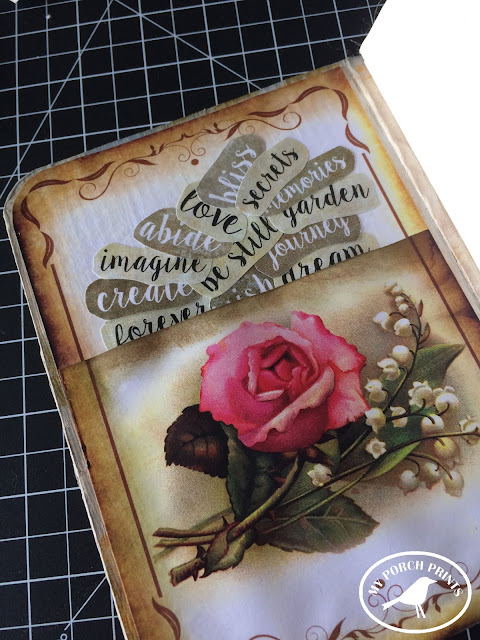
When I attached the book plate to the cover, it left these little fasteners showing on the inside front cover. I decided to cover them up using the free Journal Words Printable words. I cut a strip of craft paper and attached the words to it with a glue stick. Then I glued these over the fasteners to hide them.

French Rose Junk Journal Tutorial-Part 3: Embellishing

French Rose Junk Journal Tutorial-Part 3: Embellishing

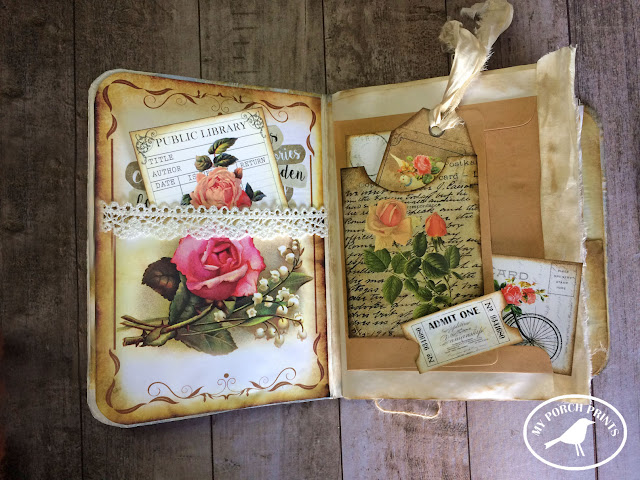
I added this library card to the pocket.

French Rose Junk Journal Tutorial-Part 3: Embellishing

Next, I glued a bit of lace to the pocket to give it a more finished look.

French Rose Junk Journal Tutorial-Part 3: Embellishing


French Rose Junk Journal Tutorial-Part 3: Embellishing

Next, it was time to work on embellishing my first page. I started with this cutout envelope, adding Distress Ink to the edges to give it some dimension and a more finished & aged look. If you don't have Distress Ink, try using a make-up sponge and a dark brown marker.

French Rose Junk Journal Tutorial-Part 3: Embellishing

I cut off the flap from a craft envelope and glued it in sideways to create a pocket. I also glued a scrap piece of sari silk ribbon to the edge of my page. This will show even when the journal is closed.
On top of my envelope, I attached the smaller rose envelope as well as a vintage ticket. Then I added some tags and cards. These can be found in my Etsy shop.

French Rose Junk Journal Tutorial-Part 3: Embellishing

French Rose Junk Journal Tutorial-Part 3: Embellishing

This is just one way to embellish your pages. You can add additional papers, ribbons, fabric, charms, cards, tags, etc., either from a kit (my Romance Writer Scrap Pack works very nicely with this style) OR you can gather your own items to mix & match.

French Rose Junk Journal Tutorial-Part 3: Embellishing

Tassel Time!
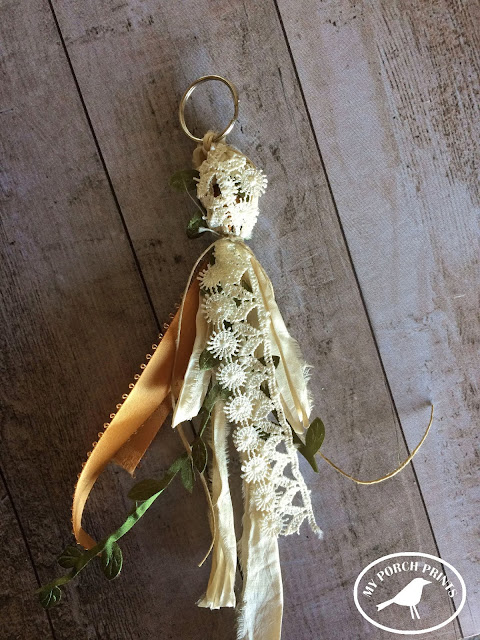
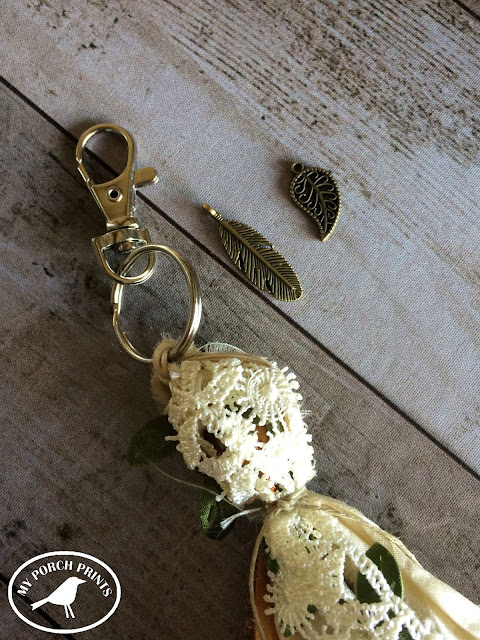
I also added a tassel to the spine of the journal. This is a good opportunity to use up scrap lace if you have any. I bought some of my lace at Walmart. I also got some on Amazon. I also used lobster hooks with keyrings, twine & charms. You could use whatever you want for this: fabric scraps cut into strips, yarn, beads, etc. Don't be afraid to get creative and use the supplies you have on hand.

Adding A Tassel to Your Junk Journal

Cut your ribbon & lace to the size you want for your tassel. Remember to make it TWICE as long because you'll be folding it in half to create the tassel.

Adding A Tassel To Your Junk Journal

Adding A Tassel To Your Junk Journal

Gather your ribbons and fold them in half, leaving one piece free. The free piece will be used to tie your ribbons together as shown.

French Rose Junk Journal Tutorial-Part 3: Embellishing

French Rose Junk Journal Tutorial-Part 3: Embellishing

Using the same piece, tie it to your keyring.

French Rose Junk Journal Tutorial-Part 3: Embellishing

French Rose Junk Journal Tutorial-Part 3: Embellishing

Gather all your ribbons together (including the piece you used to tie them) with the keyring at the top. About an inch or two down, use a piece of twine to tie your ribbons and create your tassel.

Adding A Tassel To Your Junk Journal

Adding A Tassel To Your Junk Journal

You can stop here if you want to, but I like to add a bit more to my tassel. So, I attached a couple of bronze charms to the twine as shown.

Adding A Tassel To Your Junk Journal

Adding A Tassel To Your Junk Journal

Next, attach the lobster claw clasp to your key chain. Then attach it to the binding twine on the spine of your junk journal as shown. Now it is a pretty embellishment that can also be removed if desired.

French Rose Junk Journal Tutorial-Part 3: Embellishing

Adding A Tassel To Your Junk Journal

French Rose Junk Journal Tutorial-Part 3: Embellishing

And that's it! We've created a cover, filled it with pages and added embellishments for a beautiful junk journal that is ready to hold your thoughts, creative projects & ideas, photos, art & more! Thanks for reading. :)

Will you make a junk journal now? Share your art on my Crafting Ideas Facebook Page.

Adding A Tassel To Your Junk Journal