Showing posts with label valentine. Show all posts

Friday, February 1, 2019

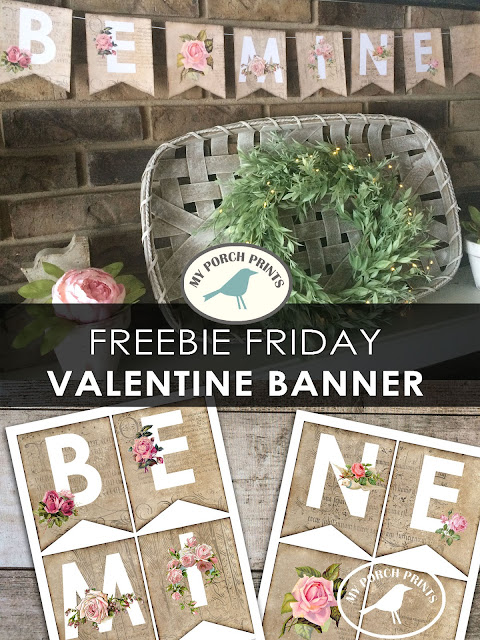
Freebie Friday: Valentine Banner

Free-Download-Be-Mine-Valentine-Banner

Freebie Friday: "Be Mine" Valentine Banner
It's the first Friday of the month which is Freebie Friday here on the Porch! That means another great free download for you. Today's freebie is this vintage style printable "Be Mine" Valentine's Day banner. 
Enjoy!

Free Printable Valentine's Day Banner from My Porch Prints

To Download
Click the image(s) below, then right click and save it to your computer.
Visit my Etsy shop to see more printables.

PERMISSIONS & COPYRIGHT
PLEASE NOTE:
 This image(s) is NOT to be re-used in digital form (as in do not re-post it on your website or anywhere else or try to sell it in digital form).

For PERSONAL use ONLY.

Free Printable Valentine's Day Banner from My Porch Prints

Follow Crafting Ideas by My Porch Prints on Facebook for lots of fun & beautiful paper crafting inspiration.


Thursday, December 27, 2018

Valentine Mini Books Tutorial

How To Make Valentine Books

Valentine Mini Books Tutorial *Contains affiliate links
Do you remember Valentine's Day as a kid? The biggest part was the box that we would set on our desks at school for all the other kids to put Valentine's in. I would always plan something really elaborate and cool, trying to be as unique as possible. One year it was a treasure chest. Another year, it was a castle. When my kids were old enough, we made even more elaborate boxes. One was a real, working clock! Another was made entirely out of chocolate.

Then, of course, there were the Valentines themselves. Most kids just bought them at the store, but I liked to make my own.

Things haven't changed much. I still enjoy creating pretty Valentine designs... like these mini books! Here is a quick tutorial. As you can see, they are easy to assemble.

You can purchase these Valentine Mini Books in my Etsy shop.

Cut Out the Covers & Pages
Begin by printing & cutting out your covers. I like to print the covers on cardstock.
Print the pages on regular paper and cut into strips as shown.


Fold the Cover
Fold the covers to create a book shape. A ruler helps to keep them straight.

Valentine's Day Mini Book Tutorial


Glue the Cover
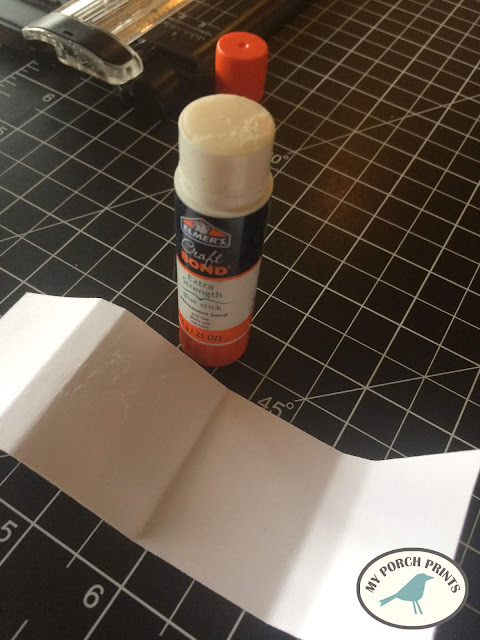
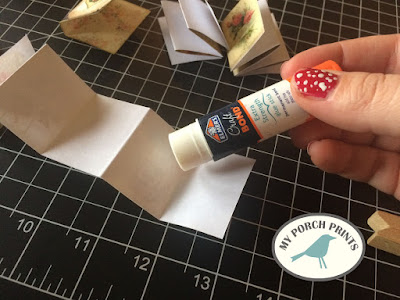
Fold and glue the inside cover as shown. I use craft glue sticks.

Glue the cover

Ink the Edges (optional)
I like to use Distress Ink to cover the edges where the paper shows and also to give the book cover an aged, finished look.
Ink the edges

Fold the Pages
Fold the pages accordion-style as shown. Then glue them together. Glue the first page to the second, second to the third, etc. You will end up with THREE sets of three pages each.

Fold the pages

Valentine's Day Mini Book Tutorial

Glue Pages Into Book
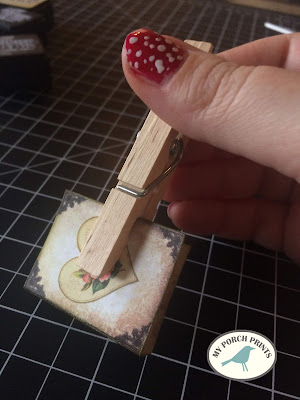
Gather your three sets of pages together & clamp. A clothespin works well for this. Add clear glue to the "raw" edges of your pages and place them inside your book cover, against the spine.

Valentine's Day Mini Book Tutorial

Clam with clothespin
Clamp to Dry
Remove the clothespin and use it to clamp the entire book together while it dries. Repeat the process, printing more book pages as desired.

Valentine's Day Mini Book Tutorial


Valentine's Day Mini Book Tutorial

How to make Valentine's Day Mini Books

Valentine's Day Mini Book Tutorial from My Porch Prints


Sunday, January 14, 2018

Love Birds Valentine Mantel


Love Birds Valentine Mantel
I used to get really excited for Valentine's Day, not so much for the romance aspect of it, but because of Valentine boxes at school. When I was a kid, I went all out with my box designs. And later, when I had my own kids, we would make the coolest boxes. One year we made a grandfather clock out of cardboard that had a working clock mechanism inside! It was as tall as my daughter. Another year we made a box out of real chocolate!


These days, my kiddos are grown up. I miss the tradition of Valentine boxes, getting to be creative and make something beautiful. So, I decided to pour that energy into decorating instead. This mantel is a fun mix of vintage and handmade with a "love birds" theme.

 The bird and cage canvas art is something I made a few years ago using plaster.

These cute little topiaries were thrift store finds.

I found these corbels at an antique show and got them for a steal!

You can download this printable banner PDF FREE! Just click the link at the bottom of the post.


Download the Valentine banner by clicking HERE!
https://drive.google.com/drive/folders/1qpKYePLFJl-25Iy0c50Y8XGM-pMair6d?usp=sharing


Tuesday, January 26, 2016

Tea-rific Valentines for Seniors & Widows

Today on the Porch, we have SNOW. And snow means working indoors. Since Valentine's Day is fast approaching, I thought it would be fun to make some valentine cards for the seniors and widows at our church.

Of course, all valentines need treats! My first thoughts (naturally) went to chocolate. But chocolate is so very difficult to send through the mail. My next thought was flat candy like laffy taffy or gum. Then I realized it didn't really work with my target audience's diets/dentures. Finally, my thought went to that sugar-free, non-sticky, super flat staple of life... tea!

And I got to work. With help from kiddo #2, a few art supplies and Twinings Tea, I was able to whip up these beauties just in time for Valentine's Day!

To make these tea-rific valentines for seniors, you'll need a few supplies:
All these can usually be found in any craft store or even Walmart's craft section.


I cut pieces of craft paper to fit half the card and combined different patterns to make it interesting. Then I glued the pieces to the blank cards.


Next, I covered the seam where the two pieces of craft paper meet with a strip of washi tape. I wrapped it around the back and inside just a bit.


Kiddo helped me make cute little tea tags out of craft paper and string.


Next, I attached the heart tea tags to the back of the tea bag and looped a couple pieces of tape to the back as well. Then I stuck the bag to the front of the card. Easy peasy!


I added the printable valentine to the inside of the card with a written message.


Finally, I cut a piece of cardstock the same size as the card to cover the tea bag before slipping it into the envelope. I'm hoping this will help it go smoothly through the mail. (One year I used 3-D stickers and they got caught in the mail and sent back to me.)


Beautiful tea-rific valentines for seniors!

Wednesday, February 12, 2014

A Sensual Valentine

Guys are really hard to shop for when it comes to Valentine’s Day gifts. A lot of girls don’t know this, but most guys don’t seem to like flowers or balloons or stuffed animals holding fuzzy hearts that say, “I Love You.” On the flip side, you can’t really get a guy beef jerky or boots for Valentine’s Day, either. Well… you could, but somehow it just doesn’t seem very romantic.


What’s a girl to do? Well, this year I was inspired to explore the five senses: see, hear, touch, taste and smell. I decided to buy a gift that goes with each, but that my hubby would love (or at least laugh at). Here’s what I came up with.


For the gifts: I bought cologne (
Drakkar Noir, my favorite scent), Jelly Bellies (his favorite flavor – juicy pear), a massage bug, an i-tunes gift card and yes, some slinky lingerie. Hey, I’m married, so it’s okay.


You could adjust these to your particular man… maybe he likes Dairy Queen Blizzards (gift certificate) or seeing a movie (instead of undies). Or maybe he likes listening to a mix CD or the feel of a certain massage oil. Get creative.

Get A Massager Here

MORE SENSUAL GIFT IDEAS

Hear: headphones, CD, audio book/Audible account, toy instrument (kazoo, harmonica), drumsticks, a recorded message from you
See: lingerie, book, video game, photograph, movie tickets, blindfold
Smell: cologne, flowers, scented candle, car freshener, plug-in freshener, beard oil
Touch: massage oil, lotion, gloves, massage feather
Taste: candy, chocolates, cookies, coffee, brownies, favorite drink, tea, gift certificate for restaurant


Next, I found some empty tea boxes. This was easy for me because 1. I drink WAY too much tea. We’re talking Mad Hatter craziness and 2. I hoard boxes, among other things. If you don’t have tea boxes, again, get creative. You could buy gift bags or ready-made boxes or use some other food box, like cereal bars (which I also hoard).


Next step was to spray paint them. Otherwise, hubby might think I just stocked up on a tea for his V-day gift. The spray paint didn’t completely cover the caution-yellow, so I went ahead and sponge-brushed a coat of matte acrylic black paint over it. I also decided to open the boxes and paint the yellow parts that weren’t showing. Good thing, too, because apparently the boxes are not all the same, and I also already recycled these as Christmas gift boxes at some point, and there was Santa paper still inside.

Finally, I printed out each “sense” and pasted it to the back of each box. Then I stacked them up and tied them with hemp rope and a sweet handmade card. See? I get to be all creative and cutesy, and he gets some stuff he can actually use. Mostly. I hope he loves it as much as I love him!


UPDATE: People have asked if I could include a printable version of the heart-shaped labels. So, here goes!

Just click the picture you want (red or white). And then right click on it and choose "save picture as" or "print".


Also, here are a few versions of the card for you to choose from.

 *Another Update: The font is Showcard Gothic for anyone who wants to use it.

Looking for more perfect gifts for your Valentine? Check out my Etsy shop!

More Valentine Gift Ideas Here:

http://whatsonmyporch.blogspot.com/2018/02/valentine-gifts-that-he-actually-wants.html