Showing posts with label vintage. Show all posts

Tuesday, April 14, 2020

Toilet Paper Roll Tags for a Junk Journal

Toilet Paper Roll Pocket Tags for a Junk Journal from My Porch Prints

Toilet Paper Roll Tags for a Junk Journal
Hello and welcome to the Porch! So, right now (spring 2020) we are in the midst of the COVID-19 epidemic, and for a few weeks it was almost impossible to find toilet paper. Anywhere. Suddenly all anyone was talking about was toilet paper, toilet paper, toilet paper. It got a little scary.

So, I decided to issue a crafting challenge on my Facebook Group (Not a member? Join the fun here!). The challenge was to turn all this toilet paper negativity into something positive by creating a craft project from toilet paper rolls. This is my own answer to the challenge. I hope you love it!

I began with two toilet paper rolls, one of which I cut up into little pieces and stared at for about half an hour. Then I cut it up some more and threw the the pieces away. LOL! Attempt 2 meant I was down to just one TP roll, so I had to break into an almost-empty paper towel roll and cut it to size. This gave me 3 toilet paper-sized rolls which I proceeded to smash flat.

Flattening My TP Rolls
Getting them flat was a challenge all on its own. I used my bone folder which helped a tad, but those suckers still wanted to pop back up into their roly poly roundness. So, I used the old dollar bill method. You remember? When your dollar bill wouldn't fit in the pop machine so you'd drag it along the edge of a table or some other flat, hard surface until it straightened out? Yep. That's what I did.


Next, I used Tim Holtz Distress Ink in Vintage Photo Color and inked the edges of my TP rolls.


And I decided I would attach them to a journal page. This one is from my Faded Roses Journal Kit in my Etsy shop.

Toilet Paper Roll Pocket Tags for a Junk Journal from My Porch Prints

Making the Pockets for the Tags
Using that same printable kit and my Rose Ledger Cards, I found some pretty ephemera pieces and cut them to fit on top of my TP rolls. I rounded the corners using my corner rounding punch and inked the edges as well.

Toilet Paper Roll Pocket Tags for a Junk Journal from My Porch Prints

Then I sewed the ephemera pieces onto my TP rolls. I had planned to leave one end open to slide the tag into but quickly realized I would need some very skinny tags to fit inside the TP rolls or behind the ephemera pieces, so I came up with a new plan....

Toilet Paper Roll Pocket Tags for a Junk Journal from My Porch Prints

Toilet Paper Roll Pocket Tags for a Junk Journal from My Porch Prints


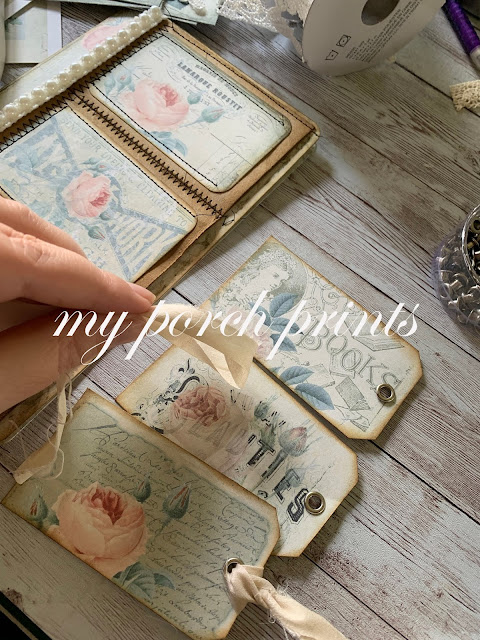
My new plan was to sew zig-zag style up the left edge to attach the TP rolls to my junk journal page. Then I also sewed zig-zags to attach in between the TP rolls, securing them to the journal page and also creating the "pocket" that the tag would slide into. I know. It's confusing. So, the tags don't actually fit INSIDE the TP rolls, they fit BEHIND them.

Toilet Paper Roll Pocket Tags for a Junk Journal from My Porch Prints

Making the Tags
I used more ephemera to create some horizontal tags. I just cut them to size and cut off the corners to make a tag shape.

Toilet Paper Roll Pocket Tags for a Junk Journal from My Porch Prints


Then I used my eyelet punch to add some holes and finished the tags off with some distress ink and a little sari silk ribbon.

Toilet Paper Roll Pocket Tags for a Junk Journal from My Porch Prints

Toilet Paper Roll Pocket Tags for a Junk Journal from My Porch Prints

All Finished!
For a final finishing touch, I added a bit of pearl bead trim. And that was it. After all that work, I was pooped. :)


Toilet Paper Roll Pocket Tags for a Junk Journal from My Porch Prints

Toilet Paper Roll Pocket Tags for a Junk Journal from My Porch Prints


Friday, February 1, 2019

Freebie Friday: Valentine Banner

Free-Download-Be-Mine-Valentine-Banner

Freebie Friday: "Be Mine" Valentine Banner
It's the first Friday of the month which is Freebie Friday here on the Porch! That means another great free download for you. Today's freebie is this vintage style printable "Be Mine" Valentine's Day banner. 
Enjoy!

Free Printable Valentine's Day Banner from My Porch Prints

To Download
Click the image(s) below, then right click and save it to your computer.
Visit my Etsy shop to see more printables.

PERMISSIONS & COPYRIGHT
PLEASE NOTE:
 This image(s) is NOT to be re-used in digital form (as in do not re-post it on your website or anywhere else or try to sell it in digital form).

For PERSONAL use ONLY.

Free Printable Valentine's Day Banner from My Porch Prints

Follow Crafting Ideas by My Porch Prints on Facebook for lots of fun & beautiful paper crafting inspiration.


Thursday, January 24, 2019

Seamstress Sewing Pocket Card Tutorial


How to create a pocket card for a junk journal

Seamstress Pocket Card Tutorial *Contains Affiliate Links
This adorable pocket card is easy to make! It was created using the "Seamstress" Scrap Pack Printable from My Porch Prints on Etsy.

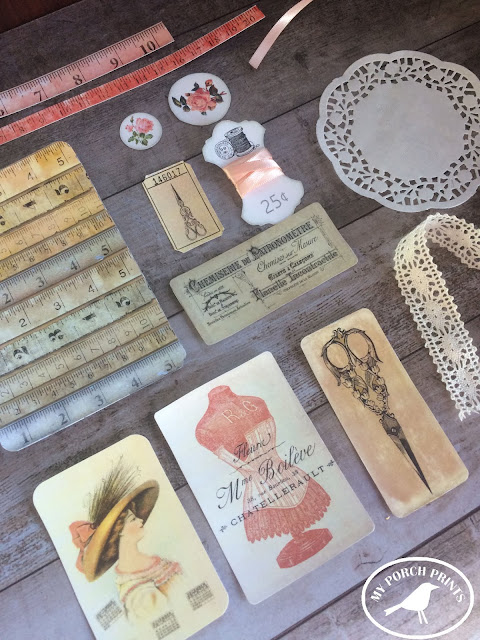
I began by printing my Scrap Pack and cutting out the elements I wanted to use for this project.

Seamstress Sewing Pocket Card Tutorial from My Porch Prints

The elements I chose included various cards & tape measures as well as a large ruler card. I also used pink ribbon which I wrapped around one of the ribbon spools, and a small doilie.

Seamstress Sewing Pocket Card Tutorial from My Porch Prints

To create my pocket, I chose a smaller card and applied glue to three sides as shown, leaving the top open.

How to make a layered card for your junk journal

I attached this card to my large ruler card, making my pocket.

Seamstress Sewing Pocket Card Tutorial from My Porch Prints

Next, I chose a colorful tape measure piece and attached it at an angle, folding the sides around to the back of my card. This adds extra support for holding things in my pocket.

Seamstress Sewing Pocket Card Tutorial from My Porch Prints

I attached my ribbon spool to one side of my pocket as shown.

Ribbon Spool Printable

 Next, I glued my small doilie to the top corner of my card.

Seamstress Sewing Pocket Card Tutorial from My Porch Prints

I decided I wanted a bit more color at the bottom of my card, so another piece of my colorful tape measure.
Seamstress Sewing Pocket Card Tutorial from My Porch Prints

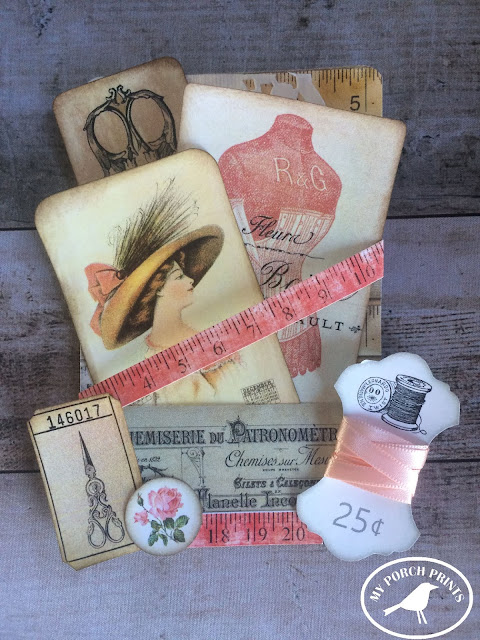
Next, I attached one of the vintage style tickets and also layered it with a flower circle.

Seamstress Sewing Pocket Card Tutorial from My Porch Prints

Seamstress Sewing Pocket Card Tutorial from My Porch Prints

To give my cards a little more interest & dimension, I used Distress Ink to darken the edges, applying it with a makeup sponge.

Seamstress Sewing Pocket Card Tutorial from My Porch Prints

And that's it! A quick & easy pocket card that works great on its own or as part of a larger junk journal or art project!

How to create a pocket card for your junk journal

How to create a pocket card for junk journal

Seamstress Sewing Pocket Card Tutorial from My Porch Prints

Seamstress Sewing Pocket Card Tutorial from My Porch Prints

Friday, January 11, 2019

Freebie Friday: Vintage Sheet Music

Freebie Friday: Vintage Sheet Music Printable Download Paper

Freebie Friday: Vintage Sheet Music
Hello crafters! It's Friday, and that means freebies here on the Porch!

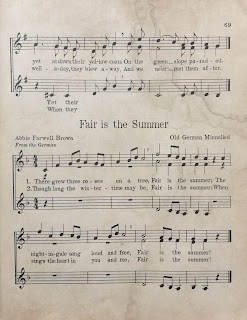
Today's freebie is a vintage sheet music download! Many of the titles have to do with seasons. Use these for junk journals, card-making, whatever you like!

Enjoy!

Follow Crafting Ideas by My Porch Prints on Facebook for lots of fun & beautiful paper crafting inspiration.

To Download
Click the image below, then right click and save it to your computer.
Visit my Etsy shop to see more printables.

PERMISSIONS & COPYRIGHT
PLEASE NOTE:
This image(s) is not to be re-used in digital form (as in do not re-post it on your website or anywhere else or try to sell it in digital form).

You MAY PRINT & sell it as part of a journal or art project.


Freebie Friday: Vintage Sheet Music Printable from My Porch Prints

Freebie Friday: Vintage Sheet Music Printable from My Porch Prints

Freebie Friday: Vintage Sheet Music Printable from My Porch Prints

Freebie Friday: Vintage Sheet Music Printable from My Porch Prints

Freebie Friday: Vintage Sheet Music Printable from My Porch Prints

Freebie Friday: Vintage Sheet Music Printable from My Porch Prints

Freebie Friday: Vintage Sheet Music Printable from My Porch Prints

Freebie Friday: Vintage Sheet Music Printable from My Porch Prints

Freebie Friday: Vintage Sheet Music Printable from My Porch Prints


Thursday, January 10, 2019

Summer Garden Journal Cover Tutorial


Summer Garden Junk Journal Cover Tutorial from My Porch Prints

Ah summer! The warm breezes, the smell of green growing things, the lazy buzz of insects. Capture your own little slice of summer in this Summer Garden Journal Kit!

Here is a quick tutorial on how to make the cover of this journal.

You will need:

Cut Your Box
The journal pages in this kit are 5x7 inches. So I cut my box slightly larger than the pages and added a 2-inch spine as shown.


Summer Garden Junk Journal Cover Tutorial from My Porch Prints

Print Papers
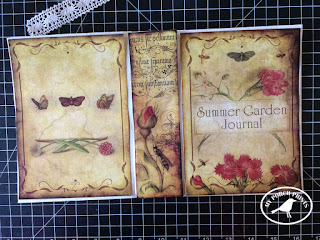
To cover the outside of the journal, you'll need to print 2 sheets (8.5x11) of the printable papers that come in this journal kit. You could also use your own paper if you like. Cut off the white edges and overlap the papers slightly, then adhere them together with glue, using a brush to smooth the glue before attaching.


Glue the paper to the outside of your journal cover using glue & a paintbrush to smooth it.


Smooth the paper, working from the center of your spine to the outside edges of your cover, pushing the air bubbles out. Don't worry if it's a little wrinkly. These will usually work themselves out as it dries.


Flip your cover over and cut off excess paper and the corners as shown. Leave a border of 1/2 to 1 inch as shown.


Also, cut triangular notches on either side of your spine.


Apply glue, using a brush to smooth, and fold the flaps over as shown.


Summer Garden Junk Journal Cover Tutorial from My Porch Prints

Once all the flaps are folded, print 2 more sheets of printable papers and glue them together like before.


Place the seam in the center of your journal inside the spine. This will help to hide it.


Fold the paper at the edges of your journal and then cut where the folds are.


Again, smooth your glue with a brush on the inside of your journal cover and then place your paper over the glue, smoothing from the spine outward toward the journal edges.


When glue is dry, gently fold up the sides of your journal, working slowly to stretch the papers and create creases.

Your Journal Cover
Next, cut out your journal covers & spine. Attach them as before, using a brush to smooth out the glue and then gluing the papers to the front & back covers and spine as shown.

Summer Garden Junk Journal Cover Tutorial from My Porch Prints

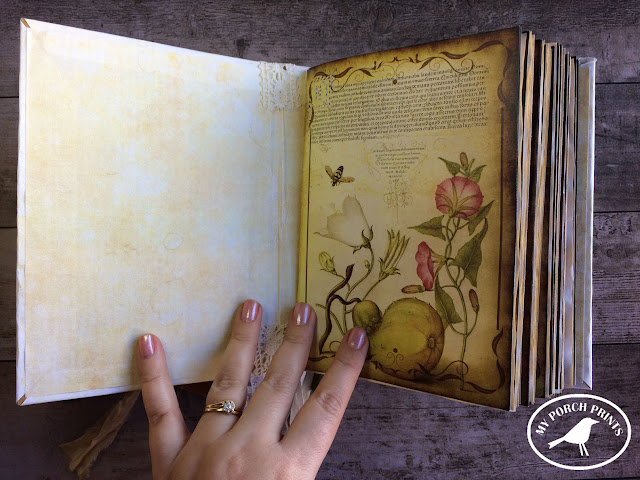
If desired, use lace to cover the spine. Attach with glue.

Summer Garden Junk Journal Cover Tutorial from My Porch Prints

Summer Garden Junk Journal Cover Tutorial from My Porch Prints

And that's it! You have a completed journal cover. Now you can add your pages & embellishments.

Summer Garden Junk Journal Cover Tutorial from My Porch Prints

Summer Garden Junk Journal Cover Tutorial from My Porch Prints
Get this Garden Mini Book in my Etsy shop. 


Summer Garden Junk Journal Cover Tutorial from My Porch Prints

Summer Garden Junk Journal Cover Tutorial from My Porch Prints

Summer Garden Junk Journal Cover Tutorial from My Porch Prints

Summer Garden Junk Journal Cover Tutorial from My Porch Prints

Summer Garden Junk Journal Cover Tutorial from My Porch Prints

Summer Garden Junk Journal Cover Tutorial from My Porch Prints

Want to make a tassel like this one? Here is a video tutorial to show you how.
And here is a video tutorial for how to make this garden journal.