Showing posts with label style. Show all posts
Showing posts with label style. Show all posts
Saturday, February 17, 2018
How To Style Industrial Farmhouse Bookshelves
I'm a sucker for what many people call "junk." Give me something old and rusty, and I swoon. So, it's no surprise that I would use it to decorate my bookshelves. Here's a little look at some of my found items.
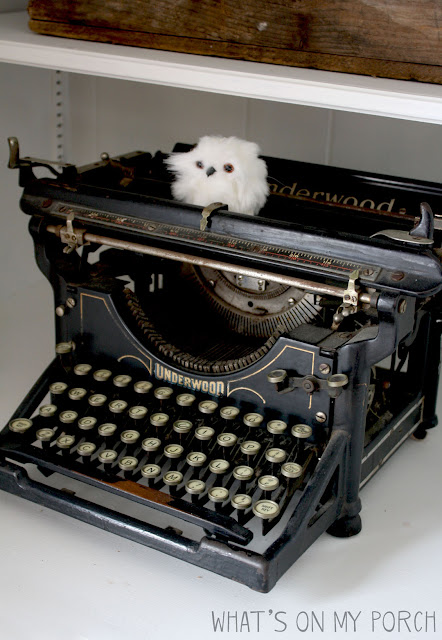
One of my favorite finds, my vintage Underwood typewriter was all but buried in the basement of an antique store. I couldn't pass it up. As a children's author (check out the Villain School Books), typewriters are near and dear to my heart. This one had so much character, too!
The roller skates came from a thrift store, as did the antique books, tackle box and clocks. The wooden crates were junk-day finds... people left them on their curbs with the trash.
The "Cooper" street sign came from a town we lived in for a while. The city was replacing old street signs and had a huge pile! I talked one of the street department employees into giving me one. I asked for the whole pile, but they said it was already promised somewhere else. Bummer!
Do you collect vintage items? What's your favorite "junk" piece?
How To Decorate A Bookshelf For Spring
How to Decorate a Spring Bookshelf
I have a love-hate relationship with our built-in bookshelves. When we first moved into our lake house less than a year ago, I was so excited for the built-ins. All that storage! Of course, it meant downsizing our furniture and getting rid of some beloved pieces. The trick is, these built-ins aren't very versatile. I can't exactly fill them with all my "junk" because it makes them look very messy.
And the space between shelves is kind of small. I can hear what you're thinking. "They're adjustable, dummy. Just move the shelves!" Well, when we moved in, we were in a bit of a hurry. Hubby had just transferred from Wisconsin back to Iowa, and we needed a house lickety-split. So, I set my kiddos to painting double-quick. And, if you adjust any of these shelves, you will find an unpainted stripe behind them. I know. I need to fix that, but I'm kind of swamped with other projects at the moment. So... the shelves stay where they are. For now.
The good news is my tiny, static shelves mean I get to bring you decorating known-how for your own bookcase.
Here are some tips for decorating your bookshelf for spring:
Color
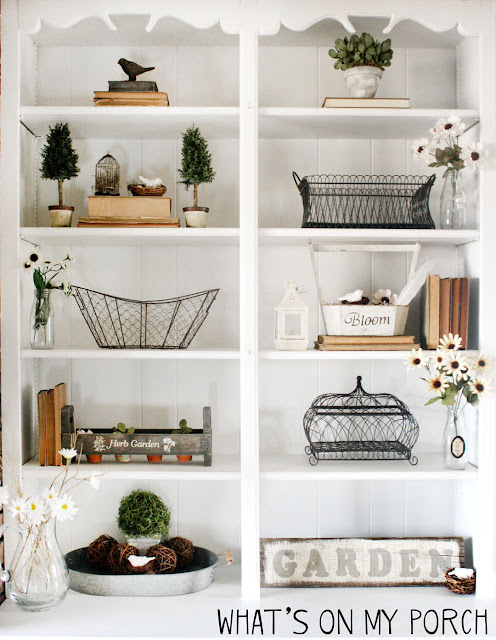
I chose a color scheme that goes well with my farmhouse style and with spring: white, black, gray and tan with a smidge of greenery thrown in. I played with the idea of using my robins eggs (which are aqua colored), but they just didn't match. Too many colors make a space look cluttered. A nice, neutral scheme gives it a clean look.
Theme & Style
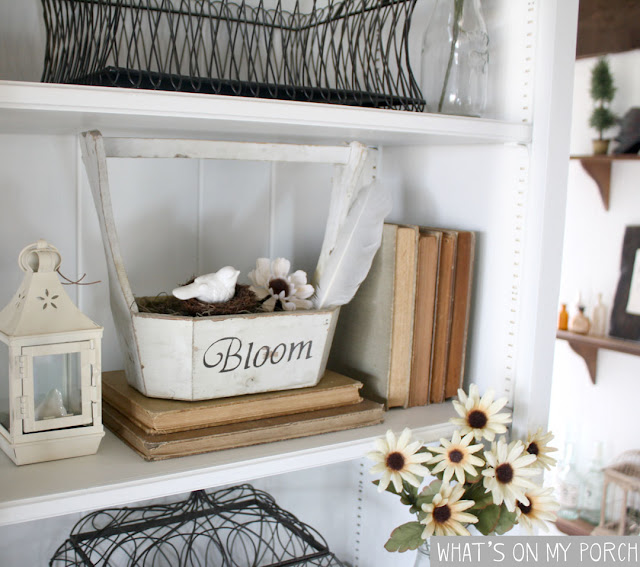
Don't go overboard with a theme, but incorporate it using your style. My style is farmhouse and my theme is spring. So, I incorporated elements of spring like birds, greenery and flowers into my existing farmhouse elements which include wire baskets, galvanized metal, wood signs and old books.
Choosing Decor
When decorating this shelf, I collected my favorite things and made a pile on my dining table, choosing what would fit best in my space and with my colors/theme. Some items didn't make the cut. It's important to tell yourself, "I'll just use this somewhere else." Also, a bookshelf is for displaying items, not storage. If you have a gazillion tatty old paperback books (like I do), store them out of sight. Despite its name, a bookshelf does not often store actual, readable books. The books on my shelf are vintage collectibles, chosen for their aesthetic. If you do need to store books or other items, try hiding them in crates or baskets.
Spacing
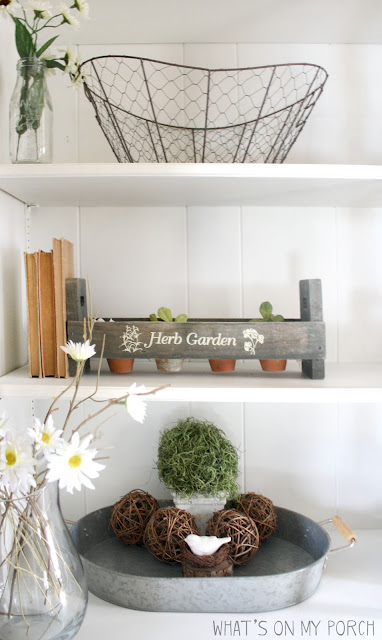
This is the trickiest part of decorating a bookshelf. How to make it look full, but not cluttered. Clean, but not skimpy. Balanced, but not too matchy-matchy. I played around with my collection of items, trying things here and there. I used the triangle or zig-zag method. The wire baskets form a triangle or zig-zag pattern. So do the wood items with words: "garden" "herb garden" & "bloom". I also scattered birds, greenery and flowers throughout. When decorating your shelf, try grouping like items on your table, then place them in the zig-zag/triangle pattern on your shelf to draw the eye back and forth up the shelf and give balance. Don't place two large items close together. I also like to put larger items on the bottom to anchor the shelf, and smaller ones on top to draw the eye upward.
Create Groupings
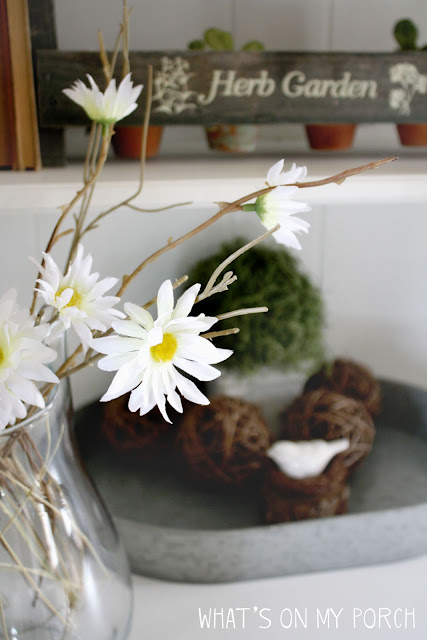
Use smaller items in conjunction with larger ones. I filled a galvanized tray with vine balls, a small moss topiary and a bird in her nest. I also used books as a base for holding other items.
Final Tips
- Don't forget those spring touches of greenery, flowers and birds & nests! Other spring themed items might be vintage garden tools, Easter bunnies, eggs, flowering branches, etc.
- Shop your house for items in your color scheme: crates, baskets, bowls, pitchers--anything can be cute when paired with other items.
- If your books don't match, think about painting the covers or covering them with craft paper. Turn the spine toward the back of the case, letting the faded pages show.
Sunday, January 14, 2018
Love Birds Valentine Mantel
Love Birds Valentine Mantel
I used to get really excited for Valentine's Day, not so much for the romance aspect of it, but because of Valentine boxes at school. When I was a kid, I went all out with my box designs. And later, when I had my own kids, we would make the coolest boxes. One year we made a grandfather clock out of cardboard that had a working clock mechanism inside! It was as tall as my daughter. Another year we made a box out of real chocolate!
These days, my kiddos are grown up. I miss the tradition of Valentine boxes, getting to be creative and make something beautiful. So, I decided to pour that energy into decorating instead. This mantel is a fun mix of vintage and handmade with a "love birds" theme.
The bird and cage canvas art is something I made a few years ago using plaster.
These cute little topiaries were thrift store finds.
I found these corbels at an antique show and got them for a steal!
You can download this printable banner PDF FREE! Just click the link at the bottom of the post.
Download the Valentine banner by clicking HERE!
Tuesday, December 26, 2017
Farmers Market Bench Makeover
 |
| Farmers' Market Bench Makeover by What's On My Porch |
I find real pleasure in taking something unwanted and old and turning it into something beautiful and useful. This Farmers' Market Bench was no exception.
I found this bench in a thrift store. I knew as soon as I saw it that it would be perfect for an entry way: a place to store shoes or toss a bag or coat. It just needed a little updating.
First, I cleaned and primed the wood with Zinsser primer. This makes it ready to take on paint. You could also sand, but that takes a lot of work, and it's not necessary as long as you prime first. It's easy to think you can skip this step, but I don't recommend it. The paint just won't stick well without it.
Next, I measured the bench and found some cute fonts and printed the words "Farmers' Market" in large letters and taped them together. (Fonts: Mottona and Twiggy Pop).
I colored the backs of my words with willow charcoal and placed the words on my bench. Then I traced them onto the wood with a pencil. I removed the paper and outlined the tracing, again with pencil. Then I filled it in with black acrylic craft paint and a small paintbrush. I extended the "f" and "s" at the beginning and end of "Farmers'".
I love how it turned out! How about you?
Want MORE makeovers?
Check out this Antique Dresser Makeover!
Sunday, August 7, 2016
Fall Farmhouse Tea Towel Pillows
It's almost fall, ya'all! What better way to celebrate the season of cool breezes, crisp apples, colorful leaves and plump pumpkins than with some cozy farmhouse style pillows?
Step 1: Tea Towels
I bought some awesome white towels from Walmart in the kitchen towel section. They are Mainstays
brand Flour Sack Towels in white. The fabric has an awesome farmhouse look and feel. The first step is to IRON your towel. They are very wrinkly, which isn't a bad thing since the look I was going for was casual, but I wanted my image transfer to be crisp.Step 2: CitraSolv
 There is a handy, delicious smelling orange cleaner out there called CitraSolv. It is heavenly! And it's awesome for transferring inkjet printed images onto fabric! **This transfer method does not work with laser printers. Only inkjet. Grab a little glass jar and a small housepaint brush for this.
Step 3: Print your picture... backwards!
I always mess up this step. I printed the entire image on four different sheets of paper before I realized I had forgotten to flip it. I use Photoshop to create a document the same size as my pillow. (In this case, around 22x22 inches). Then I crop each section to fit an 8.5 x 11 sheet of paper and print them, line them up and tape them. I'm sorry if this is confusing. You may want to start with an image that can fit a standard sheet of paper... just don't forget to flip it backwards! If you don't have Photoshop, you can do this in MS Word by inserting Word Art, choosing Rotate and Flip Horizontal. You can do it with pictures, too.
Step 4: Transfer the image.
Once you have your (backwards) image place it on the tea towel so the ink is touching the fabric. Make sure it's centered. Tape the corners in place. Then lightly brush the CitraSolv onto the back of the image. Use a tablespoon to rub the image and transfer it to the fabric. After rubbing the entire image, gently lift it to be sure it transferred. It's very difficult to line it up again. I've never been successful doing it.
Step 5: Sew & stuff your pillow! And then repeat and make a few more! :)

The files for these designs are available on my Etsy shop:
Resize as needed and remember to FLIP them so they are backwards before you print! :)
Subscribe to:
Posts (Atom)


