Showing posts with label kids. Show all posts

Tuesday, August 27, 2019

Halloween Wheel Window Card Tutorial


Halloween Wheel Window Card
This super-cute Halloween Wheel Window Card has a window and a wheel with spinning words. It's cute on its own or as a cover or insert for a junk journal!
To make it you'll need a few supplies:

Supplies:
Black Cardstock
Tim Holtz Ornate Plate
Brass Fastener
Circle Punch
Awl Or Other Sharp Tool
Craft Knife
Mounting Tape
Tape, Glue, Scissors, Etc.

Printables:
Pumpkin Image (I got mine from Jento Design on Etsy)
(Pumpkin image is also available in the cover of my Cozy Autumn Journal Kit Printable)
"Seasons" Journal Words Printable from My Porch Prints
Coffee Stained Book Pages Printable from My Porch Prints


Preparing The Black Card
To begin, cut an 8.5x11 inch sheet of black cardstock in half to create two 8.5x5.5 pieces. Then cut an extra half-inch off the side & bottom of one piece. This will be your main card.


Punch Half-Circle
Punch a half-circle in the center bottom of the smaller, main card.


Bookplate Pumpkin
Next, place your book plate in the center of your pumpkin image and trace the inside, the outside corners, and the fastening holes.


Use your awl or sharp tool to punch the fastener holes.


Using a craft knife, cut out the center tracing.


Next, attach your bookplate to your pumpkin as shown.


Creating Your Wheel
Find a circle shape that is the same size or slightly smaller than your main black card. Trace it onto the larger cardstock piece (NOT the one with the half-circle punched out). Cut it out. This will become your wheel.


Find and mark the center of your circle.
One way to do this is to place the circle on a piece of paper and use a ruler to cut the paper to the same size as the circle. Then, measure each side and mark the halfway point. For instance, my paper was 4x4 inches. So, the center of each side was the 2 inch mark. I drew a line at each 2-inch mark, and where the lines intersected was the center of my paper.

I used my awl to create a hole in the center of my paper, then placed my circle on the paper, lining my circle edges with my paper edges, and flipped it over. Using a pencil, I marked through the hole I created onto my circle. You can also look up "How to find the center of a circle" if that is more helpful.


Create a hole in the center of your circle or wheel. Then align the wheel in the bottom-center of your card (where you punched the half-circle). And mark through the center hole. Use the awl to punch it out.


Creating Your Window
This part is just a little tricky. It took me some trial and error. With the wheel aligned on the center bottom of your card, place the pumpkin over the top edge of the wheel so that your wheel shows through the window. (See photo above.) You'll want to align it carefully. The wheel should show through, but the edges of the wheel should not.


Now that you have your pumpkin and wheel aligned, carefully remove the wheel by sliding it away. Do not move your pumpkin.


Use a pencil to trace inside your pumpkin bookplate onto your card.


Now, remove your pumpkin and use your craft knife to cut out where you marked with your pencil.

Back of card.
Turn your card to the back (see above photo) and use your brass fastener to attach your wheel to the back of the card. Then flip it back to the front again.

Front of card.
 Your wheel should completely cover the window you cut out as shown above.


Adding Seasonal Words
Use glue to attach your cut-out "Seasons" Journal Words to the wheel, using the cut-out hole as a guide for placing the words. (See the above photo.)


When you've glued on a word, spin the wheel until the word disappears and attach another word. Repeat until the wheel is full of words. Try to space them evenly. Note: Be sure to leave plenty of space between the words so no more than one shows up in the window at a time.


When you've finished applying your words to the wheel through the window, use a piece of tape to secure your brass fastener.


Attach Pumpkin
You might also want to secure the fasteners on your pumpkin book plate. Then glue your pumpkin to your card, lining up the window so the words show through and covering your brass fastener.

If your pumpkin isn't large enough to cover your fastener, consider using some cheesecloth or decorative tissue paper underneath your pumpkin to hide the fastener. Just don't cover your window.


Print your Coffee Stained Book Page on cardstock and fold it in half as shown.


Use strips of mounting tape to attach your completed pumpkin card to the folded "Coffee Stained Book Page" card.


Align the pumpkin card with the bottom of the folding card as shown below.


If you want, ink the edges of your card, and you're finished! Now you can use the punched out part at the bottom to move the spinning wheel and change the words in your window. See video below.
If you liked this tutorial, please share!
Thanks!
Stephanie from My Porch Prints


Friday, April 19, 2019

Freebie Friday: Free Printable Easter Bible Verse Tags

Free Easter Gift Basket Bible Verse Scripture Tags My Porch Prints

Freebie Friday: Easter Basket Gift Tags
Hello crafters! So, I was putting the final touches on Easter baskets for my grown daughters, and I really wanted to add some decorative tags & Bible verses. A quick search of the Internet revealed that there just aren't that many free, printable Easter tags out there with Bible verses on them. At least, not any that were my style. So, like any good designer, I decided to create some myself!

And what kind of a friend would I be if I didn't share? :)

So, please enjoy these free printable Easter scripture tags (at bottom of this post). They have images of flowers, crosses, feathers, etc. I included a couple that would work for boys, too. Also, some are blank for you to write names on or other sentiments.

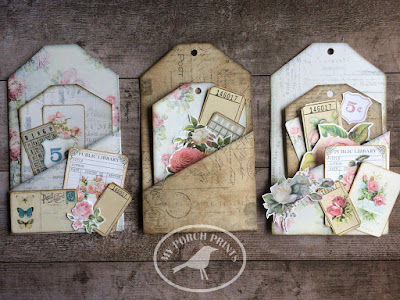
They also go nicely with my Printable Pocket Tags from My Porch Prints on Etsy.
These pocket tags are available in my Etsy shop.

Have a blessed Easter, everyone! He is risen!


To Download
Click the image(s) below, then right click and save it to your computer.
Visit my Etsy shop to see more printables.

PERMISSIONS & COPYRIGHT
PLEASE NOTE:
 This image(s) is NOT to be re-used in digital form (as in do not re-post it on your website or anywhere else or try to sell it in digital form).

For PERSONAL use ONLY.
Free Printable Bible Verse Easter Tags from My Porch Prints
Here are some more Bible verses for Easter: 
The angel said to the women, “Do not be afraid, for I know that you are looking for Jesus, who was crucified. He is not here; he has risen, just as he said. Come and see the place where he lay.”
Matthew 28:5-6

He is not here; he has risen! Remember how he told you, while he was still with you in Galilee: ‘The Son of Man must be delivered over to the hands of sinners, be crucified and on the third day be raised again.’
Luke 24:6-7

“Don’t be alarmed,” he said. “You are looking for Jesus the Nazarene, who was crucified. He has risen! He is not here. See the place where they laid him.”
Mark 16:6

They stripped him and put a scarlet robe on him, and then twisted together a crown of thorns and set it on his head. They put a staff in his right hand. Then they knelt in front of him and mocked him. “Hail, king of the Jews!” they said.
Matthew 27:28-29

When he had received the drink, Jesus said, “It is finished.” With that, he bowed his head and gave up his spirit.
John 19:30

The crowds that went ahead of him and those that followed shouted,
“Hosanna to the Son of David!”
“Blessed is he who comes in the name of the Lord!”
“Hosanna in the highest heaven!”
Matthew 21:9

“We are going up to Jerusalem, and the Son of Man will be delivered over to the chief priests and the teachers of the law. They will condemn him to death and will hand him over to the Gentiles to be mocked and flogged and crucified. On the third day he will be raised to life!”
Matthew 20:18-19

Jesus called out with a loud voice, “Father, into your hands I commit my spirit.” When he had said this, he breathed his last.
Luke 23:46

“Abba, Father,” he said, “everything is possible for you. Take this cup from me. Yet not what I will, but what you will.”
Mark 14:36

Above his head they placed the written charge against him: this is jesus, the king of the jews.
Matthew 27:37

Rejoice greatly, Daughter Zion!
Shout, Daughter Jerusalem!
See, your king comes to you,
righteous and victorious,
lowly and riding on a donkey,
on a colt, the foal of a donkey.
Zechariah 9:9

Finally the other disciple, who had reached the tomb first, also went inside. He saw and believed. (They still did not understand from Scripture that Jesus had to rise from the dead.)
John 20:8-9

Lord, save us!
Lord, grant us success!
Blessed is he who comes in the name of the Lord.
From the house of the Lord we bless you.
Psalm 118:25-26

Source: https://dailyverses.net/easter


Saturday, September 15, 2018

Halloween Mini Spell Books Tutorial


Halloween Mini Spell Books
Fall is a time for pumpkin spice, crisp pretty leaves and... Halloween! This set of four mini Halloween spell books makes a fun and bewitching craft project.

Once you see how easy they are to make, you'll want to get your craft on.

1. Start with the printable download: Halloween Mini Books from My Porch Prints on Etsy.


2. Print the covers on cardstock* and the inside pages on regular paper. Cut them out as shown. You should have 3 page strips for each book.

*My printer was low on ink, which I didn't realize at the time. So, my "Book of Spells" cover is a little more "red" than the actual version. 


3. Fold the lighter, inside cover as pictured. Also fold along the "spine" to create a book shape. Secure with adhesive. I use craft glue or glue sticks.


4. You can add depth to your book (and cover up any crease lines) by using a black marker and a make-up sponge to darken the edges & spine.


5. Cut out the page strips and fold them accordion style. Apply glue to the back and glue page 1 to page 2, page 3 to page 4, and page 5 to page 6 as shown. Basically, just scrunch up your "accordion" so the page-backs stick together.


6. Now you have a book cover and a set of three signatures. (A signature is a collection of pages.)
Using a clip or clothespin, line up your three page signatures and hold them tightly together. Apply glue to the edge and push it into the inner spine of your book as shown. Hold for about 30 seconds or until adhesive begins to set.


 7. Finish by clamping the cover and pages together and allowing the adhesive to dry. Repeat process for each mini book.


And that's it! You have a collection of spooky spell books perfect for Halloween!