Showing posts with label wood. Show all posts

Friday, February 16, 2018

How To Transfer Images To Wood

How to Transfer Images to Wood Crates

How To Transfer Images To Wood Crates
Once upon a time there was a girl who loved cool old junk. One day her village decided to get rid of all the junk by having a clean-up day. The curbs overflowed with antique furniture and galvanized buckets. The girl was so happy. Especially when she scored not one, but TWO old, weathered wooden crates.


For years, the crates sat on her shelves. And the girl thought about doing some kind of project with them. Should she paint them? But she couldn't bring herself to change their weathered loveliness. Until one day, when she saw an old coffee crate on Pinterest and it gave her an idea!
Okay, seriously, it felt like a fairytale moment when I found these cute little crates. I really couldn't decide what to do with them... until now! And you can do it, too. Let's take a look at how I transferred graphics to my old, wooden crates.

How to Transfer Images to Wood Crates


Gather Supplies
First, I gathered some supplies: a spoon, a paintbrush, a glass and a reverse print-out of my graphic which I got from The Graphics Fairy here. I altered it in Photoshop to fit my crates and added a year at the bottom. And of course, the main ingredient: Citra Solv. This is a delicious cleaner that smells like oranges and heaven. It is made with essential oils and is great for getting goo and grease off pretty much anything. It also works as an image transfer agent. Handy!


Transfer the Image
Next, I placed the image ink-side down on my crate, centering it, and securing it with tape. Then I lightly dipped the brush in the Citra Solv and brushed it across the paper. Finally, I rubbed the image with the back of the spoon to transfer it to the wood. Easy peasy!

How to Transfer Images to Wood Crates


Of course, the image isn't perfectly crisp, but it matches the faded look of each crate. Now, who is going to try this?


Tuesday, January 9, 2018

Farmhouse Finds From Amazon


Farmhouse products you can find on Amazon!
Farmhouse Finds From Amazon
If you can't tell, I'm pretty much in love with farmhouse style. We're running away together. There are so many choices now for that vintage farm look. And you don't have to go to a specialty store or website to get it. You can find amazing farmhouse décor on Amazon. Take a look at these affordable farmhouse finds!


Galvanized Metal Desk Organizer


Candle Lantern


White Wall Sconce


Metal Chairs


Kitchen Utensil Holder


Architectural Corbel


Barn Door Console


Clock


Thursday, December 28, 2017

Update Your Home for the New Year!

Resolutions.

We've all got 'em. Mine is pretty much always to lose weight. It lasts for a week or two until the willpower fizzles out and chocolate starts sounding way better than skinny jeans.

But one resolution we CAN keep is to update our house! You might have visited your parents or grandparents this holiday season. Maybe their homes make you jealous... or maybe you look at the same old wood paneling and dusty, outdated curtains and wonder why they never change their style. Of course, if you're like me, you go home and look at your own dusty curtains and wonder why you never change YOUR style.

Enter the Home Update Resolution!

This is the year. You can do it. It starts with some simple baby steps.

Home Update: Baby Steps

1. Clean. I know. It's no fun, but put away your pouty face and get out those rubber gloves. Wipe, vacuum, pick up. You can do it. I believe in you.

2. Declutter & Organize! Now that you've got some space on your dining table, use it as a command center. Start emptying out your kitchen cabinets and drawers. Make piles for "Keep" "Junk" and "Donate".  Anything you haven't used lately, or items that are broken... toss them. Now is NOT the time to be sentimental. Just because your great-aunt Mabel passed down that cracked ugly cookie jar does NOT mean you have to keep it. Take a photo and start a donation box.
 
Need some ideas on how to organize? Check out my Pinboard:

https://www.pinterest.com/thegoodvillain/the-tidy-life/
Here is a link to my Pinboard for organizing and decluttering.

3. Paint the Wood. Some of you will cringe when I say this. I know it is a fad right now to have white painted wood. So, you don't HAVE to do this, but if you have 70s wood paneling that isn't even real wood. Please. FOR HUMANITY. Paint that stuff white! But start with a good cleaning and some Zinsser primer first. And if you're feeling really feisty... paint your outdated wood cabinets, too!

Here is what our dining room looked like after painting the bookshelves and wood paneling.
So much brighter!


4. Change Your Curtains. Maybe they came with the house. Maybe you just don't think about them, but curtains can be like wrinkles for your house... they make it look OLD. Take a look at your favorite rooms on Pinterest. What do they have in common? I bet many of them have simple white curtains or NO curtains at all. I realize naked windows are not always practical, so if you need curtains, make them simple and clean. For our curtains, we used a package of twin flat sheets we bought on Amazon. In white. We clipped them with black curtain rings and saved a TON of money by using electric conduit instead of curtain rods (cost was around $3/rod!). Plus the conduit is WAAAAY less flimsy.

In our daughter's room, we used sheer lace curtains and metal electrical conduit for the curtain rods.
It is much cheaper and stronger than regular curtain rods!
This was our daughter's room before. No lie.


5. Paint Furniture. This is like the wood dilemma above (see #3). I know your orange-ish cabinet and your dark brown buffet and your honey blonde dining table all came from Grandma so-and-so, and she'd roll over in her grave if you painted them, but honestly... they look weird together. So many different wood tones. And they make your house so dark. Take another look at your favorite Pinterest homes. What color are the cabinets, the tables, the buffets? If they're white or gray, then you might want to consider painting your own furniture white or gray, too. Just a suggestion.

 
https://whatsonmyporch.blogspot.com/search?q=dresser

See what this dresser looks like after a coat of paint.


6. Update Your Art. Not ready to leap into painting furniture or rooms just yet? Try something smaller. 
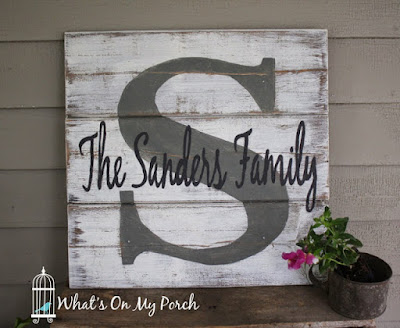
Make a family name sign. It will add some quick and easy farmhouse charm to your home. And maybe it will even give you the redecorating bug, who knows?

 
https://whatsonmyporch.blogspot.com/2015/05/monogram-pallet-family-name-sign.html


Good luck decluttering and updating your house. Here's to a clean, fresh and beautiful NEW YEAR!

Want more farmhouse style décor? Check out this post about Galvanized Farmhouse Finds from Hobby Lobby.

http://whatsonmyporch.blogspot.com/2017/12/galvanized-farmhouse-from-hobby-lobby.html

Want an even EASIER way to redecorate your house? Get printable art in my Etsy shop!

https://www.etsy.com/shop/MyPorchPrints?section_id=19861674


Tuesday, December 26, 2017

Farmers Market Bench Makeover

Farmers' Market Bench Makeover by What's On My Porch


I find real pleasure in taking something unwanted and old and turning it into something beautiful and useful. This Farmers' Market Bench was no exception.


I found this bench in a thrift store. I knew as soon as I saw it that it would be perfect for an entry way: a place to store shoes or toss a bag or coat. It just needed a little updating.


First, I cleaned and primed the wood with Zinsser primer. This makes it ready to take on paint. You could also sand, but that takes a lot of work, and it's not necessary as long as you prime first. It's easy to think you can skip this step, but I don't recommend it. The paint just won't stick well without it.


Next, I measured the bench and found some cute fonts and printed the words "Farmers' Market" in large letters and taped them together. (Fonts: Mottona and Twiggy Pop).


I colored the backs of my words with willow charcoal and placed the words on my bench. Then I traced them onto the wood with a pencil. I removed the paper and outlined the tracing, again with pencil. Then I filled it in with black acrylic craft paint and a small paintbrush. I extended the "f" and "s" at the beginning and end of "Farmers'".

I love how it turned out! How about you?


Want MORE makeovers?
Check out this Antique Dresser Makeover!

 
https://whatsonmyporch.blogspot.com/2013/08/antique-dresser-makeover.html