Showing posts with label graphic. Show all posts

Thursday, January 17, 2019

Freebie Friday: Bird Postcards

Freebie Friday: Printable Bird Postcards from My Porch Prints


My Etsy Shop:  https://www.etsy.com/shop/MyPorchPrints
My Facebook: https://www.facebook.com/myporchprints

Freebie Friday: Bird Postcards

Hello crafters! It's Friday, and that means freebies here on the Porch!

Today's freebie is a vintage style postcard with a bird image. It comes in two varieties. Use these for junk journals, card-making, whatever you like!

Enjoy!

Follow Crafting Ideas by My Porch Prints on Facebook for lots of fun & beautiful paper crafting inspiration.


To Download
Click the image below, then right click and save it to your computer.
Visit my Etsy shop to see more printables.

PERMISSIONS & COPYRIGHT
PLEASE NOTE:
 This image(s) is not to be re-used in digital form (as in do not re-post it on your website or anywhere else or try to sell it in digital form).

You MAY PRINT & sell it as part of a journal or art project.Freebie Friday: Printable Bird Postcards from My Porch Prints
Want more freebies? Use the Search bar. Just type in the word "freebie".
And be sure to check out my other blog posts & tutorials, too!


Friday, February 16, 2018

How To Transfer Images To Wood

How to Transfer Images to Wood Crates

How To Transfer Images To Wood Crates
Once upon a time there was a girl who loved cool old junk. One day her village decided to get rid of all the junk by having a clean-up day. The curbs overflowed with antique furniture and galvanized buckets. The girl was so happy. Especially when she scored not one, but TWO old, weathered wooden crates.


For years, the crates sat on her shelves. And the girl thought about doing some kind of project with them. Should she paint them? But she couldn't bring herself to change their weathered loveliness. Until one day, when she saw an old coffee crate on Pinterest and it gave her an idea!
Okay, seriously, it felt like a fairytale moment when I found these cute little crates. I really couldn't decide what to do with them... until now! And you can do it, too. Let's take a look at how I transferred graphics to my old, wooden crates.

How to Transfer Images to Wood Crates


Gather Supplies
First, I gathered some supplies: a spoon, a paintbrush, a glass and a reverse print-out of my graphic which I got from The Graphics Fairy here. I altered it in Photoshop to fit my crates and added a year at the bottom. And of course, the main ingredient: Citra Solv. This is a delicious cleaner that smells like oranges and heaven. It is made with essential oils and is great for getting goo and grease off pretty much anything. It also works as an image transfer agent. Handy!


Transfer the Image
Next, I placed the image ink-side down on my crate, centering it, and securing it with tape. Then I lightly dipped the brush in the Citra Solv and brushed it across the paper. Finally, I rubbed the image with the back of the spoon to transfer it to the wood. Easy peasy!

How to Transfer Images to Wood Crates


Of course, the image isn't perfectly crisp, but it matches the faded look of each crate. Now, who is going to try this?


Sunday, August 7, 2016

Fall Farmhouse Tea Towel Pillows


It's almost fall, ya'all! What better way to celebrate the season of cool breezes, crisp apples, colorful leaves and plump pumpkins than with some cozy farmhouse style pillows?

Step 1: Tea Towels
I bought some awesome white towels from Walmart in the kitchen towel section. They are Mainstays
brand Flour Sack Towels in white. The fabric has an awesome farmhouse look and feel. The first step is to IRON your towel. They are very wrinkly, which isn't a bad thing since the look I was going for was casual, but I wanted my image transfer to be crisp.

Step 2: CitraSolv
There is a handy, delicious smelling orange cleaner out there called CitraSolv. It is heavenly! And it's awesome for transferring inkjet printed images onto fabric! **This transfer method does not work with laser printers. Only inkjet. Grab a little glass jar and a small housepaint brush for this.

Step 3: Print your picture... backwards!
I always mess up this step. I printed the entire image on four different sheets of paper before I realized I had forgotten to flip it. I use Photoshop to create a document the same size as my pillow. (In this case, around 22x22 inches). Then I crop each section to fit an 8.5 x 11 sheet of paper and print them, line them up and tape them. I'm sorry if this is confusing. You may want to start with an image that can fit a standard sheet of paper... just don't forget to flip it backwards! If you don't have Photoshop, you can do this in MS Word by inserting Word Art, choosing Rotate and Flip Horizontal. You can do it with pictures, too.

Step 4: Transfer the image.
Once you have your (backwards) image place it on the tea towel so the ink is touching the fabric. Make sure it's centered. Tape the corners in place. Then lightly brush the CitraSolv onto the back of the image. Use a tablespoon to rub the image and transfer it to the fabric. After rubbing the entire image, gently lift it to be sure it transferred. It's very difficult to line it up again. I've never been successful doing it.


Step 5: Sew & stuff your pillow! And then repeat and make a few more! :)


The files for these designs are available on my Etsy shop:
 
https://www.etsy.com/shop/MyPorchPrints

Resize as needed and remember to FLIP them so they are backwards before you print! :)


Tuesday, May 6, 2014

Chair & Foot Stool

Pretty chair and stool makeover! I found both of these beauties at the thrift store. They don't exactly match, but the color and grain sack theme tie them together.

For the stool, all I had to do was tighten the legs with some wood glue and sew this pretty, shabby tuft for the top. I basically sewed a rectangular pillow (adding some pre-made graphic patches). Then I stuffed it and tufted it by sewing on buttons. I attached it to the stool using a few upholstery tacks.


 The chair I primed/painted and distressed with a sanding block. Then I sewed some graphic pillows, even adding a pretty graphic to an existing cushion.


 They make a fine pair! Don't you think? :)

Monday, April 28, 2014

Apple Basket, Table, Bins

Here are a few projects I've been working on lately.

First up, is an apple basket. I decided to spruce up this vintage basket with a cute little French graphic from the Graphics Fairy (see link in sidebar).


Next, was a drop leaf table. I had already given it a makeover, but wanted to add just a little something more. So, using another Graphics Fairy graphic, I painted the image in a light, subtle buttery yellow, then sanded it away to give it a faded, shabby look.


Finally, during our town spring clean-up day, hubby and I found a bunch of old drawers. Hubby used a few to build me these fabulous junk bins. I LOVE them!


Wednesday, February 26, 2014

Transfer Images to Flower Pots


Transfer Images to Flower Pots
I recently saw a tutorial on transferring images using Mod Podge and I wanted to try it. The perfect opportunity came in the form of three old terra cotta flower pots that I found on sale at a thrift store. They already had a pretty, timeworn quality, but I was looking for more white and less red. 

Paint
So, I began by painting them with a thin, dry-brushed layer of white. After that I added another layer of gray--just here and there where the red was still poking through.

 
Applying the Graphic
After they were dry, I printed some Graphics Fairy (see link in sidebar) images backwards and then cut them out. I sponged over them with Mod Podge (matte finish) and stuck them to the pots. I messed this part up just a little. I should have cut the paper around the graphic, not just in square, straight lines. I figured this out on the last one.


Dry Overnight
The tough part came next: letting them dry overnight without touching or peeking.

Lightly Wet & Peel
The next day I took them to the sink and lightly dampened the paper with water until I could see the image through it. Then, ever-so-gently, I peeled it away and also rolled it. Peeling seemed to want to take off the image, but rolling away the paper little by little worked, leaving the image behind and (mostly) intact.

The finished product turned out very pretty and has a kind of shabby, vintage, French look that I love! Can't wait to pot some herbs in these pretty planters!

 Transfer Images to Flower Pots!

Transfer Images to Flower Pots


Wire Basket

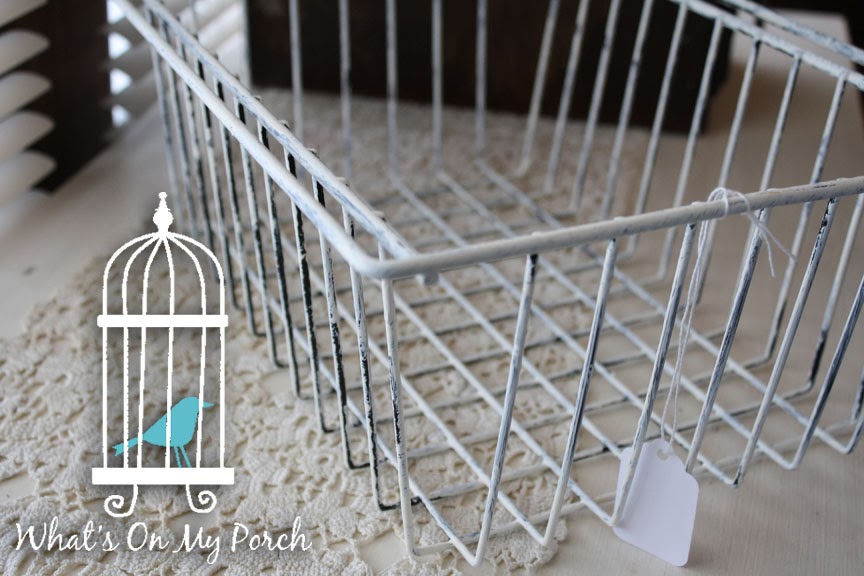
I also found this cutie patootie wire basket. It wasn't much to look at, but a quick coat of white paint (leaving some black showing through for that chippy look) makes it perfectly shabby!


Friday, February 14, 2014

Clock Shelf Makeover

So, technically for a makeover, I like to show "before" photos. Unfortunately, I completely forgot to take any.

Suffice to say this awesome clock/shelf was plain brown wood. And the photo frames on the sides were empty. You can picture it... I KNOW you can!

I just added a few coats of satin country white paint, then sanded/chipped it to give it that old, worn, vintage, chippy paint look. I also painted the hooks. I've just recently discovered the awesomeness of painted metal hardware and am now officially addicted.

Next, I mixed black acrylic paint with water and brushed it on, then wiped it off so the paint wasn't so bright and shiny, but rather had a vintage, worn feel and voila!

For the photo frames, I cut out a muslin fabric, using the cardboard frame-backs as a template. Then I used my favorite transfer method (Citra Solv!) to transfer the French labels to the fabric and voila again!

The only real trouble I had was trying not to get paint on the glass clock face. It is rounded, convex glass and is glued inside, so I couldn't remove it. I got a little paint on it, but it wiped off easily. Also, I realized after I'd completely finished painting, glazing and chipping that I forgot to paint the clock piece (with the two little triangles on it). Oopsadaisy. Luckily, I was able to get those painted without too much fuss.

I LOVE how this turned out!


Tuesday, November 12, 2013

Vintage Image Stockings


We've had the same stockings for years. And while they have some charm and nostalgia for us, I would never pick them out in a store today and say, "Oh, these are beautiful!" Nope. I would say, "What a ratty, nasty old thing. Does Santa really put edibles in THAT!"

They don't match. My husband's is about eight feel long and super skinny. And green. With a pompom. My daughters' stockings were both made by their aunt. And while I love the home-sewn style, they are red and green, which sounds like it would match all things Christmas, but really doesn't because I very rarely do up the house in traditional colors. My stocking is red. I think. And made of satin. Or did I switch to white last year? In any case, it's obviously not memorable.

Plus, my style has changed. It is always changing. Right now I'm in a vintage/shabby/French country mode. I like all things chippy, shabby, burlap and grain sack and decided my stockings should reflect that style. 
So, I got to work making these awesome vintage image stockings. They have cute little vintage graphics on them, ranging from a pic of Santa, to sheet music for Silent Night, to old Christmas ads and even part of "A Visit From Saint Nicholas" by Clement Moore (often called "Twas the Night Before Christmas"). I wish I could tell you where I found them, but I often collect images as I come across them, then use them later. But any similar images would do. I transferred the images to the stockings using Citra Solv. You can read about how to transfer printed images here.

The how-to was pretty simple. I downloaded an oversized stocking pattern from online and traced it onto some excellent grain sack-style fabric. Then I just sewed around the edges. Twice for durability, leaving the top open. My brood can get pretty rough on Christmas mornings. And sometimes poor, old Santa is a bit frantic while filling those things in the dead of night, too.

Once sewn, I frayed the edges by hand. This was very time consuming. I also added burlap, lace and other frills to the top along with a handmade chalkboard tag for the names. I think they turned out pretty sweet. Merry Christmas!


https://whatsonmyporch.blogspot.com/2017/12/woodland-christmas-mantel.html
 
Want MORE Christmas ideas? Check out my blog post for a Woodland Christmas Mantel.