Showing posts with label words. Show all posts

Friday, December 28, 2018

Freebie Friday: Journal Words for Bookplates

Journal Words for Bookplates: Free Printable Download My Porch Prints

Journal Words for Bookplates *Contains Affiliate Links
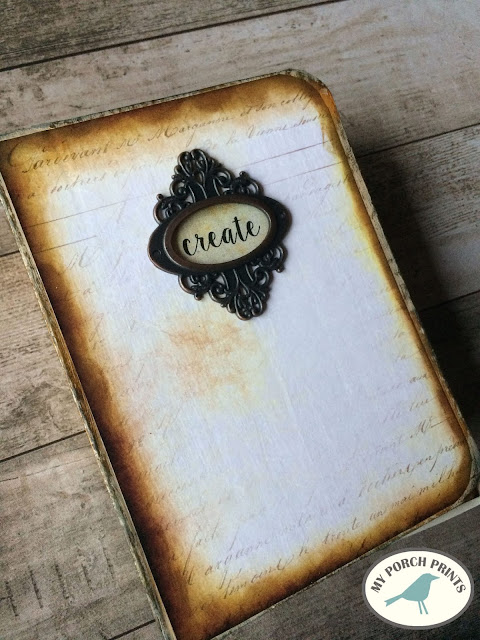
Hey junk journalers & all you crafty people! Today's Freebie Friday is so simple, and yet so useful! You've probably seen journals on Pinterest with those cute Tim Holtz Ornate Book Plates. Sometimes they even have words inside them with cute fonts and pretty backgrounds. You could probably make them yourself, but my motto is why do it myself when I can get a free download? Exactly!

So, today I have a free download for you of printable journal words specially designed with those bookplates in mind. You can choose from dark words on a light, vintage background or white words on a darker background. Just scroll through the photos to see how easy it is. Then go the bottom for your free download & get crafting! ;)

Be sure to SHARE your creations on the Crafting Ideas Facebook Page.

Words: Create, wish, dream, be still, imagine, bliss, love, garden, journal, junk, notes, abide, forever, memories, secrets, journey

Journal Words for Bookplates: Free Printable Download My Porch Prints

Journal Words for Bookplates: Free Printable Download My Porch Prints

Journal Words for Bookplates: Free Printable Download My Porch Prints

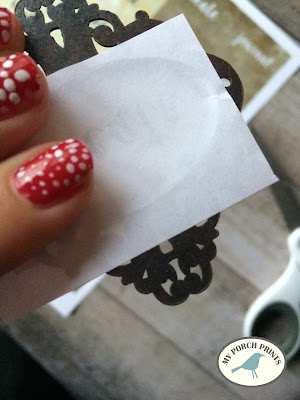
TIP: Cut out your chosen word and then press against the back of the book plate. This will give you a raised guide for cutting.

Journal Words for Bookplates: Free Printable Download My Porch Prints

Journal Words for Bookplates: Free Printable Download My Porch Prints


Journal Words for Bookplates: Free Printable Download My Porch Prints

Journal Words for Bookplates: Free Printable Download My Porch Prints

Journal Words for Bookplates: Free Printable Download My Porch Prints

Journal Words for Bookplates: Free Printable Download My Porch Prints

Follow Crafting Ideas by My Porch Prints on Facebook for lots of fun & beautiful paper crafting inspiration.

To download, click the image below, then right click and save it to your computer.
Visit my Etsy shop to see more printables.


COPYRIGHT

PLEASE NOTE: This image is not to be re-used in digital form (as in do not re-post it on your website or anywhere else or try to sell it in digital form). 

You MAY PRINT & sell it as part of a journal or art project (please credit My Porch Prints).


Journal Words for Bookplates: Free Printable Download My Porch Prints


Friday, February 16, 2018

How To Transfer Images To Wood

How to Transfer Images to Wood Crates

How To Transfer Images To Wood Crates
Once upon a time there was a girl who loved cool old junk. One day her village decided to get rid of all the junk by having a clean-up day. The curbs overflowed with antique furniture and galvanized buckets. The girl was so happy. Especially when she scored not one, but TWO old, weathered wooden crates.


For years, the crates sat on her shelves. And the girl thought about doing some kind of project with them. Should she paint them? But she couldn't bring herself to change their weathered loveliness. Until one day, when she saw an old coffee crate on Pinterest and it gave her an idea!
Okay, seriously, it felt like a fairytale moment when I found these cute little crates. I really couldn't decide what to do with them... until now! And you can do it, too. Let's take a look at how I transferred graphics to my old, wooden crates.

How to Transfer Images to Wood Crates


Gather Supplies
First, I gathered some supplies: a spoon, a paintbrush, a glass and a reverse print-out of my graphic which I got from The Graphics Fairy here. I altered it in Photoshop to fit my crates and added a year at the bottom. And of course, the main ingredient: Citra Solv. This is a delicious cleaner that smells like oranges and heaven. It is made with essential oils and is great for getting goo and grease off pretty much anything. It also works as an image transfer agent. Handy!


Transfer the Image
Next, I placed the image ink-side down on my crate, centering it, and securing it with tape. Then I lightly dipped the brush in the Citra Solv and brushed it across the paper. Finally, I rubbed the image with the back of the spoon to transfer it to the wood. Easy peasy!

How to Transfer Images to Wood Crates


Of course, the image isn't perfectly crisp, but it matches the faded look of each crate. Now, who is going to try this?


Tuesday, December 26, 2017

Farmers Market Bench Makeover

Farmers' Market Bench Makeover by What's On My Porch


I find real pleasure in taking something unwanted and old and turning it into something beautiful and useful. This Farmers' Market Bench was no exception.


I found this bench in a thrift store. I knew as soon as I saw it that it would be perfect for an entry way: a place to store shoes or toss a bag or coat. It just needed a little updating.


First, I cleaned and primed the wood with Zinsser primer. This makes it ready to take on paint. You could also sand, but that takes a lot of work, and it's not necessary as long as you prime first. It's easy to think you can skip this step, but I don't recommend it. The paint just won't stick well without it.


Next, I measured the bench and found some cute fonts and printed the words "Farmers' Market" in large letters and taped them together. (Fonts: Mottona and Twiggy Pop).


I colored the backs of my words with willow charcoal and placed the words on my bench. Then I traced them onto the wood with a pencil. I removed the paper and outlined the tracing, again with pencil. Then I filled it in with black acrylic craft paint and a small paintbrush. I extended the "f" and "s" at the beginning and end of "Farmers'".

I love how it turned out! How about you?


Want MORE makeovers?
Check out this Antique Dresser Makeover!

 
https://whatsonmyporch.blogspot.com/2013/08/antique-dresser-makeover.html


Wednesday, September 30, 2015

Signs, Signs, EVERYWHERE Signs!

So, a while back, during our town's "junk" day... you know, the day where everyone throws their junk on the curb? And then the rest of us go dumpster diving for three days looking for hidden treasure? Yes, that day. Anyhoo, I was going through my neighbor's junk heap delicately searching when I found some old fencing that had been thrown out. With Hubby's help, I turned that old fence into a series of hand-painted signs... and my love for wood signs was born!

Soon, I got my hands on some pallet wood, and poor Hubby was overwhelmed with sawing and assembling more wooden "doors" for me. I added hinges and other hardware, sanding, staining, painting and lettering these delightful little doors!

Here are the latest products of my obsession. And you can learn more about how to make your OWN sign here.


Friday, November 15, 2013

Fruit of the Spirit Wood Sign


Fruit of the Spirit Wood Sign
I've been waiting to make this sign for a LONG time. I've always struggled with the Fruit of the Spirit as described in Galatians: Love, Joy, Peace, Patience, Kindness, Goodness, Gentleness, Faithfulness and Self-Control. I thought having a BIG, pretty reminder on my wall might help me when I'm feeling especially impatient or jerk-ish or cranky.

Originally, I wanted to paint these on my dining table. But since it is often covered in art projects, I don't know if I'd really ever see these guys, and I wanted them VISIBLE.

DOWNLOAD THIS FRUIT OF THE SPIRIT SIGN
Free PDF printable 22x17* inch version of this sign available HERE (for personal use only).
*Available as four 8.5x11 sheets to be assembled


Here's a quick rundown of how I did it:

Step 1: Hubby Cuts Vintage Pallet Wood For Me And Assembles It
Step 2: I Paint It White (using a satin interior flat paint in a creamy off-white)

Step 3: I design the words in Photoshop, Print and Assemble, trying to remember that I need to exercise the Fruits of the Spirit even while I'm pulling my hair out wondering why the edges of the words aren't matching up.


Step 4: Color The Back With Charcoal


Step 5: Trace Words Onto Sign
Step 6: Paint Words


I love how this sign turned out! So glad I finally got around to doing it!