Showing posts with label spring. Show all posts

Friday, January 11, 2019

Freebie Friday: Vintage Sheet Music

Freebie Friday: Vintage Sheet Music Printable Download Paper

Freebie Friday: Vintage Sheet Music
Hello crafters! It's Friday, and that means freebies here on the Porch!

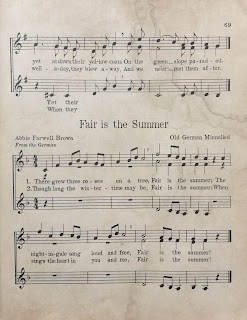
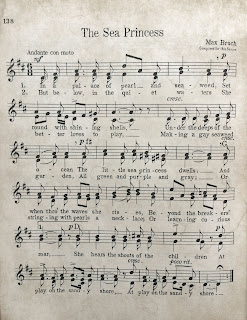
Today's freebie is a vintage sheet music download! Many of the titles have to do with seasons. Use these for junk journals, card-making, whatever you like!

Enjoy!

Follow Crafting Ideas by My Porch Prints on Facebook for lots of fun & beautiful paper crafting inspiration.

To Download
Click the image below, then right click and save it to your computer.
Visit my Etsy shop to see more printables.

PERMISSIONS & COPYRIGHT
PLEASE NOTE:
This image(s) is not to be re-used in digital form (as in do not re-post it on your website or anywhere else or try to sell it in digital form).

You MAY PRINT & sell it as part of a journal or art project.


Freebie Friday: Vintage Sheet Music Printable from My Porch Prints

Freebie Friday: Vintage Sheet Music Printable from My Porch Prints

Freebie Friday: Vintage Sheet Music Printable from My Porch Prints

Freebie Friday: Vintage Sheet Music Printable from My Porch Prints

Freebie Friday: Vintage Sheet Music Printable from My Porch Prints

Freebie Friday: Vintage Sheet Music Printable from My Porch Prints

Freebie Friday: Vintage Sheet Music Printable from My Porch Prints

Freebie Friday: Vintage Sheet Music Printable from My Porch Prints

Freebie Friday: Vintage Sheet Music Printable from My Porch Prints


Saturday, February 17, 2018

How To Decorate A Bookshelf For Spring

How to Decorate a Bookshelf for Spring

How to Decorate a Spring Bookshelf
I have a love-hate relationship with our built-in bookshelves. When we first moved into our lake house less than a year ago, I was so excited for the built-ins. All that storage! Of course, it meant downsizing our furniture and getting rid of some beloved pieces. The trick is, these built-ins aren't very versatile. I can't exactly fill them with all my "junk" because it makes them look very messy.

And the space between shelves is kind of small. I can hear what you're thinking. "They're adjustable, dummy. Just move the shelves!" Well, when we moved in, we were in a bit of a hurry. Hubby had just transferred from Wisconsin back to Iowa, and we needed a house lickety-split. So, I set my kiddos to painting double-quick. And, if you adjust any of these shelves, you will find an unpainted stripe behind them. I know. I need to fix that, but I'm kind of swamped with other projects at the moment. So... the shelves stay where they are. For now.

The good news is my tiny, static shelves mean I get to bring you decorating known-how for your own bookcase.

Here are some tips for decorating your bookshelf for spring:

How to Decorate a Bookshelf for Spring

Color
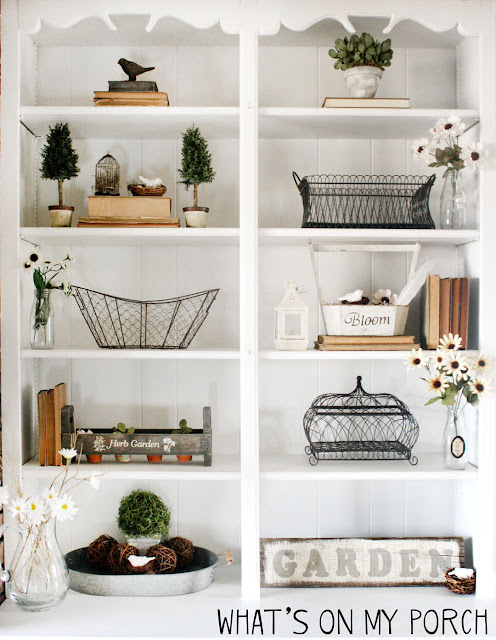
I chose a color scheme that goes well with my farmhouse style and with spring: white, black, gray and tan with a smidge of greenery thrown in. I played with the idea of using my robins eggs (which are aqua colored), but they just didn't match. Too many colors make a space look cluttered. A nice, neutral scheme gives it a clean look.

How to Decorate a Bookshelf for Spring


Theme & Style
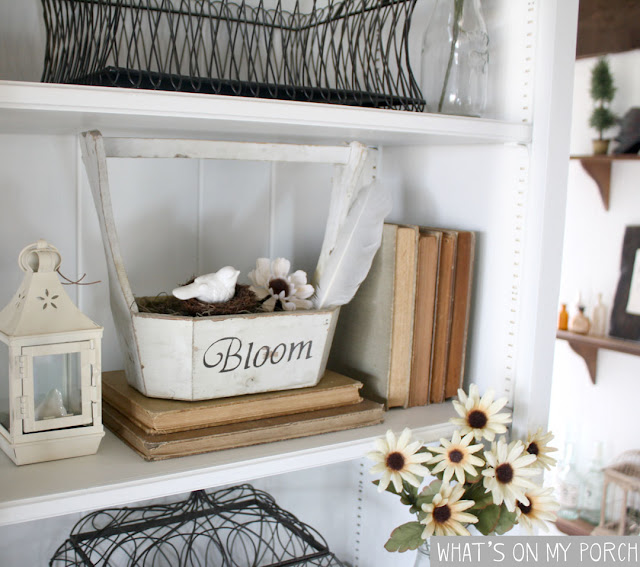
Don't go overboard with a theme, but incorporate it using your style. My style is farmhouse and my theme is spring. So, I incorporated elements of spring like birds, greenery and flowers into my existing farmhouse elements which include wire baskets, galvanized metal, wood signs and old books.

How to Decorate a Bookshelf for Spring


Choosing Decor
When decorating this shelf, I collected my favorite things and made a pile on my dining table, choosing what would fit best in my space and with my colors/theme. Some items didn't make the cut. It's important to tell yourself, "I'll just use this somewhere else." Also, a bookshelf is for displaying items, not storage. If you have a gazillion tatty old paperback books (like I do), store them out of sight. Despite its name, a bookshelf does not often store actual, readable books. The books on my shelf are vintage collectibles, chosen for their aesthetic. If you do need to store books or other items, try hiding them in crates or baskets.

How to Decorate a Bookshelf for Spring


Spacing
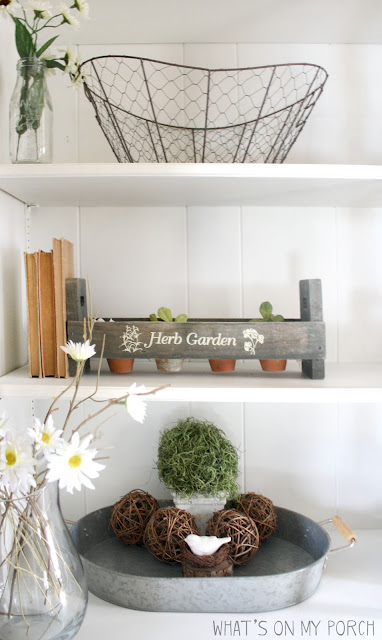
This is the trickiest part of decorating a bookshelf. How to make it look full, but not cluttered. Clean, but not skimpy. Balanced, but not too matchy-matchy. I played around with my collection of items, trying things here and there. I used the triangle or zig-zag method. The wire baskets form a triangle or zig-zag pattern. So do the wood items with words: "garden" "herb garden" & "bloom". I also scattered birds, greenery and flowers throughout. When decorating your shelf, try grouping like items on your table, then place them in the zig-zag/triangle pattern on your shelf to draw the eye back and forth up the shelf and give balance. Don't place two large items close together. I also like to put larger items on the bottom to anchor the shelf, and smaller ones on top to draw the eye upward.

How to Decorate a Bookshelf for Spring

Create Groupings
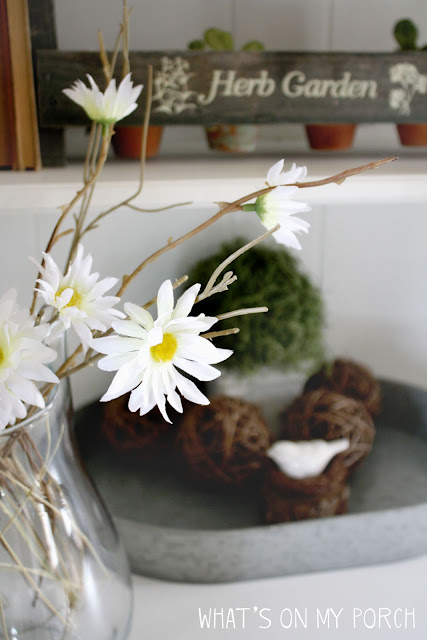
Use smaller items in conjunction with larger ones. I filled a galvanized tray with vine balls, a small moss topiary and a bird in her nest. I also used books as a base for holding other items.

How to Decorate a Bookshelf for Spring


Final Tips
  • Don't forget those spring touches of greenery, flowers and birds & nests! Other spring themed items might be vintage garden tools, Easter bunnies, eggs, flowering branches, etc.
  • Shop your house for items in your color scheme: crates, baskets, bowls, pitchers--anything can be cute when paired with other items.
  • If your books don't match, think about painting the covers or covering them with craft paper. Turn the spine toward the back of the case, letting the faded pages show.
Remember above all to showcase your own style and have fun!


How to Decorate a Bookshelf for Spring


Friday, February 16, 2018

Style A Springtime Tray: Spring Decor

How to Decorate a 3-Tiered Tray for Spring & Easter

Style a Springtime Tray: Spring Decor
It's almost time. The drip-drip-drip of melting snow falling from the roof will give way to the sound of insects chirping in the night. Birds will sing, bunnies will hop and tulips and hyacinths will poke through the ground, bringing color to the world again.

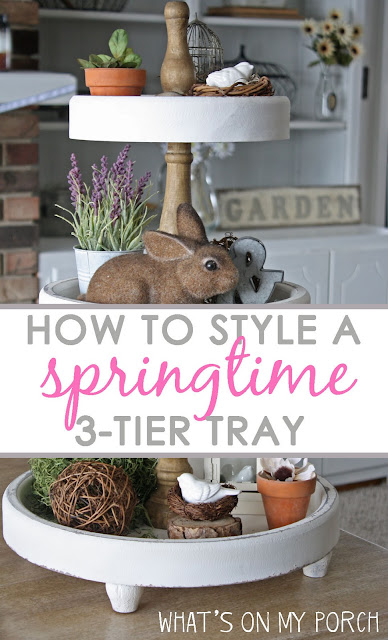
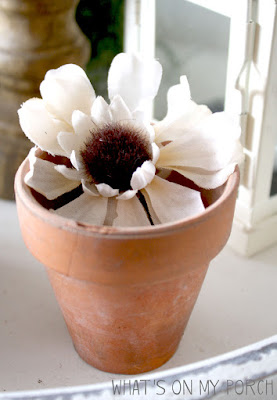
Celebrate the return of spring with a little home décor. What makes good springtime decorations? Think green! Moss, potted plants. You can even steal pieces of some faux greenery and add them to little terracotta pots (like I did).

How to Decorate a 3-Tiered Tray for Spring & Easter


Bunnies & Birdies
Also, bunnies and birds and other springtime animals like baby chicks or foxes. Pick them up at thrift stores: like this vintage bunny bank. Or you can purchase bird nests and ceramic birds on Amazon.

How to Decorate a 3-Tiered Tray for Spring & Easter


How to Decorate a 3-Tiered Tray for Spring & Easter


Bring Nature Indoors
Add other natural elements: wood cuttings or twigs, pretty stones and faux flowers. Mix in farmhouse style décor such as galvanized letters, small lanterns, bird cages, vintage alarm clocks, etc.

How to Decorate a 3-Tiered Tray for Spring & Easter

How to Decorate a 3-Tiered Tray for Spring & Easter

Styling Tips:
  • Create vignettes or groupings
  • Pair items of varying textures, sizes, and colors
  • Stick to a spring color scheme (like green, brown, white)
  • Anchor the bottom with larger items, smaller on top
How to Decorate a 3-Tiered Tray for Spring & Easter

How to Decorate a 3-Tiered Tray for Spring & Easter

How do you celebrate spring?
Want MORE ideas for spring? Make these flower pots with French graphic images.

Friday, February 26, 2016

Spring Flowers Monogram Wreath


Spring has sprung! Or it will soon. Be ready for it with this pretty monogrammed letter made from cardboard and thrift store flowers. (I used a letter "S" for our last name, but you can make any letter you want!)

I began in Photoshop, creating a file that was twice the size of an 8.5x11 paper (so, 17x22). Then I made a big old letter "S" using Times New Roman. I made it white and added an "outline" effect in black. Then I cropped the top half of the picture to 8.5x11 and printed it. I went to my history and stepped back, then cropped and printed the bottom half.

*If this step feels too complicated for you, try making a smaller letter in a simple program like Word.

After printing, I taped the two halves of my letter "S" together and used an old mailing box as my cardboard. You can use anything you want... a cereal box, shoebox, pizza box, whatever. Then I taped it down and traced it with a pencil. This left an indentation of the letter. If you want something a little more readable, try coloring on the back with charcoal or black crayon and then tracing it.


Next, I cut out my letter "S". I used a bag of Spanish moss (you can get this in Walmart's craft section, usually) and some old roses I found at a thrift store. I took the roses apart (leaves, too!) and piled them according to size. I used the smaller ones on the ends of my letter and bigger roses in the thicker, middle sections. I glued down leaves first, then moss, then just added my roses wherever they made sense, often grouping them in two's and three's.

To hang my monogrammed spring flowers, I used a length of pink rick rack (Walmart sewing section) and taped it to the back of my armoire door with packing tape. :) Classy, I know.

It adds a pretty touch of spring, don't you think?


Sunday, March 22, 2015

Easy Spring Flowering Branches


Easy Spring Flowering Branches
If you're like me, you LOVE the look of flowering trees... those bare branches with the tiny, perfect flowers--no leaves to get in the way, just pretty perfection! However, I've tried cutting a few to bring into the house. Sometimes they are perfect and wonderful and last for days. Most times, though, they die quickly, are hard to work with and usually come with little "residents" in the form of spiders and other nasty visitors.


Solution? Make your own! It wasn't hard to find a few broken branches in our yard after a long, snowy winter. I went to the thrift store and bought a couple old bouquets of white flowers. They even came with some mossy grass that made a very nice faux bird nest! Some hot glue and voila! Spring has sprung!


Thursday, March 20, 2014

Clay Bird Eggs for Spring


Today is the FIRST DAY OF SPRING! Here is a quick project to celebrate.

I love the look of little bird eggs, but all the craft stores seem to have is the larger, chicken-sized eggs. I even looked online for wooden eggs. I was able to find some, but they were going to be very expensive with shipping costs. So, I decided to make my own.

Using an inexpensive sculpting clay from Walmart, I rolled it into small egg-like shapes. Of course, I'm no sculptor and most of my eggs are a little wonky. But I figure, with all the money I'm saving, close counts. I let them dry for a couple days and then painted them with acrylic in shades of pale gray-green, robins egg blue, softest yellow.

Then came the speckling. All good bird eggs are speckled. I mixed up a medium-dark gray and tried flicking it on with a brush. Then I tried painting on polka dots. Nothing looked right. Finally, I got an old toothbrush and ran my finger across it, making a huge mess, but it got the job done. They're far from perfect, but unless you get a real, up-close view, your eye will probably just skim over the imperfections.

I had a trio of birds nests from a thrift store. I stuffed these with some old moss used for making topiaries, but you could probably go outside and find a similar item from nature. Otherwise, the dollar store sells it. They also sell shredded basket filler that works well as a nest. My little ceramic birds were purchased online.

The end result is a sweet little touch of spring to display around the house and in my birdcage collection. Happy Spring!