Showing posts with label crafting. Show all posts

Tuesday, August 13, 2019

Why is it called "My Porch Prints"?


A few people have asked why my shop is called "My Porch Prints." It's kind of a weird name, I know. One lady even asked me, "What's a Porch Print?" Ha ha!

Well, to understand the name, we have to go back a few years. Around 2014, I was really into making over vintage furniture. I would scout local thrift shops & Craigslist to find the perfect piece: An old radio cabinet, a Duncan Phyfe table. Then I would break out my trusty orbital sander and paintbrushes and get to work.
And where did I do all this makeover magic?
Why, on my front porch, of course!


At that time, our family of four lived in a 2-story 1800s foursquare house. It had a big ole wrap-around porch--the perfect spot for making a mess. I really, really loved making over furniture. It was kind of an addiction. There was something so satisfying about taking an old, scratched, rickety piece of "junk" and turning it into something new and beautiful. I started a business called "What's On My Porch" because people would actually drive by my house to see what I was working on! :) I sold my furniture pieces from home and also at craft & antique shows.


But in fall of 2015, something happened. I was walking with my co-worker on our break, and I noticed my feet, especially my right one, were really hurting. It got so bad, I finally went to the doctor. He told me to take some ibuprofen. But over the course of weeks & months, it got worse and worse. I had to walk with a cane. And then BOTH feet started hurting and I panicked! I realized I'd been limping on my left foot... and if it started to hurt... I wouldn't be able to walk at all.

And that's exactly what happened.

In 2017, I began using a mobility scooter to get around the grocery store or if we went on long walks. I went to lots of specialists: podiatrists, orthopedics, rheumatologists, neurologists. I had several tests: x-rays, MRI. I was stuck with needles, shocked and had holes drilled into my feet and legs to test the nerves. Nothing. Eventually doctors quit wanting to see me and just sort of threw up their hands. Thankfully, my feet are good enough to get me around most of the time, but I just can't walk long distances. I was 37 when that happened.

Then, in 2017, my doctor prescribed Gabapentin for my foot pain. At the time, I thought it was some kind of pain medicine, but I later learned it's actually for seizures. It messed me up terribly, and I ended up in the ER twice in the 2 months that I was on it. It gave me terrible heart palpitations which have never gone away.

Whew! All this to say I was very sad about not being able to walk. I'd always dreamed of travelling when our children were grown up. And the heart palpitations were so scary and terrible, I thought I might never feel "normal" again.

But even in the midst of my troubles, God found ways to bless me. I was able to create like I had before, but this time, I did it with my computer. I found great joy in making beautiful printables!


In 2016, I started my current Etsy shop. I had to choose a shop name. I wanted it to include "Porch" to tie it into my old furniture business. So, I decided to call it My Porch Printables, but that was just a bit too long. So I shortened it to My Porch Prints.

My old logo was a bird in its cage, but my new logo is just the bird, free of the cage. I kind of love it.

Of course, I no longer have my big front porch. We had to trade the 2-story home for something I could manage with my feet. But I love, love, LOVE creating beautiful printables for others to use in their own creations! I still really miss walking and re-finishing furniture. But I'm so grateful for what I can still do. Thanks to you, Porch fans, for making it possible!  I am so thankful for you all!

With Love,
Stephanie


Freebie! Get these free oversized tags by clicking here.


Monday, April 29, 2019

Layered Junk Journal Cover Tutorial

Layered Junk Journal Cover Tutorial from My Porch Prints

Do you ever look at journal covers on Pinterest and think, "How do they do that?" I often find myself perusing beautiful, layered journals, wondering how people are so creative?! I imagine some crafty lady in a beautiful studio with shelves of pretty, decorative boxes labeled "papers" and "embellishments" and "lace". She carefully chooses each item: vintage, tea-stained papers and little metal charms. And somehow, magically, a junk journal cover is born.

Okay, I know it's not quite as fantastic as that. How do I know? Because my craft studio is my dining table. And my shelves of boxes are sprawled across numerous cabinets & closets in my home. And labels? Ha ha. They would all have to say, "junk" on them because I'm not the most organized person.

So, how do we mere mortals create beautiful layered journal covers? With tutorials and kits! Ha ha! Seriously, though, I created a pretty little printable kit which you can find in my Etsy shop (My Porch Prints). And I also made this tutorial. So, follow along, and together we'll make some lovely layers worthy of Pinterest!

List of Supplies/Printables:


So, first I cut out a cardboard piece that will serve as my journal cover.* I'm not actually creating an entire journal today, just the cover. If you want a junk journal tutorial, click here. I also cut out all my printables.*You can also create a journal first, and then attach these printables to the cover. 


I rounded the corners of my cardboard cover by creating a template cut from a corner of scrap cardstock. This ensures all my rounded corners are even. Then, I used a makeup sponge to apply Distress Ink around the edges.


I chose the words I wanted to use from my printable kit and carefully tore them out, then inked the edges.


Next, I rounded the corners of my background paper and inked it as well. Then I applied glue, spreading it with a brush and glued my paper to my cardboard. This serves as my background, kind of like a canvas for my layers.


I wanted a lace element, so I added this to the edge of my journal with glue.

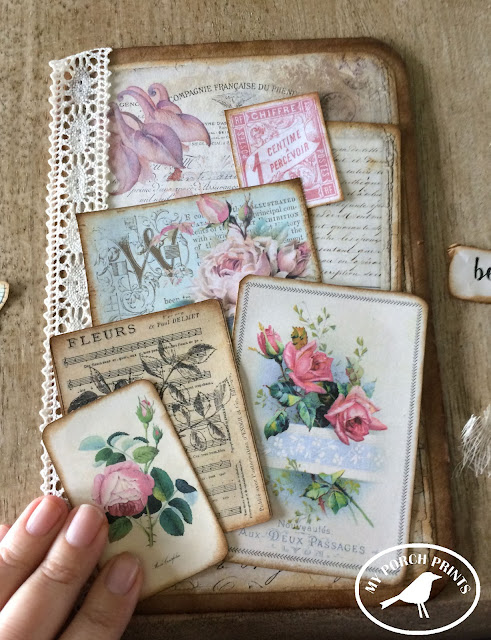
Now it was time to start layering. I inked all the edges of my printable elements and then began placing them on my journal cover background to get an idea of how it would look when it was all finished.


I think the key to layering is not to worry about covering up the layer underneath. I always think, "But I can't cover up this pretty thing! It will ruin it!" Nope! It really is okay to cover up one layer with another. Trust me.

Begin with tall or large items first.


It's okay if items hang off the edges a little.


I inked bits of cheesecloth and used them behind small pieces to add interest, texture & dimension.


To add my journal title, I chose the word "imagine" and cut it out. Then, I placed it behind my book plate and pressed gently. This created indentations in the paper, which I used as a guide when cutting out my title word. I glued the title word to my journal and attached my bookplate. You can use the fasteners provided or glue.


Last, I added a small key charm, attaching it to my lace as shown. I also threaded some pink ribbon through the lace holes.

Layered Junk Journal Cover Tutorial from My Porch Prints


And that was it! The printable kit is designed so the colors and pieces go together for easy layering. Enjoy!

Layered Junk Journal Cover Tutorial from My Porch Prints