Showing posts with label furniture. Show all posts

Thursday, December 28, 2017

Update Your Home for the New Year!

Resolutions.

We've all got 'em. Mine is pretty much always to lose weight. It lasts for a week or two until the willpower fizzles out and chocolate starts sounding way better than skinny jeans.

But one resolution we CAN keep is to update our house! You might have visited your parents or grandparents this holiday season. Maybe their homes make you jealous... or maybe you look at the same old wood paneling and dusty, outdated curtains and wonder why they never change their style. Of course, if you're like me, you go home and look at your own dusty curtains and wonder why you never change YOUR style.

Enter the Home Update Resolution!

This is the year. You can do it. It starts with some simple baby steps.

Home Update: Baby Steps

1. Clean. I know. It's no fun, but put away your pouty face and get out those rubber gloves. Wipe, vacuum, pick up. You can do it. I believe in you.

2. Declutter & Organize! Now that you've got some space on your dining table, use it as a command center. Start emptying out your kitchen cabinets and drawers. Make piles for "Keep" "Junk" and "Donate".  Anything you haven't used lately, or items that are broken... toss them. Now is NOT the time to be sentimental. Just because your great-aunt Mabel passed down that cracked ugly cookie jar does NOT mean you have to keep it. Take a photo and start a donation box.
 
Need some ideas on how to organize? Check out my Pinboard:
https://www.pinterest.com/thegoodvillain/the-tidy-life/
Here is a link to my Pinboard for organizing and decluttering.

3. Paint the Wood. Some of you will cringe when I say this. I know it is a fad right now to have white painted wood. So, you don't HAVE to do this, but if you have 70s wood paneling that isn't even real wood. Please. FOR HUMANITY. Paint that stuff white! But start with a good cleaning and some Zinsser primer first. And if you're feeling really feisty... paint your outdated wood cabinets, too!

Here is what our dining room looked like after painting the bookshelves and wood paneling.
So much brighter!


4. Change Your Curtains. Maybe they came with the house. Maybe you just don't think about them, but curtains can be like wrinkles for your house... they make it look OLD. Take a look at your favorite rooms on Pinterest. What do they have in common? I bet many of them have simple white curtains or NO curtains at all. I realize naked windows are not always practical, so if you need curtains, make them simple and clean. For our curtains, we used a package of twin flat sheets we bought on Amazon. In white. We clipped them with black curtain rings and saved a TON of money by using electric conduit instead of curtain rods (cost was around $3/rod!). Plus the conduit is WAAAAY less flimsy.

In our daughter's room, we used sheer lace curtains and metal electrical conduit for the curtain rods.
It is much cheaper and stronger than regular curtain rods!
This was our daughter's room before. No lie.


5. Paint Furniture. This is like the wood dilemma above (see #3). I know your orange-ish cabinet and your dark brown buffet and your honey blonde dining table all came from Grandma so-and-so, and she'd roll over in her grave if you painted them, but honestly... they look weird together. So many different wood tones. And they make your house so dark. Take another look at your favorite Pinterest homes. What color are the cabinets, the tables, the buffets? If they're white or gray, then you might want to consider painting your own furniture white or gray, too. Just a suggestion.

 
https://whatsonmyporch.blogspot.com/search?q=dresser

See what this dresser looks like after a coat of paint.


6. Update Your Art. Not ready to leap into painting furniture or rooms just yet? Try something smaller. Make a family name sign. It will add some quick and easy farmhouse charm to your home. And maybe it will even give you the redecorating bug, who knows?

 
https://whatsonmyporch.blogspot.com/2015/05/monogram-pallet-family-name-sign.html


Good luck decluttering and updating your house. Here's to a clean, fresh and beautiful NEW YEAR!

Want more farmhouse style décor? Check out this post about Galvanized Farmhouse Finds from Hobby Lobby.

http://whatsonmyporch.blogspot.com/2017/12/galvanized-farmhouse-from-hobby-lobby.html

Want an even EASIER way to redecorate your house? Get printable art in my Etsy shop!

https://www.etsy.com/shop/MyPorchPrints?section_id=19861674


Tuesday, November 10, 2015

Red Radio Cabinet


You may have seen a similar cabinet on Pinterest. Like me, you may have even pinned it. Twice. And you might have also thought, "I NEED that." Of course, radio cabinets aren't all that easy to come by, but when you do find one on Craigslist. In your town. You BUY it! And then you paint it RED.

Okay, so that's what happened. One dark and stormy night, the ever-beleaguered Hubby went out and brought home this bad boy: an antique wood radio cabinet.

I seriously thought about painting it white. "White goes with everyone's décor," I said. But my daughter convinced me to go for the red. "Not too many people can fit red into their house," I said. "Yes," she answered, "but that means the ones who can will be REALLY excited to find something in red."

Okay!

Here's a quick rundown of the process. First, Hubby removed the fabric "speaker" in the front. Then I sanded a few of the rough spots. Not enough, though. After I painted, some of the dents showed through, but we'll call that "character."

Then I primed it with Zinsser primer. This step may or may not have been necessary. I was going for a bit heavier distressing than usual, so I could have probably gone without the primer.

Then I painted the whole piece red. (Acrylic craft paint, Walmart craft section.) After that, I sanded it with a sanding block.The red was a tad on the orangey side, but I didn't mind because I knew I'd be going over it with a dark stain, which is the last process: to brush on stain and wipe it off. The stain helps bring out the sanded wood, essentially staining it again. It also adds depth and a little shine to the piece while giving it a layer of protection.


I really love how she turned out! Once again, I wish I had a bigger house, because I'd keep this one! Alas, it is moving on to greener pastures.


Sunday, September 13, 2015

Secretary Makeover With Damask "Tattoo"

I have been so busy.
Also lazy.
Well, lazy about posting to my blog, anyway.
But that just means I've gone into overdrive on my Porch!
Check out this cute little wood secretary makeover that I  am too tired to properly write about:

Before: this secretary had seen better days. It was pretty scratched up, and the drawers had major opening issues.
After! The secretary got a lovely paint job and a little sanding to give it a chippy look.

I painted the inside gray with a cute little damask "tattoo". :)

I printed it out in sections and lined the pieces up, then I colored on the back with willow charcoal (at Walmart, craft section). When I lined it up where I wanted it, I traced the design with a regular pencil. Okay, not just a regular one, a HARRY POTTER pencil!
 
The willow charcoal left a decent design behind, which I filled in with paint. Careful not to smudge it away!

I used a dry brush technique to make it look worn and faded. Just dip a paintbrush in your gray paint, wipe it on a paper towel and lightly brush over the white design.
 

Wednesday, March 25, 2015

Media Cabinet Makeover


Even before spring officially arrived, I'd been chomping at the bit wanting to do a new Porch project. I've got a pile of things in the basement, and technically I'm supposed to be stopping the madness to get our house ready to put on the market, but I admit it. I have a problem. I see something cute and I just want to make it cuter!

Like this TV cabinet for example.

I love, love, LOVE curvy little legs and cute little doors with tiny little knobs and well... I saw this baby's potential and wanted to make her SHINE.

My original plan was too ambitious for hubby. I wanted to gut this cabinet and add barnboard shelves and a beadboard back, but it wasn't to be. Hubby is maxed out with his own work at the moment, so I had to settle for what I could do on my own, mainly painting.

So, I started with Zinsser primer. It sticks to everything and is essential if you don't want to sand. Next came a couple layers of a country white latex paint. After that, I scraped and sanded away at the edges to give this cabinet a chippy, vintage look. Finally, I brushed on a walnut stain/sealer and wiped it off with a cotton rag.

Actually, it was hubby's shirt. If you're going to steal a cotton shirt out of your husband's drawer and use it for staining furniture, I highly recommend doing it when he's at work. Fighting is bad for a marriage, so let's just avoid it.

This little lady is still drying, but I'm hoping to get her out onto the Porch and take some nice photos with a little natural light to really show her off!


Thursday, June 19, 2014

Sofa Table Makeover

I recently got my hands on this cutie-patootie sofa table! A client told me her daughter was on the lookout for just such a table, and when I saw this pretty thing, I just had to pick it up!

Unfortunately, it didn't work for my client's daughter. However, I LOVE the way it turned out. This is another one of those pieces that I would have kept for myself if only I had the space!

Alas, it was not meant to be. I had a LOT of interest in this pretty gal, and she is going home with someone else tonight. <wistful sigh> Ah well... I guess it means I get to fall in love with something new now. :)


Friday, May 23, 2014

Markets & Shows: A How-To Guide for your Booth


I just finished doing my second ever market booth/stall. And while it is fresh in my mind, I wanted to share my experience with all the first-timers out there who are thinking of selling their wares at a market or show.

First of all, a little background: What's On My Porch is my part-time, home-based business. I spend the warmer months junking for items to fix up and sell - mainly furniture and home decor. As I was growing this business, I received an offer from a nearby shop asking if I'd like to be part of their Spring Market - a gathering of vendors selling everything from furniture to jewelry and goat's milk soap to alpaca rugs. Yes, seriously.


I thought, "This is a great opportunity!" So I junked like I'd never junked before, went into a furniture-refinishing frenzy and ended up with LOTS of items to sell. Along the way, I made lots of mistakes but also had lots of triumphs. Here are a few nuggets of wisdom I have to pass on to you:

1. Get Ready

You will need plenty of inventory, yes. Whether you're selling handmade jewelry or candles or big ole furniture, you  need stuff to sell. But you also need ways to DISPLAY those items. Think outside the box. Pinterest is chock-full of ideas for this. For instance, hang your jewelry on a potted tree-branch. Use vintage furniture (wink, nudge) - like a chippy dresser to display your cupcakes. Price tags are also a good idea. If you sell beauty accessories, bring a MIRROR. Or buy one from me. :)


2. Get Ready Some More

You have items and a way to show them off, now you need a few more things. If your show is outside, you NEED a canopy. Yes, need. The sun is merciless and so is the rain. Wind can END you. So, anchor your canopy with a couple cinder blocks or bricks. Be prepared for the weather. You also need a cash drawer or pouch. I keep my prices in dollar increments. No messing around with a roll of quarters for me! Also: calculator, blankets, chairs, SNACKS, more snacks, water, sunscreen, a book or i-pad, etc. If you have access to electricity, bring a string of white lights. Paper/Markers. You want to make "Sold" signs and mark whether or not that person paid. (Hint, if you mark it SOLD, they should have paid.) Nobody wants to haul a dresser around while they're shopping. Save it. Mark it as sold. And write that person's contact info down.


3. Haggle Happens

People expect a little haggling at a fair. Often they will bring a pile of items up to you and offer $___ for the whole pile. I'm usually a little flexible, especially if someone is buying a pile.

Hint: Don't shout at people. I let people peruse at their leisure. No pressure. If someone seems interested I might say, "Feel free to make me an offer on that." But that's all. I don't like to be badgered when I'm buying items. If I want it, I buy it. If not, then being harassed by a seller is not going to change my mind.


4. Decorate Your Booth

Make it pretty and keep in theme with what you are selling as well as the season. My market had a "spring" theme. I came with pots of flowers with little signs saying "for display only." Also, I made a pretty lace garland to draw attention and decorate my red Nebraska Cornhuskers canopy which brings me to...


5. Disasters Happen, Don't Freak Out

We could not find our regular canopy and were forced to use alternative options: mainly a big red one advertising a sports team from a rival state. Yay. We got a little flack for it, but we laughed it off, and hey... It kept the rain and sun off, so I was happy. If you face similar dire circumstances, remember it's only STUFF. If the wind blows over your glass display, it will suck. You will want to cry. But try to keep a smile on. People will think you are brave, and that's better than hearing you blurt out a nasty word in front of a soccer mom and her brood of little ears.


6. Pricing

This is so tricky. I usually keep my prices pretty reasonable. You can get an idea by walking around the fair and seeing what others are pricing their items for. Also, keep in mind the market. Mine was in smalltown Iowa. These are quilting ladies, moms, farmers... We don't usually sell $8,000 coffee tables here. It's more like sixty bucks, max.


7. Bring a Buddy

Help is invaluable. I was lucky enough to have my kiddos and hubby to help me through. This could not have happened without them. I can't lift furniture alone. I can't load and unload a truck myself. And when you have to go to the little girls' room... you really need someone to watch your money drawer for you.


8. Finally, Have Fun

Bad things will happen. Good things will happen. But your attitude makes all the difference. Try to relax. Hopefully you'll make a little cash and have some stories to share. Like I did. :)


Wednesday, May 7, 2014

Desk Makeover With French Wreath Graphic


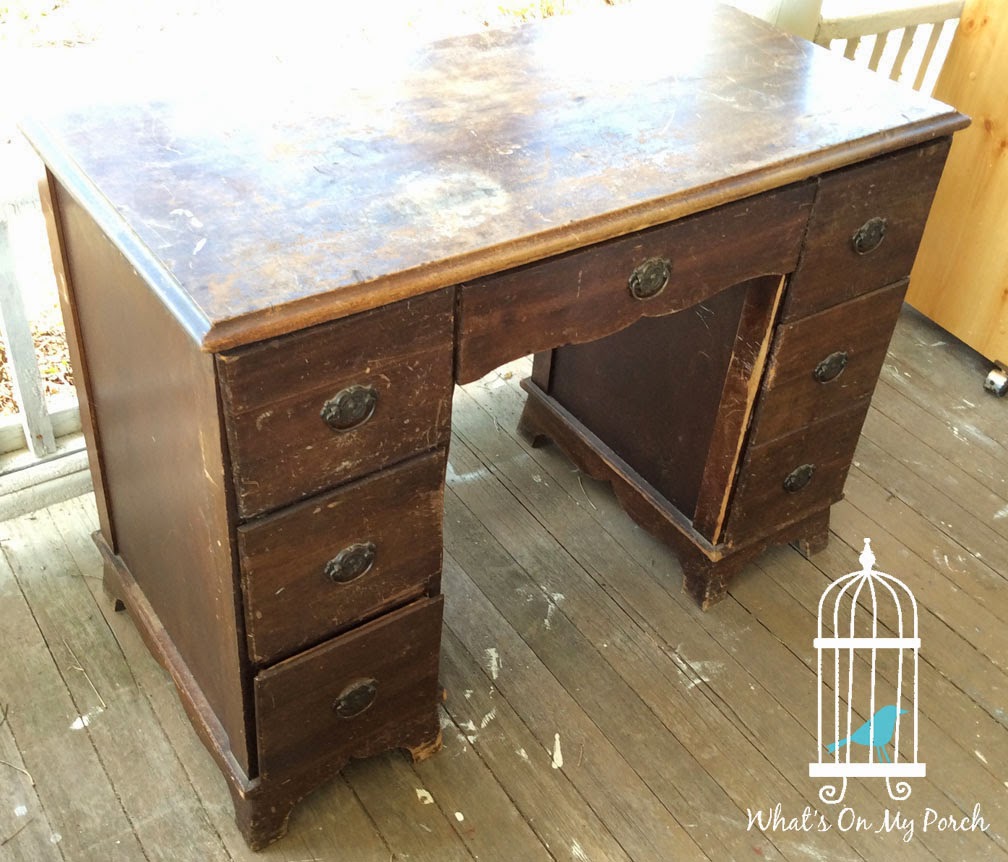
Hubby picked up this desk for me. It was a Craigslist find. I wasn't sure what exactly I was going to do with it. I only knew that it was abused and needed love. :)


I began by sanding the top down to the bare wood. It wasn't hard. The finish was practically begging to come off. I didn't sand out all the imperfections though. I like them. Next, I primed/painted the bottom portion of the desk (hardware, too!), then sanded the edges for a rough/chippy look. Finally, I stained the bottom (over the paint), wiping it away to leave behind an antique sheen.


On top, I did a white wash of watered-down latex paint. When it was dry, I also stained over that. It gives the top that driftwood look.Then I traced the graphic on and painted it. 
Thank you Graphics Fairy (see link in sidebar).

 
Here it is with the left side "distressed" so you can see the difference.

I think it turned out gorgeous. Could be used as a desk, vanity or even a TV stand! Lots of shabby-chic, cottage loveliness!