Toilet Paper Roll Tags for a Junk Journal
Hello and welcome to the Porch! So, right now (spring 2020) we are in the midst of the COVID-19 epidemic, and for a few weeks it was almost impossible to find toilet paper. Anywhere. Suddenly all anyone was talking about was toilet paper, toilet paper, toilet paper. It got a little scary.
So, I decided to issue a crafting challenge on my Facebook Group (Not a member? Join the fun here!). The challenge was to turn all this toilet paper negativity into something positive by creating a craft project from toilet paper rolls. This is my own answer to the challenge. I hope you love it!
I began with two toilet paper rolls, one of which I cut up into little pieces and stared at for about half an hour. Then I cut it up some more and threw the the pieces away. LOL! Attempt 2 meant I was down to just one TP roll, so I had to break into an almost-empty paper towel roll and cut it to size. This gave me 3 toilet paper-sized rolls which I proceeded to smash flat.
Flattening My TP Rolls
Getting them flat was a challenge all on its own. I used my bone folder which helped a tad, but those suckers still wanted to pop back up into their roly poly roundness. So, I used the old dollar bill method. You remember? When your dollar bill wouldn't fit in the pop machine so you'd drag it along the edge of a table or some other flat, hard surface until it straightened out? Yep. That's what I did.
Next, I used Tim Holtz Distress Ink in Vintage Photo Color and inked the edges of my TP rolls.
And I decided I would attach them to a journal page. This one is from my Faded Roses Journal Kit in my Etsy shop.
Making the Pockets for the Tags
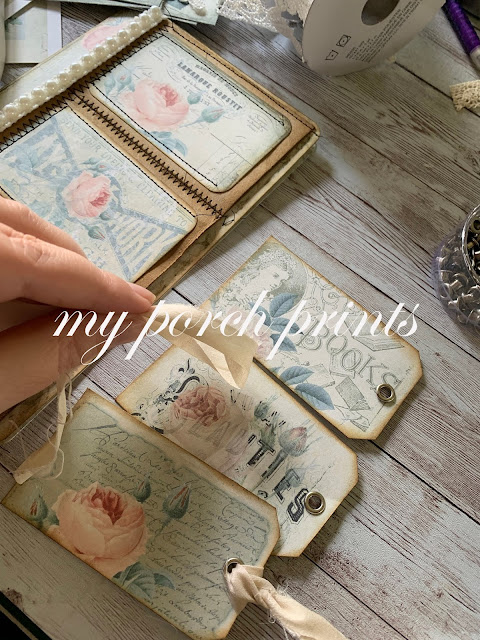
Using that same printable kit and my Rose Ledger Cards, I found some pretty ephemera pieces and cut them to fit on top of my TP rolls. I rounded the corners using my corner rounding punch and inked the edges as well.
Then I sewed the ephemera pieces onto my TP rolls. I had planned to leave one end open to slide the tag into but quickly realized I would need some very skinny tags to fit inside the TP rolls or behind the ephemera pieces, so I came up with a new plan....
My new plan was to sew zig-zag style up the left edge to attach the TP rolls to my junk journal page. Then I also sewed zig-zags to attach in between the TP rolls, securing them to the journal page and also creating the "pocket" that the tag would slide into. I know. It's confusing. So, the tags don't actually fit INSIDE the TP rolls, they fit BEHIND them.
Making the Tags
I used more ephemera to create some horizontal tags. I just cut them to size and cut off the corners to make a tag shape.
Then I used my eyelet punch to add some holes and finished the tags off with some distress ink and a little sari silk ribbon.
All Finished!
For a final finishing touch, I added a bit of pearl bead trim. And that was it. After all that work, I was pooped. :)


