I just finished doing my second ever market booth/stall. And while it is fresh in my mind, I wanted to share my experience with all the first-timers out there who are thinking of selling their wares at a market or show.
First of all, a little background: What's On My Porch is my part-time, home-based business. I spend the warmer months junking for items to fix up and sell - mainly furniture and home decor. As I was growing this business, I received an offer from a nearby shop asking if I'd like to be part of their Spring Market - a gathering of vendors selling everything from furniture to jewelry and goat's milk soap to alpaca rugs. Yes, seriously.
I thought, "This is a great opportunity!" So I junked like I'd never junked before, went into a furniture-refinishing frenzy and ended up with LOTS of items to sell. Along the way, I made lots of mistakes but also had lots of triumphs. Here are a few nuggets of wisdom I have to pass on to you:
1. Get Ready
You will need plenty of inventory, yes. Whether you're selling handmade jewelry or candles or big ole furniture, you need stuff to sell. But you also need ways to DISPLAY those items. Think outside the box. Pinterest is chock-full of ideas for this. For instance, hang your jewelry on a potted tree-branch. Use vintage furniture (wink, nudge) - like a chippy dresser to display your cupcakes. Price tags are also a good idea. If you sell beauty accessories, bring a MIRROR. Or buy one from me. :)
2. Get Ready Some More
You have items and a way to show them off, now you need a few more things. If your show is outside, you NEED a canopy. Yes,
need. The sun is merciless and so is the rain. Wind can END you. So, anchor your canopy with a couple cinder blocks or bricks. Be prepared for the weather. You also need a cash drawer or pouch. I keep my prices in dollar increments. No messing around with a roll of quarters for me! Also: calculator, blankets, chairs, SNACKS, more snacks, water, sunscreen, a book or i-pad, etc. If you have access to electricity, bring a string of white lights. Paper/Markers. You want to make "Sold" signs and mark whether or not that person paid. (Hint, if you mark it SOLD, they should have paid.) Nobody wants to haul a dresser around while they're shopping. Save it. Mark it as sold. And write that person's contact info down.
3. Haggle Happens
People expect a little haggling at a fair. Often they will bring a pile of items up to you and offer $___ for the whole pile. I'm usually a little flexible, especially if someone is buying a pile.
Hint: Don't shout at people. I let people peruse at their leisure. No pressure. If someone seems interested I might say, "Feel free to make me an offer on that." But that's all. I don't like to be badgered when
I'm buying items. If I want it, I buy it. If not, then being harassed by a seller is not going to change my mind.

4. Decorate Your Booth
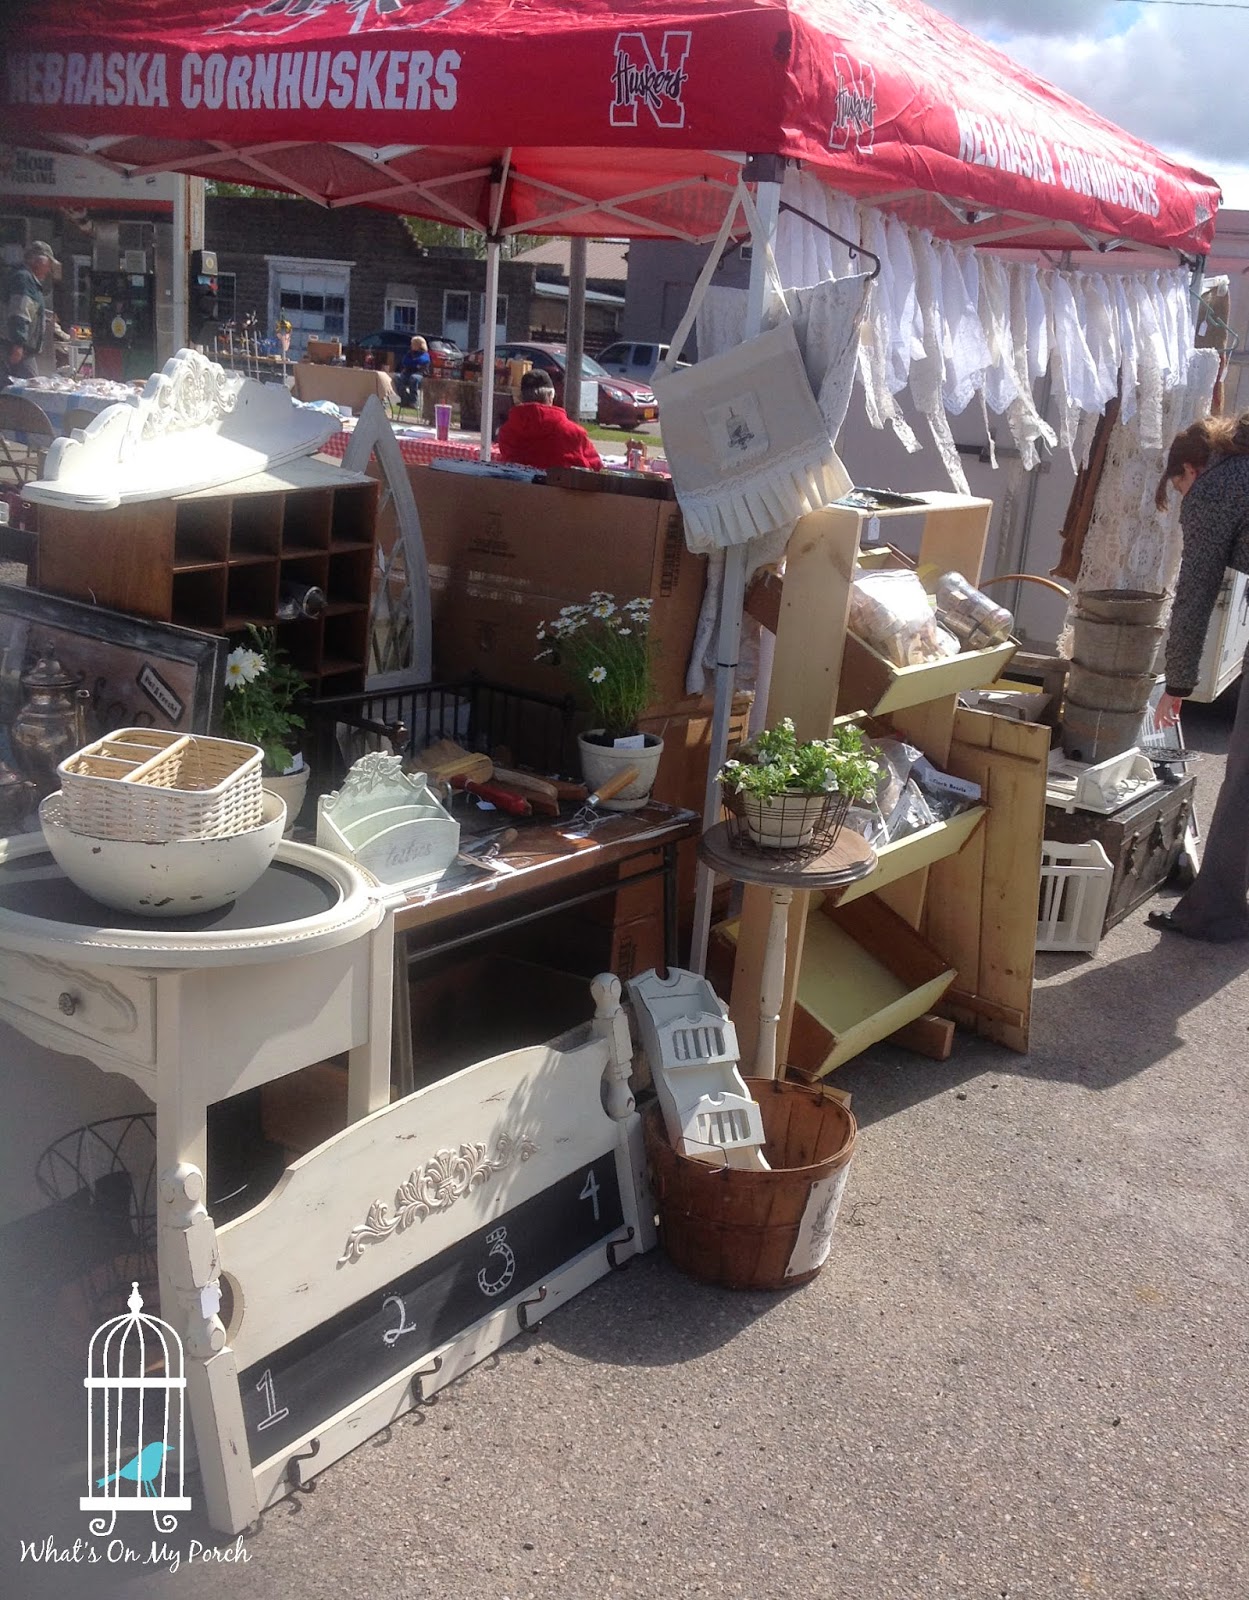
Make it pretty and keep in theme with what you are selling as well as the season. My market had a "spring" theme. I came with pots of flowers with little signs saying "for display only." Also, I made a
pretty lace garland to draw attention and decorate my red Nebraska Cornhuskers canopy which brings me to...
5. Disasters Happen, Don't Freak Out
We could not find our regular canopy and were forced to use alternative options: mainly a big red one advertising a sports team from a rival state. Yay. We got a little flack for it, but we laughed it off, and hey... It kept the rain and sun off, so I was happy. If you face similar dire circumstances, remember it's only STUFF. If the wind blows over your glass display, it will suck. You will want to cry. But try to keep a smile on. People will think you are brave, and that's better than hearing you blurt out a nasty word in front of a soccer mom and her brood of little ears.
6. Pricing
This is so tricky. I usually keep my prices pretty reasonable. You can get an idea by walking around the fair and seeing what others are pricing their items for. Also, keep in mind the market. Mine was in smalltown Iowa. These are quilting ladies, moms, farmers... We don't usually sell $8,000 coffee tables here. It's more like sixty bucks, max.
7. Bring a Buddy
Help is invaluable. I was lucky enough to have my kiddos and hubby to help me through. This could not have happened without them. I can't lift furniture alone. I can't load and unload a truck myself. And when you have to go to the little girls' room... you really need someone to watch your money drawer for you.
8. Finally, Have Fun
Bad things will happen. Good things will happen. But your attitude makes all the difference. Try to relax. Hopefully you'll make a little cash and have some stories to share. Like I did. :)