Tuesday, December 10, 2019

"I AM" Mini Book Freebie Printable


I Am statements from Jesus in the Bible

Then Jesus declared, “I am the bread of life. Whoever comes to me will never go hungry, and whoever believes in me will never be thirsty. John 6:35
----------------------------------------------------------

Check out my Etsy shop for more printables!

----------------------------------------------------------
"I AM" Mini Book Printable
Hello Porch people! I've put together this FREE sweet printable mini book featuring the "I AM" statements from Jesus in the Bible. Sometimes I really need help to remember His promises and who Jesus says he is. This little book makes a nice stocking stuffer or gift. I kept the design neutral so it can be gifted to a girl or a guy, but you can decorate it using your own unique style. And the best part? It fits inside a 3.75 x 2.25 inch mint tin.

This is a free download. Just click the link below to download the PDF file. (Includes photo instructions to assemble your mini book.) Please remember this is for personal use only. Enjoy!

Decorate Your Mint Tin
Need some ideas for decorating your mint tin? Watch this video tutorial on my YouTube channel.

I AM free Mini Book from My Porch Prints: Jesus Bible


I AM free Mini Book from My Porch Prints: Jesus Bible

I Am statements from Jesus in the Bible

I AM free Mini Book from My Porch Prints: Jesus Bible

I AM free Mini Book from My Porch Prints: Jesus Bible

I AM free Mini Book from My Porch Prints: Jesus Bible

I AM free Mini Book from My Porch Prints: Jesus Bible

I AM free Mini Book from My Porch Prints: Jesus Bible

Download This Freebie
Download the PDF file for this "I AM" mini book by clicking here.
Includes photo instructions to assemble your mini book.
*Tip: Round the corners for a nice, finished look and easier fit in your mint tin.

See these "mint tins" on Amazon:


YOU MIGHT ALSO LIKE....
You might also like my Tin Box Mini Book from My Porch Prints on Etsy.

My Porch Prints printable Mini Mint Tin Book
Tin Box Mini Book printable available in my Etsy shop: My Porch Prints


Tuesday, August 27, 2019

Halloween Wheel Window Card Tutorial


Halloween Wheel Window Card
This super-cute Halloween Wheel Window Card has a window and a wheel with spinning words. It's cute on its own or as a cover or insert for a junk journal!
To make it you'll need a few supplies:

Supplies:
Black Cardstock
Tim Holtz Ornate Plate
Brass Fastener
Circle Punch
Awl Or Other Sharp Tool
Craft Knife
Mounting Tape
Tape, Glue, Scissors, Etc.

Printables:
Pumpkin Image (I got mine from Jento Design on Etsy)
(Pumpkin image is also available in the cover of my Cozy Autumn Journal Kit Printable)
"Seasons" Journal Words Printable from My Porch Prints
Coffee Stained Book Pages Printable from My Porch Prints


Preparing The Black Card
To begin, cut an 8.5x11 inch sheet of black cardstock in half to create two 8.5x5.5 pieces. Then cut an extra half-inch off the side & bottom of one piece. This will be your main card.


Punch Half-Circle
Punch a half-circle in the center bottom of the smaller, main card.


Bookplate Pumpkin
Next, place your book plate in the center of your pumpkin image and trace the inside, the outside corners, and the fastening holes.


Use your awl or sharp tool to punch the fastener holes.


Using a craft knife, cut out the center tracing.


Next, attach your bookplate to your pumpkin as shown.


Creating Your Wheel
Find a circle shape that is the same size or slightly smaller than your main black card. Trace it onto the larger cardstock piece (NOT the one with the half-circle punched out). Cut it out. This will become your wheel.


Find and mark the center of your circle.
One way to do this is to place the circle on a piece of paper and use a ruler to cut the paper to the same size as the circle. Then, measure each side and mark the halfway point. For instance, my paper was 4x4 inches. So, the center of each side was the 2 inch mark. I drew a line at each 2-inch mark, and where the lines intersected was the center of my paper.

I used my awl to create a hole in the center of my paper, then placed my circle on the paper, lining my circle edges with my paper edges, and flipped it over. Using a pencil, I marked through the hole I created onto my circle. You can also look up "How to find the center of a circle" if that is more helpful.


Create a hole in the center of your circle or wheel. Then align the wheel in the bottom-center of your card (where you punched the half-circle). And mark through the center hole. Use the awl to punch it out.


Creating Your Window
This part is just a little tricky. It took me some trial and error. With the wheel aligned on the center bottom of your card, place the pumpkin over the top edge of the wheel so that your wheel shows through the window. (See photo above.) You'll want to align it carefully. The wheel should show through, but the edges of the wheel should not.


Now that you have your pumpkin and wheel aligned, carefully remove the wheel by sliding it away. Do not move your pumpkin.


Use a pencil to trace inside your pumpkin bookplate onto your card.


Now, remove your pumpkin and use your craft knife to cut out where you marked with your pencil.

Back of card.
Turn your card to the back (see above photo) and use your brass fastener to attach your wheel to the back of the card. Then flip it back to the front again.

Front of card.
 Your wheel should completely cover the window you cut out as shown above.


Adding Seasonal Words
Use glue to attach your cut-out "Seasons" Journal Words to the wheel, using the cut-out hole as a guide for placing the words. (See the above photo.)


When you've glued on a word, spin the wheel until the word disappears and attach another word. Repeat until the wheel is full of words. Try to space them evenly. Note: Be sure to leave plenty of space between the words so no more than one shows up in the window at a time.


When you've finished applying your words to the wheel through the window, use a piece of tape to secure your brass fastener.


Attach Pumpkin
You might also want to secure the fasteners on your pumpkin book plate. Then glue your pumpkin to your card, lining up the window so the words show through and covering your brass fastener.

If your pumpkin isn't large enough to cover your fastener, consider using some cheesecloth or decorative tissue paper underneath your pumpkin to hide the fastener. Just don't cover your window.


Print your Coffee Stained Book Page on cardstock and fold it in half as shown.


Use strips of mounting tape to attach your completed pumpkin card to the folded "Coffee Stained Book Page" card.


Align the pumpkin card with the bottom of the folding card as shown below.


If you want, ink the edges of your card, and you're finished! Now you can use the punched out part at the bottom to move the spinning wheel and change the words in your window. See video below.
If you liked this tutorial, please share!
Thanks!
Stephanie from My Porch Prints


Tuesday, August 13, 2019

Why is it called "My Porch Prints"?


A few people have asked why my shop is called "My Porch Prints." It's kind of a weird name, I know. One lady even asked me, "What's a Porch Print?" Ha ha!

Well, to understand the name, we have to go back a few years. Around 2014, I was really into making over vintage furniture. I would scout local thrift shops & Craigslist to find the perfect piece: An old radio cabinet, a Duncan Phyfe table. Then I would break out my trusty orbital sander and paintbrushes and get to work.
And where did I do all this makeover magic?
Why, on my front porch, of course!


At that time, our family of four lived in a 2-story 1800s foursquare house. It had a big ole wrap-around porch--the perfect spot for making a mess. I really, really loved making over furniture. It was kind of an addiction. There was something so satisfying about taking an old, scratched, rickety piece of "junk" and turning it into something new and beautiful. I started a business called "What's On My Porch" because people would actually drive by my house to see what I was working on! :) I sold my furniture pieces from home and also at craft & antique shows.


But in fall of 2015, something happened. I was walking with my co-worker on our break, and I noticed my feet, especially my right one, were really hurting. It got so bad, I finally went to the doctor. He told me to take some ibuprofen. But over the course of weeks & months, it got worse and worse. I had to walk with a cane. And then BOTH feet started hurting and I panicked! I realized I'd been limping on my left foot... and if it started to hurt... I wouldn't be able to walk at all.

And that's exactly what happened.

In 2017, I began using a mobility scooter to get around the grocery store or if we went on long walks. I went to lots of specialists: podiatrists, orthopedics, rheumatologists, neurologists. I had several tests: x-rays, MRI. I was stuck with needles, shocked and had holes drilled into my feet and legs to test the nerves. Nothing. Eventually doctors quit wanting to see me and just sort of threw up their hands. Thankfully, my feet are good enough to get me around most of the time, but I just can't walk long distances. I was 37 when that happened.

Then, in 2017, my doctor prescribed Gabapentin for my foot pain. At the time, I thought it was some kind of pain medicine, but I later learned it's actually for seizures. It messed me up terribly, and I ended up in the ER twice in the 2 months that I was on it. It gave me terrible heart palpitations which have never gone away.

Whew! All this to say I was very sad about not being able to walk. I'd always dreamed of travelling when our children were grown up. And the heart palpitations were so scary and terrible, I thought I might never feel "normal" again.

But even in the midst of my troubles, God found ways to bless me. I was able to create like I had before, but this time, I did it with my computer. I found great joy in making beautiful printables!


In 2016, I started my current Etsy shop. I had to choose a shop name. I wanted it to include "Porch" to tie it into my old furniture business. So, I decided to call it My Porch Printables, but that was just a bit too long. So I shortened it to My Porch Prints.

My old logo was a bird in its cage, but my new logo is just the bird, free of the cage. I kind of love it.

Of course, I no longer have my big front porch. We had to trade the 2-story home for something I could manage with my feet. But I love, love, LOVE creating beautiful printables for others to use in their own creations! I still really miss walking and re-finishing furniture. But I'm so grateful for what I can still do. Thanks to you, Porch fans, for making it possible!  I am so thankful for you all!

With Love,
Stephanie


Freebie! Get these free oversized tags by clicking here.


Friday, June 28, 2019

Lady Scientist Steampunk Junk Journal: My Porch Prints

Lady Scientist Steampunk Junk Journal by My Porch Prints

I've been a fan of steampunk for years. There's just something about the idea of Victorian-era charm mixed with a little science fiction. It's romantic and exciting. Plus it makes for a great journal theme!

This journal is called "Lady Scientist." It's a mix of inventions and natural science with a touch of feminity. It's a binder-ring journal. The covers were created using medium weight chipboard & printable papers (links below). The pages were also made using printable papers. Instead of printing double sided, I printed one-sided on cardstock and glued them together to make thicker pages. Then I used an eyelet punch to create the holes. Enjoy!

The bookplate is a black metal label holder. To attach the clasp, I used brass fasteners and lightly spray painted them with black paint, letting some of the gold show through.  

Lady Scientist Steampunk Junk Journal by My Porch Prints


This "corset" page was created with black cardstock and eyelets with ribbon strung through. I actually used a large mixing bowl from my kitchen to cut out a partial circle shape, then traced it to create two the same size. These became the sides of my corset. It makes a cute tuck spot! :) The train image is from a kit in my shop (see links below).

Lady Scientist Steampunk Junk Journal by My Porch Prints


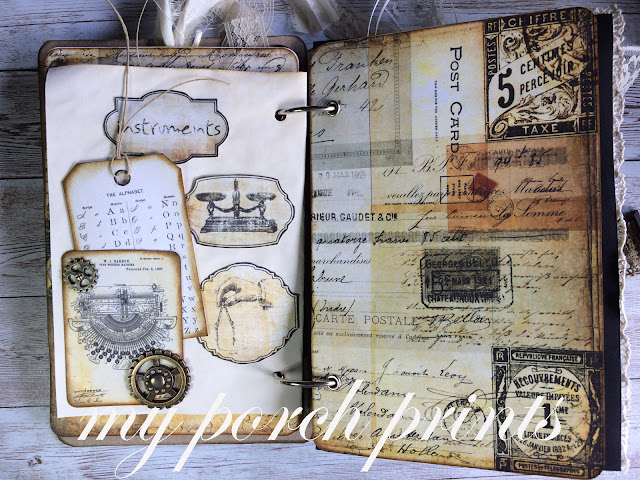
Steampunk style gears and printables from my shop were used for these pages.

Lady Scientist Steampunk Junk Journal by My Porch Prints

Lady Scientist Steampunk Junk Journal by My Porch Prints

Lady Scientist Steampunk Junk Journal by My Porch Prints


This waterfall fold was so fun & easy to make! I'll try to put a tutorial video together for it. The insect specimen cards are from my Etsy store. The spinner clasp is from Tim Holtz.

Lady Scientist Steampunk Junk Journal by My Porch Prints


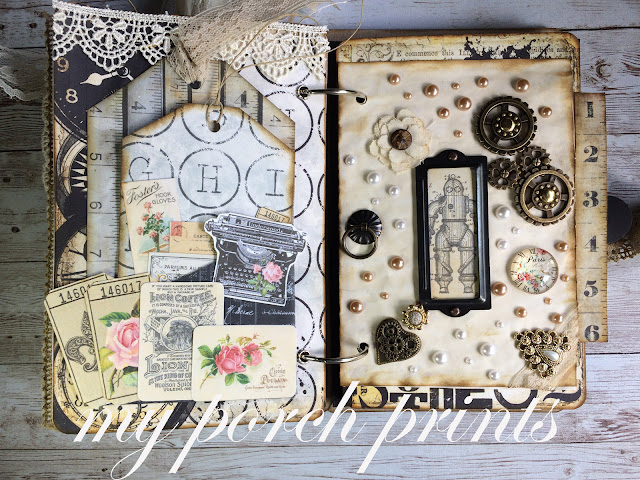
This page was created using cabochons & bezels, metal necklace chain & ring clasps (links below).

Lady Scientist Steampunk Junk Journal by My Porch Prints


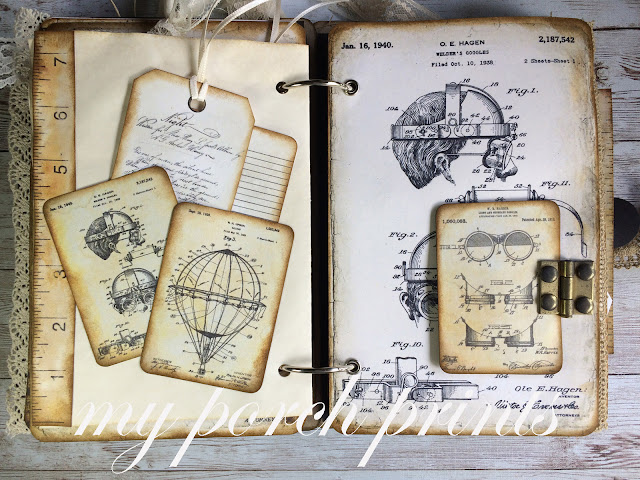
For this page, I used more of my printables and a small brass hinge I had in my stash. I attached it using my spray-painted brass fasteners to create a fun moving part.
Lady Scientist Steampunk Junk Journal by My Porch Prints

Lady Scientist Steampunk Junk Journal by My Porch Prints

Again, this hinge was attached using my spray-painted brass fasteners. So easy and fun to make these moving pieces.

Lady Scientist Steampunk Junk Journal by My Porch Prints


The left page here has an Industrial Pocket Tag from my Etsy shop. On the right is a page my daughter created. I thought it went perfectly with the "Lady Scientist" theme! The tape measure on the far right is actually a card that slides out of a tuck-spot.

Lady Scientist Steampunk Junk Journal by My Porch Prints

These are some of the printable cards & other pieces I used. I picked a small flower outside and placed it in the bottle as a "specimen". :)

Lady Scientist Steampunk Junk Journal by My Porch Prints

This journal was so much fun to create. I hope you liked it! Be sure to check me out on YouTube, Facebook, Etsy, Instagram & Pinterest!
Stephanie - My Porch Prints

LINKS FROM THIS PROJECT:
---------------------------------------
METAL LABEL HOLDERS:
https://amzn.to/2ITCrqw

MINI GLASS BOTTLES:
https://amzn.to/2LpeAAC

GEAR PIECES:
https://amzn.to/2ITCOBq

EYELET PUNCH
https://amzn.to/2J9LZwp

HANDLE RINGS:
https://amzn.to/2LnByb5

TIM HOLTZ METAL GAME SPINNERS:
https://amzn.to/2JaZ7RM

ROUND CABOCHONS & BEZELS:
https://amzn.to/2ZPCede

OVAL CABOCHONS & BEZELS:
https://amzn.to/2J9tb0a

TUTORIAL WATERFALL PHOTOS
From Liz Thepaperproject:
https://youtu.be/wLv4YqD0K_M
---------------------------------
MY PORCH PRINTS PRINTABLES USED IN THIS JOURNAL:
---------------------------------
INVENTION JOURNAL PAGES:
https://www.etsy.com/listing/702226282/invention-journal-pages-junk-journal

STEAMPUNK CARDS:
https://www.etsy.com/listing/715967499/steampunk-cards-pocket-letter-patent-kit

SPECIMEN CARDS:
https://www.etsy.com/shop/MyPorchPrints?ref=seller-platform-mcnav&search_query=specimen+cards

INDUSTRIAL GRUNGE PAPERS:
https://www.etsy.com/listing/713362523/industrial-grunge-printable-paper-junk

TIN BOX MINI BOOK:
https://www.etsy.com/listing/710033793/tin-box-mini-book-junk-journal-kit

INDUSTRIAL POCKET TAGS:
https://www.etsy.com/listing/708434913/industrial-pocket-tags-loaded-envelope

ANTIQUE TAGS & CARDS:
https://www.etsy.com/listing/631942335/antique-tags-cards-junk-journal-ephemera

TAPE MEASURES & RULERS:
https://www.etsy.com/listing/616125177/tape-measure-sewing-junk-journal-vintage