Monday, September 24, 2018

Make This Steampunk Clock Mini Book


Steampunk Clock Cabochon Mini Book from My Porch Prints

Steampunk Clock Cabochon Mini Book from My Porch Prints*
*Not a real clock
This cute little Clock Mini Book is easy to make!
All you need are: 


Book Cover
To begin, print & cut your book cover, pages, & chosen clock circle. Next, fold the cover as shown (cutting off any extra) and glue the inside cover to the outside cover. If desired, use a black marker to color on a make-up sponge. Then lightly rub this along the edges of your book to cover any white edges and add a vintage effect. You can also use Distress Ink for this.


Adding the Pages
Cut your pages into three strips and fold them accordion style. Glue the pages together to create three sets of three pages each. Clamp the pages together. I used a clothespin for this. Then apply glue to the edge of your clamped pages and insert them into the cover, pushing them inside the spine as shown. Hold for 30 seconds or so until the glue sets a bit, then clamp the book closed and set aside to dry.


Steampunk Clock Cabochon Mini Book from My Porch Prints


Clock & Cabochon Cover
Once your book pages are dry, cut out your clock face (or whichever design you choose) and glue it to your book cover. Use a drop of clear glue to attach your glass circle cabochon to your clock face. Rub the glass circle around a bit and press down hard to get out any air bubbles. Allow to dry.

Steampunk Clock Cabochon Mini Book from My Porch Prints

Steampunk Clock Cabochon Mini Book from My Porch Prints


All done!
Now you have a cute little Steampunk Clock Mini Book! Use it on its own or as an embellishment for a junk journal. Could also become a cute necklace, charm or ornament.

Steampunk Clock Cabochon Mini Book from My Porch Prints

Steampunk Clock Cabochon Mini Book from My Porch Prints

Get the Mini Book Printable & Clock Circles from My Porch Prints on Etsy.


Saturday, September 22, 2018

Wizard Themed Envelope Journal


Make This Wizard Envelope Journal from My Porch Prints

Wizard Themed Envelope Journal
Make this magical envelope journal. All you need are a few envelopes, some basic craft supplies and the Wizard Journal Scrap Pack from My Porch Prints on Etsy.

To Start: Make A Quick & Easy Envelope Journal
*Also see video at the bottom of this post
You can use any color or shape of envelope you like. I chose these black envelopes because black goes nicely with the wizard theme.

Make This Quick & Easy Black Envelope Journal from My Porch Prints1. Choose an envelope as your "cover", open the flap and set it down. Choose another envelope & fold the flap backwards.

2. Remove the adhesive strip.

3. Slide the flap into your "cover" envelope until it is flush. Press down to attach it. Flip envelope like a book page. Take a new envelope, bend the flap backwards and insert it into the previous one. Flip it like a page and repeat the process. Keep doing this until you have the desired number of pages.

4. Once you have the journal finished. Use the flap from the very first "cover" envelope--fold it around to the back of your journal and remove the adhesive strip. This becomes your spine cover!

5. If desired, crease the "spine" to look more like a book.

6. That's it! So easy and cute! Now you have a journal with built-in tuck spots!

Page Background Papers
Now you can begin preparing your pages for decorating. I printed & cut printable pages from the Wizard Journal Scrap Pack into a size slightly smaller than my envelopes (about 5x7 inches) leaving about a 1/4 inch gap all around when I placed them on my envelopes.

To prepare the papers, I colored on a make-up sponge with a black marker and used it to distress the edges. You can also do this with Distress Ink.


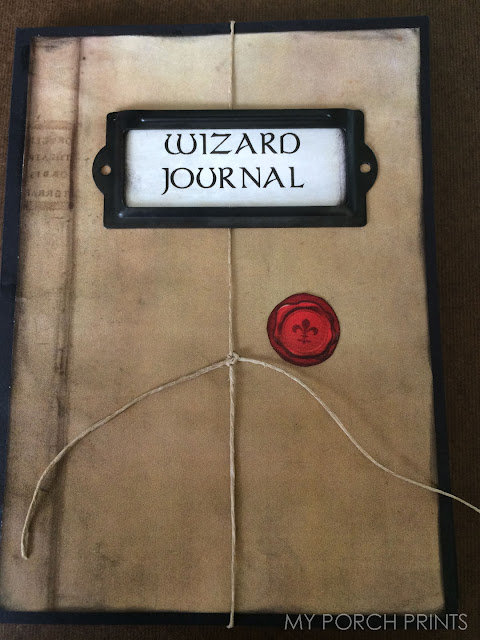
For the cover, I used craft glue to attach a cut & distressed paper. Then I tied a piece of hemp rope around the cover page and placed a "wax seal" (also from the Wizard Journal Scrap Pack) over the knot. I used a metal file plate (find similar ones here) to highlight the title, attaching it with Gorilla Super Glue.

Make This Wizard Envelope Journal from My Porch Prints


Decorate!
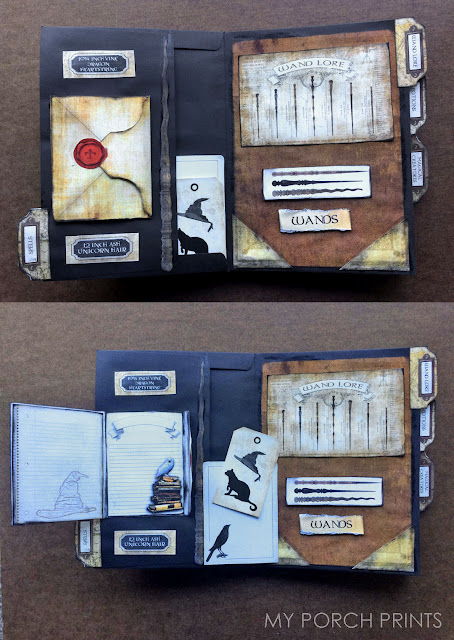
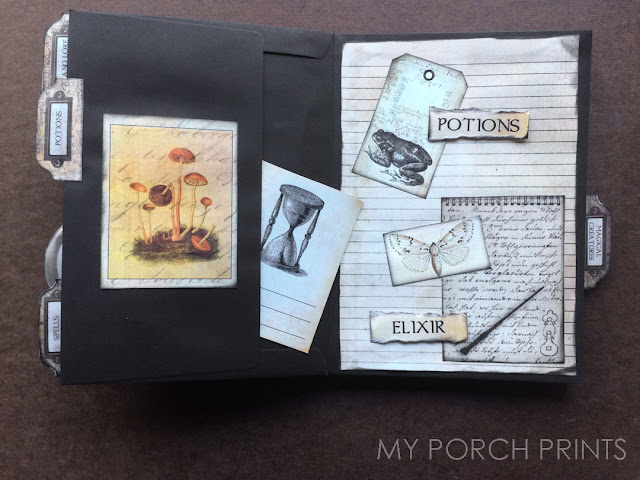
Next, I decorated my pages. This is where you can really get creative. I made some flaps & envelopes that open to reveal pictures and more writing spaces. To create the "Book Of Magic" flap, I used to small pieces of paper to make hinges and glued them to the back as shown. Then I hid a small picture of a black bird beneath it.

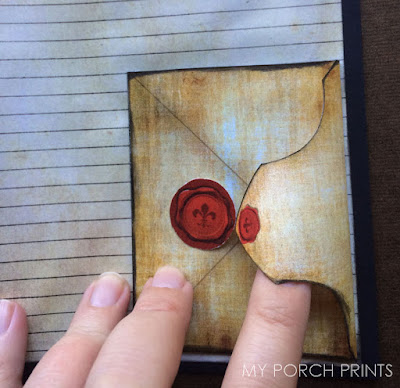
I also used a printed envelope from the scrap pack and one of the "wax" seals. I only glued down part of the seal so that the envelope flap could tuck beneath it.

Scroll to see all my Wizard Journal pages!

Make This Wizard Envelope Journal from My Porch Prints

Make This Wizard Envelope Journal from My Porch Prints


Make This Wizard Envelope Journal from My Porch Prints

Make This Wizard Envelope Journal from My Porch Prints

Make This Wizard Envelope Journal from My Porch Prints

Make This Wizard Envelope Journal from My Porch Prints

Make This Wizard Envelope Journal from My Porch Prints

Make This Wizard Envelope Journal from My Porch Prints

Make This Wizard Envelope Journal from My Porch Prints


Envelope Journal Video Tutorial


Writer-Themed Tim Holtz Clock

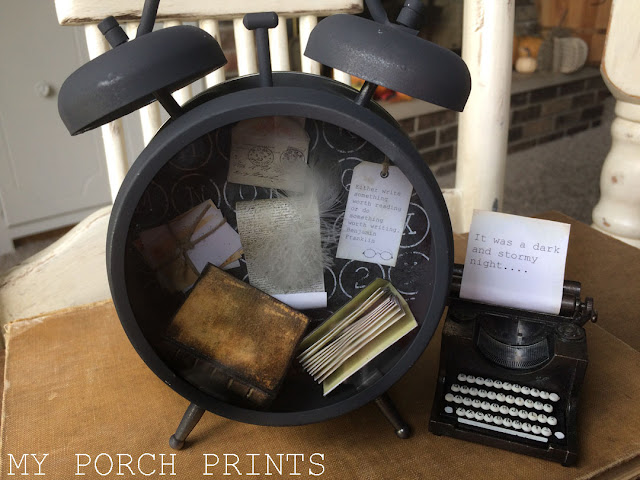
Writer Themed Tim Holtz Clock by My Porch Prints

Writer-Themed Tim Holtz Clock
Have you seen the Idea-Ology Assemblage Clock from Tim Holtz? I've actually gutted vintage clocks to make them over... and I can tell you this clock is waaaaay easier! The back just pops right off, no screws. And it's basically a blank canvas waiting to be personalized. The hardest part is choosing a theme.

I thought about doing a Christmas theme (and I still might!), but I wanted a clock I could display year-round, something that was... me. So, I chose a writer theme. I loooove a good book. I'm also a children's author (check out the Villain School Books).

Here's a quick tutorial on how you can make this writer-themed clock.

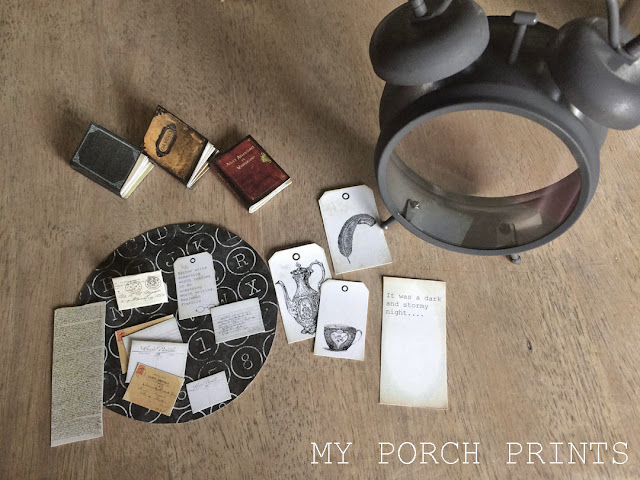
Most of the elements (the background and little pile of mail, scroll, tiny books, etc.) came from my Romance Writer Scrap Pack. I actually had to resize the elements to fit the clock and have the "mini elements" file available to anyone who purchases the scrap pack from my Etsy shop.

Remove Glass Front
The first thing I did was remove the glass front piece to prep the clock for spray-painting. It comes in a shiny silver, which is attractive, but I wanted a more "vintage" feel. A pair of pliers helped to loosen the little nuts so I could turn the metal pieces enough to slip the glass out. Be careful, some pieces of this are sharp and could potentially cut you.


Spray Paint
Set the glass aside. I found a piece of old cardboard to lay my clock on and went outside to spray paint. I did not want a black clock, but rather a vintage silver. So, I did a very LIGHT coat of spray paint, standing a couple feet away and just misting it over the clock. I repeated it until I got the look I wanted.


Paper Backing
Next, I traced the back onto some paper from my Romance Writer Scrap Pack on Etsy. It has the look of old typewriter keys and made a nice backdrop for my decorative elements. I glued it to the clock-back.


Writer Themed Tim Holtz Clock


Assembling Mini Elements
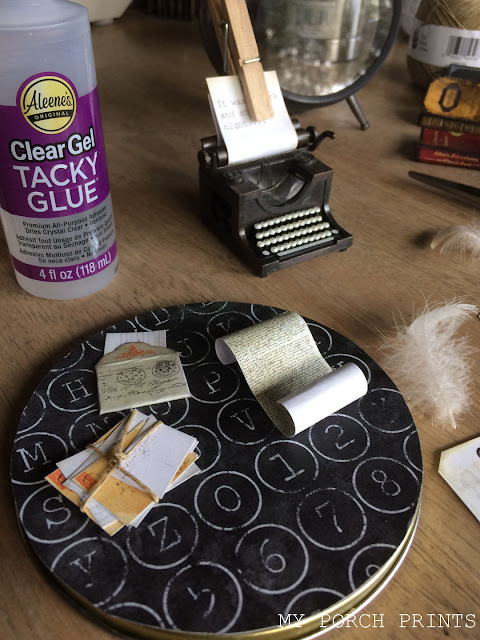
Now it was time to assemble my writer-themed elements! I printed out a few items from my Romance Writer Scrap Pack and also my Da Vinci Mini Book & Alice In Wonderland Mini Book. Re-sizing the items, I created a mini pile of envelopes & postcards, tying them together with hemp twine (find a similar twine here). I used a pencil to roll up my "scroll" and added a goose down feather I found outside as a "quill".

Writer Themed Tim Holtz Clock

Mini Mail tied with hemp twine


Arranging The Layout
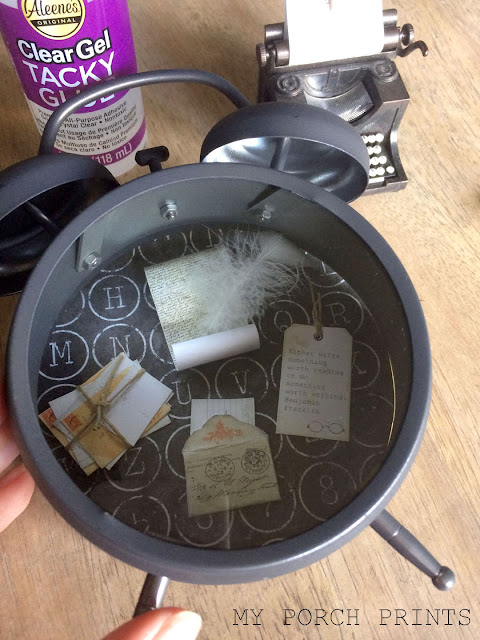
I played around with the layout, placing my clock over the back piece to see how things would fit.

Writer Themed Tim Holtz Clock

Writer Themed Tim Holtz Clock by My Porch Prints

Finishing Touches
Once I had the items arranged as desired, I glued them into place. The mini books I simply tossed in the bottom, then I pushed the back onto the clock, with the elements glued to it. A tiny vintage typewriter pencil sharpener (found on eBay, you can find a similar one here) with some typed words displayed on top finished the look.

Will you do a clock makeover now? What will your theme be?
Share on my Facebook page.

Writer Themed Tim Holtz Clock by My Porch Prints

Writer Themed Tim Holtz Clock by My Porch Prints


Sunday, September 16, 2018

How To Make A Journal From Blank Cards


How To Make A Journal From Blank Cards
This cute little junk journal is easy to make. All it takes is a few blank greeting cards. Here's how to make one of your very own.

Gather Your Cards
Gather some A2 Kraft Cards & Envelopes. You won't use the envelopes for this project, but save them for a future journal craft. Decide how big you want your journal to be. I used 8 cards for a total of 16 pages, including front & back covers.


One More Card
Now get one more card and cut it vertically into inch-long strips as shown. I like to use a trimmer for this, but you can use scissors, too.


Hinges
Fold each strip in half as pictured. A ruler can help with this to keep the fold straight. These strips will become your "hinges".


Cut Off Hinge Ends
Next, take one of your folded strips or "hinges" and cut off each end at an angle as pictured.


Attach Cards Using Hinge
Line up two cards folded ends touching. Apply craft glue to your hinge and glue it to one of the cards as pictured. Next, apply glue to the other side of the hinge and attach it to the other card. The hinge holds the cards together, kind of like a door hinge holds a door to a wall. Repeat this process for all of your cards until they form one large book.

Don't worry about the hinges showing. Once you decorate your journal, you can cover them with papers.


Done! Easy Peasy
And you're finished! You have a blank card journal ready for your personal touch.
Want to see how I decorated mine with a vintage "World Travel" theme? Click here.