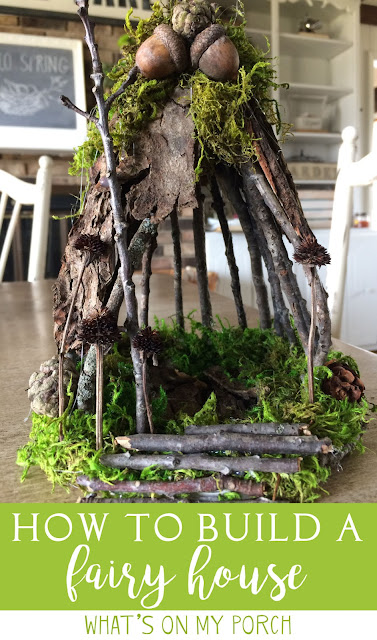
How To Make A Fairy House With Twigs and Moss
Lately I'm obsessed with fairy gardens and houses and tiny little fairy furniture. These fun little structures make a great project to do with children or just for the child in you.
I've made a few fairy structures and furniture pieces, and even a fairy door for a tree. But today, we'll focus on making a fairy house.
Here is what you'll need:
- Twigs
- Moss
- Acorns
- Small Pine Cones
- Bark
- Glue (I used Gorilla glue)
- Air-Dry Clay
- Cardboard (like from a box)
- Large Masking Tape (optional)
- Pruning Shears (optional)
If you're gathering items from nature, you might consider baking them before you use them to get the critters and critter eggs out. I did. I lined baking sheets with foil and baked at 225 F degrees for an hour. Use your judgement here. Baking twigs, acorns, pine cones, bark, etc. worked fine for me. I even baked a few fall leaves. Again, use your best judgement so as not to cause fires, etc.
Step 1: Clay & Cardboard
Cut a piece of cardboard into the size & shape you want for your house. I just used a piece of a box flap and cut into a rough circle shape. Next, use your air-dry clay to make a ring around the box, wrapping it underneath and making it thick on top (so you can push your twigs into it). It's easiest to work in small sections and just use your fingers to blend and work the clay as you go along. This makes a solid base for your structure.
Step 2: Twigs
Using your hands or a cutting tool, cut/snap the twigs until they are roughly the size you want for your fairy house. I recommend about 6-10 twigs for this, but you can decide what works for you. Place a drop of glue on the end of your twig, then press each twig into the clay around the edges of your cardboard and angle them so they meet in the middle like a tee-pee. If more clay is needed, you can add it around the base of each twig.
Step 3: (Hardest Part) Let it dry overnight.
Step 4: (Funnest Part) Start Decorating! Roof & Floor
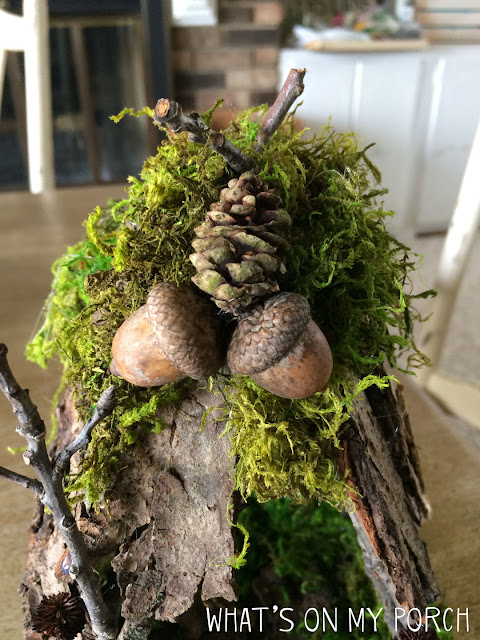
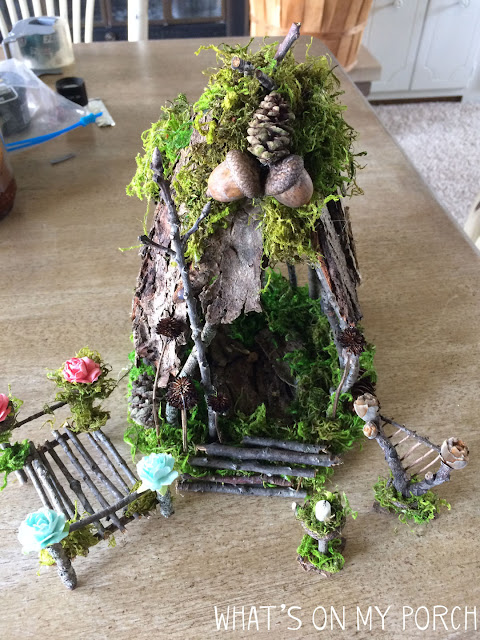
I added large masking tape to the tops of my branches to create a larger surface for attaching my bark "roof". I made sure the tape wrapped around and stuck to itself, not just to the branches as it might fall off. Cut pieces of bark using your hands to snap them or cutting tools (such as wire cutters or pruning shears). Attach the bark to the top of your structure. Don't worry if you have a few gaps. You can fill them in with moss.
Also, add bark pieces to the floor using glue. Again, don't worry about gaps.
Step 4: Moss
Using super glue OR hot glue and some kind of craft stick or tweezers, begin tucking moss into all the cracks and crevices and gluing it into place. Also, cover all of the exposed clay at the base of your house with moss.
Step 5: Steps
Build twig "steps" for your fairy house by breaking a few twigs and gluing them to the house. Start with one twig on the doorstep, then glue another twig and another until you have the desired amount of steps.
Step 6: Finishing Touches
Time to use pine cones, acorns, dried flowers, etc., to create your own unique touches. Consider making an interesting embellishment above the door. Add some fancy dried flowers or twigs next to the steps. You could also make a candle stand. Pretty rocks, crystals, etc., also make fun additions. Use your imagination!
And you're all done. You have a beautiful fairy house for your fairy friends. I've used mine in a terrarium in my home, but you could also place yours outside in a garden or in the woods. I'm not sure how long it would withstand the elements, but if it doesn't last long, that's just an excuse to make another one! :)
Happy creating!


No comments:
Post a Comment
Note: Only a member of this blog may post a comment.