Friday, December 28, 2018

"French Rose" Junk Journal Tutorial : Part 1

French Rose Junk Journal Tutorial : My Porch Prints

*Contains Affiliate Links
French Rose Junk Journal Tutorial
Part 1: Making A Cover
Hello Crafters! Today we're making a journal from a cardboard box and the French Roses Journal Pages from My Porch Prints on Etsy. In this first part, I'll show you how to make the cover. The pages & assembly will come in Part 2.

Find A Box
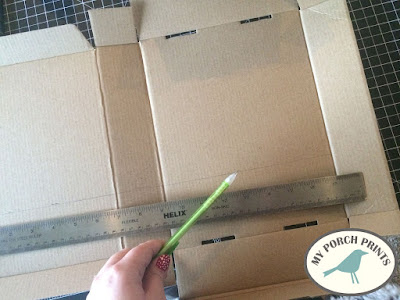
Start by finding a box. A really easy solution is to use a cereal or cracker box. They tend to already have a journal shape. I used a leftover Christmas box. It was already close the size I wanted and was just begging to be transformed into a junk journal. I opened my box and cut it to the dimensions that would work best with my journal pages: 5x7 inches. I actually cut the box just a smidge larger so that my cover would extend over my pages a bit.

French Rose Junk Journal Tutorial : My Porch Prints
Cut Your Box
Next, I opened up my box and cut it to the size I wanted using a craft knife.

French Rose Junk Journal Tutorial : My Porch Prints

French Rose Junk Journal Tutorial : My Porch Prints

French Rose Junk Journal Tutorial : My Porch Prints
Paint Box 
I decided to paint my box white. This is not necessary. There are LOTS of options here. You could cover your box with paper or fabric. Or leave it plain brown if it has no printing or stickers on it. But I opted to paint mine white.

French Rose Junk Journal Tutorial : My Porch Prints

French Rose Junk Journal Tutorial : My Porch Prints

Round The Corners
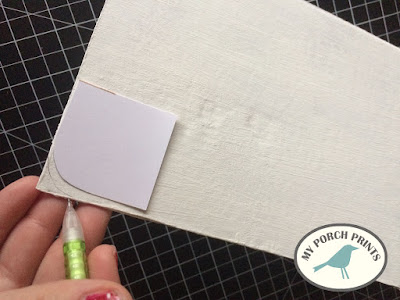
Another optional choice is to cut your corners and round them off. I like the way this looks, but again totally optional. If you want consistent corners, make a template from a piece of paper or cardstock and trace.
French Rose Junk Journal Tutorial : My Porch Prints

Front Cover
I decided to use one of my printable journal pages as a cover: plain with some coffee stain markings and script around the edges. I liked the simple look and it leaves me lots of room for decorating options. I cut the corner in a curve to match my cover.

French Rose Junk Journal Tutorial : My Porch Prints
Spine & Back Cover
I also cut pieces of journal pages to fit my spine & back cover, leaving a bit of border around the edges. This left the spine with an unfinished look, so I inked the edges with Distress Ink and a make-up sponge to give the paper a more finished look.

French Rose Junk Journal Tutorial : My Porch Prints

French Rose Junk Journal Tutorial : My Porch Prints

Glue The Cover
To attach the paper to my cover, I applied glue on the journal cover and spread it using a paint brush. This helps keep the paper from bubbling too much.

French Rose Junk Journal Tutorial : My Porch Prints

French Rose Junk Journal Tutorial : My Porch Prints

TIP: If your craft glue is running low, use a cup to hold it upside down. This will keep the glue ready at the tip!

French Rose Junk Journal Tutorial : My Porch Prints

French Rose Junk Journal Tutorial : My Porch Prints

Ink Journal Edges 
Once my papers were applied to the outside cover, I opted to ink the white edges. I thought it gave it more of an antique feel. I also applied ink to the edges of the INSIDE cover.

French Rose Junk Journal Tutorial : My Porch Prints

Inside Cover Pocket
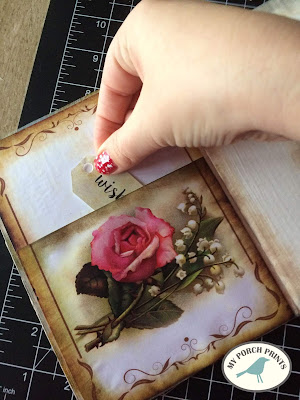
Now it was time to do the inside cover. I wasn't sure exactly what to do for this. Finally, I decided just to use more journal pages and create pockets for holding tags, etc. I rounded the corners to match. After gluing a page inside the cover, I cut a second piece to cut and form a pocket.

French Rose Junk Journal Tutorial : My Porch Prints

French Rose Junk Journal Tutorial : My Porch Prints


Gluing Pockets
I only applied glue to three sides of my pocket, leaving the top open. Then I spread it with a brush.

French Rose Junk Journal Tutorial : My Porch Prints

French Rose Junk Journal Tutorial : My Porch Prints

French Rose Junk Journal Tutorial : My Porch Prints

French Rose Junk Journal Tutorial : My Porch Prints

Cover & Bookplate
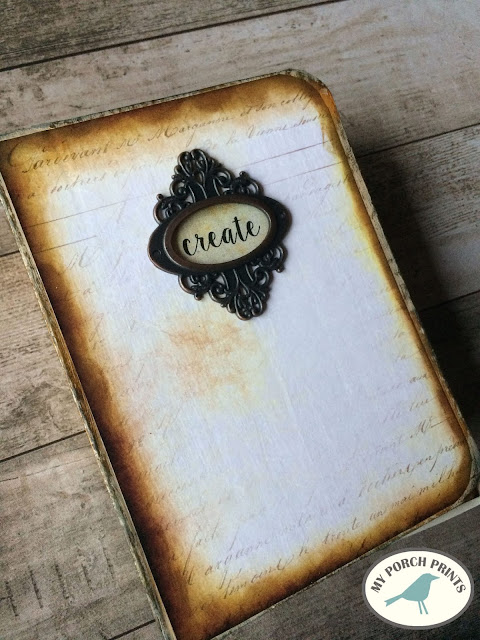
For the cover, I decided to use a Tim Holtz Ornate Plate and the word "Create". The words come from a free printable. I started by cutting out my word & gluing it with a craft glue stick to my journal.
French Rose Junk Journal Tutorial : My Porch Prints

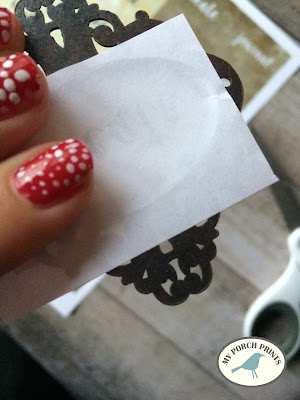
Next, I placed the book plate over the word and marked the holes with an awl from a bookbinding kit. This requires a light hand. Be careful not to damage your pages on the other side.

French Rose Junk Journal Tutorial : My Porch Prints

French Rose Junk Journal Tutorial : My Porch Prints

Finally, I added the fasteners. They show on the opposite side, but I'm planning to use some embellishments to cover them later.

French Rose Junk Journal Tutorial : My Porch Prints


In Part 2, I will talk about adding pages & binding to your journal.


Freebie Friday: Journal Words for Bookplates

Journal Words for Bookplates: Free Printable Download My Porch Prints

Journal Words for Bookplates *Contains Affiliate Links
Hey junk journalers & all you crafty people! Today's Freebie Friday is so simple, and yet so useful! You've probably seen journals on Pinterest with those cute Tim Holtz Ornate Book Plates. Sometimes they even have words inside them with cute fonts and pretty backgrounds. You could probably make them yourself, but my motto is why do it myself when I can get a free download? Exactly!

So, today I have a free download for you of printable journal words specially designed with those bookplates in mind. You can choose from dark words on a light, vintage background or white words on a darker background. Just scroll through the photos to see how easy it is. Then go the bottom for your free download & get crafting! ;)

Be sure to SHARE your creations on the Crafting Ideas Facebook Page.

Words: Create, wish, dream, be still, imagine, bliss, love, garden, journal, junk, notes, abide, forever, memories, secrets, journey

Journal Words for Bookplates: Free Printable Download My Porch Prints

Journal Words for Bookplates: Free Printable Download My Porch Prints

Journal Words for Bookplates: Free Printable Download My Porch Prints

TIP: Cut out your chosen word and then press against the back of the book plate. This will give you a raised guide for cutting.

Journal Words for Bookplates: Free Printable Download My Porch Prints

Journal Words for Bookplates: Free Printable Download My Porch Prints


Journal Words for Bookplates: Free Printable Download My Porch Prints

Journal Words for Bookplates: Free Printable Download My Porch Prints

Journal Words for Bookplates: Free Printable Download My Porch Prints

Journal Words for Bookplates: Free Printable Download My Porch Prints

Follow Crafting Ideas by My Porch Prints on Facebook for lots of fun & beautiful paper crafting inspiration.

To download, click the image below, then right click and save it to your computer.
Visit my Etsy shop to see more printables.


COPYRIGHT

PLEASE NOTE: This image is not to be re-used in digital form (as in do not re-post it on your website or anywhere else or try to sell it in digital form). 

You MAY PRINT & sell it as part of a journal or art project (please credit My Porch Prints).


Journal Words for Bookplates: Free Printable Download My Porch Prints


Thursday, December 27, 2018

Valentine Mini Books Tutorial

How To Make Valentine Books

Valentine Mini Books Tutorial *Contains affiliate links
Do you remember Valentine's Day as a kid? The biggest part was the box that we would set on our desks at school for all the other kids to put Valentine's in. I would always plan something really elaborate and cool, trying to be as unique as possible. One year it was a treasure chest. Another year, it was a castle. When my kids were old enough, we made even more elaborate boxes. One was a real, working clock! Another was made entirely out of chocolate.

Then, of course, there were the Valentines themselves. Most kids just bought them at the store, but I liked to make my own.

Things haven't changed much. I still enjoy creating pretty Valentine designs... like these mini books! Here is a quick tutorial. As you can see, they are easy to assemble.
You can purchase these Valentine Mini Books in my Etsy shop.

Cut Out the Covers & Pages
Begin by printing & cutting out your covers. I like to print the covers on cardstock.
Print the pages on regular paper and cut into strips as shown.


Fold the Cover
Fold the covers to create a book shape. A ruler helps to keep them straight.

Valentine's Day Mini Book Tutorial


Glue the Cover
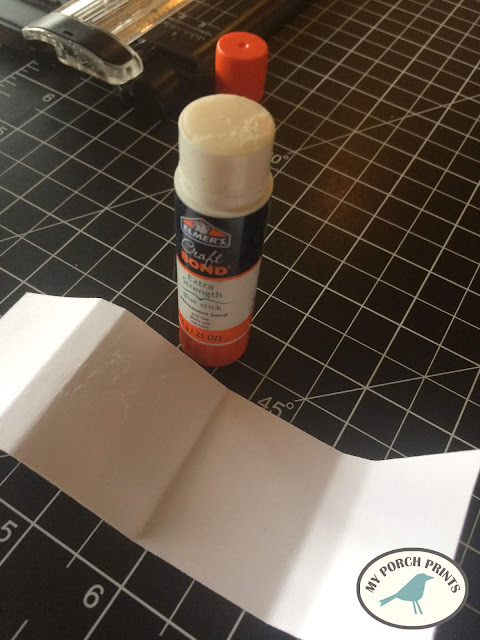
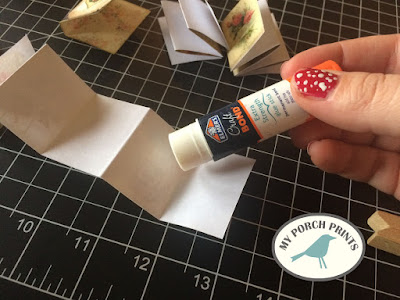
Fold and glue the inside cover as shown. I use craft glue sticks.

Glue the cover

Ink the Edges (optional)
I like to use Distress Ink to cover the edges where the paper shows and also to give the book cover an aged, finished look.
Ink the edges

Fold the Pages
Fold the pages accordion-style as shown. Then glue them together. Glue the first page to the second, second to the third, etc. You will end up with THREE sets of three pages each.

Fold the pages

Valentine's Day Mini Book Tutorial

Glue Pages Into Book
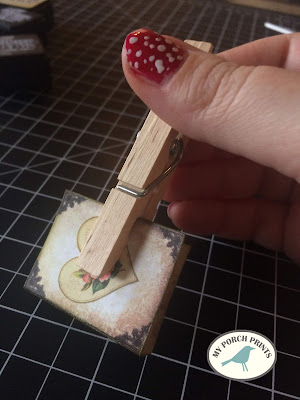
Gather your three sets of pages together & clamp. A clothespin works well for this. Add clear glue to the "raw" edges of your pages and place them inside your book cover, against the spine.

Valentine's Day Mini Book Tutorial

Clam with clothespin
Clamp to Dry
Remove the clothespin and use it to clamp the entire book together while it dries. Repeat the process, printing more book pages as desired.

Valentine's Day Mini Book Tutorial


Valentine's Day Mini Book Tutorial

How to make Valentine's Day Mini Books

Valentine's Day Mini Book Tutorial from My Porch Prints