Tuesday, December 19, 2017

Woodland Christmas Mantel


Lately, I'm obsessed with woodland décor. Maybe it's because we recently moved to a house near a lake. But there's something romantic and cozy about a fireplace, rustic logs, woodland creatures and buffalo check.

I recently painted the mantel above our fireplace. It was a kind of honey-colored wood and didn't really match. I thought a nice clean white would go better with my style. It also helps items to pop.

For my woodland-themed mantel, I used plain wood branches, painted white to give them more of a birch-feel. For the greenery, I cut up an inexpensive wire garland into "pine branches" and lightly spray painted them white for a frosted look.

The knit stockings are from Christmas Central (christmascentral.com) They were really inexpensive (less than $10 each) and are perfect for that "lodge" feeling. I added chalk tags with our names.

Stocking are probably our favorite part of Christmas morning. It's our tradition to let the kids wake up (but not before 6 AM!) and open their stockings first. It keeps them from waking up mom and dad. As they grew older, we added "making coffee" to the stocking tradition. So even if their giggles wake us up, at least there's coffee!

You'll notice a couple of little owls peeking out from the greenery as well as some other little touches like dollar-store snowflakes and a white feather. The glass hurricane jar is from a thrift store. I threw in a little fake snow and added a lantern ornament plus a few bottle brush trees. The red and white scarf is also a thrift store find. And the buffalo check wrapping paper was from the dollar store.


Decorate A Christmas Bookshelf:
See photos and get ideas HERE.

https://whatsonmyporch.blogspot.com/2017/12/decorate-christmas-bookshelf.html
 
 
https://www.etsy.com/listing/475691705/red-truck-with-christmas-tree-sign-red?ref=shop_home_active_2
Need more décor? Get this Christmas printable from My Porch Prints on Etsy:
 

Saturday, December 16, 2017

Decorate A Christmas Bookshelf


Decorate a beautiful Christmas bookshelf. From What's On My Porch.

I have a love-hate relationship with our built-in bookshelves. On the one hand, they provide tons of storage and decorating opportunities. On the other, they leave no space for any other pieces of furniture. I will always have bookshelves on my walls. I can't move them. Ever.

Plus, the shelves themselves are not adjustable, so I face major size restrictions when it comes to what will fit on them.

When we moved in, these shelves were brown wood. Ugly brown wood. They date back to the sixties, and it showed! Thankfully, my sweet firstborn daughter and her lovely friend were willing to paint them for me (for a sad twenty bucks apiece). Thanks girls! And I am just thrilled because nothing says "Christmas" like a snowy white backdrop.

And what goes great with snowy white? You got it, RED!

Decorating bookshelves for Christmas can be fun, easy and cheap as I'm about to tell you.


I recommend starting with a basic color scheme. My main colors here are white and red with some muted browns, greens and grays. You can incorporate the items you already have on your shelf, or go full-on Christmas. I decided to incorporate.

A great place for picking up inexpensive decor is the thrift store. It's where I get most of my smaller items, like the mini Christmas trees you see scattered around the shelves.


Here you can see my antique skate topped with tiny presents and a tiny tree.


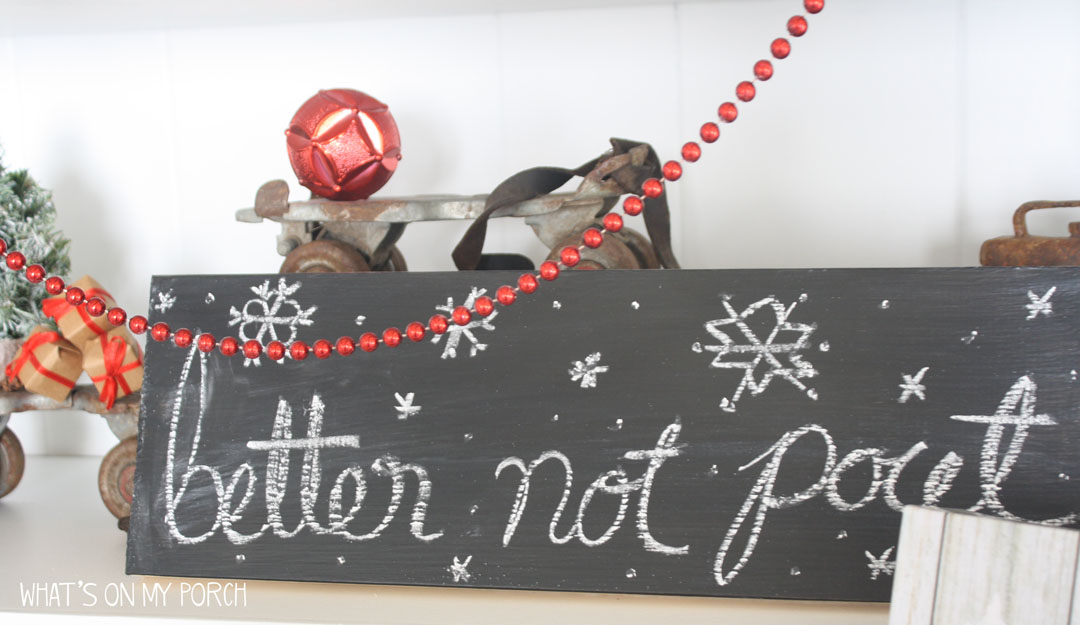
Another inexpensive idea is to create your own chalkboard. I made this one with an old plank and chalkboard paint. They're so versatile for seasonal decorating. I think this one will stay on the shelf long after Christmas is over.


Ornaments aren't just for the tree! Like this little lantern which adds interest and also works with the red color scheme.


 This beautiful frosted tree was only $12 at Walmart. I picked it up on a whim and am so glad I did! It adds some nice dimension and texture!


An antique store find, this little red gumball machine works great as a snow globe. But you don't have to go antiquing to get your very own... they are sold in many places, including on Amazon.

 Buffalo check is big right now. It gives a nice, "lodge" feeling to your bookshelves. I wrapped empty boxes from my pantry (think cereal, mac-and-cheese, etc.). The paper is from a dollar store.

A bowl of dried pine cones with a scoop and ornament thrown in.


The greenery is actually a cheap Walmart garland, dusted with a light coat of white spray paint and clipped with wire cutters to make "branches" and wreaths.
I scattered these all over my bookshelf, so cute!

Want MORE Christmas ideas?
Check out this Woodland Christmas post. 


This printable design is for sale in my Etsy Shop.


This printable sign is available in my Etsy shop: My Porch Prints
Get this printable sign in Stephanie's Etsy Shop: My Porch Prints.

Looking for Christmas stocking ideas? 

Make your own Vintage Image Stockings.


Friday, December 15, 2017

New Year, New House, New Projects

Hey Porch Fans! I'm back! As some of you know, our family spent the last year in Wisconsin living in an apartment. Hubby's job needed him to work in the Badger State for a spell, so my home projects were put on hold. Also, due to some health issues, I've been unable to do much this year, but I'm hoping to get back into the swing of things in 2018!
 

Our old house.

 
The old porch where I worked on furniture projects.
  

Before our move to Wisconsin, we spent 10 years in Iowa raising our two girls in a rickety, old 2-story home built in 1894. It was a labor of love, constantly working to make the house a home. There was no room inside for my favorite work: furniture makeovers. So, I took my projects out onto our wrap-around front porch to sand and paint and stain. That was how "What's On My Porch" began. It was literally a blog about the projects on my porch. It was sad to see the old home get sold, but it has opened the door for new projects and new decorating endeavors!

I loved our old open staircase!
 
Currently, we live in a single story home on a beautiful lake in central Iowa. I never envisioned myself in a house like this. In fact, I used to hate everything about these kinds of homes. I thought they had no character or charm. But I'm starting to realize that charm is something you can add to ANY space. And while I miss our big, open staircase, I don't miss climbing those stairs ten times a day to get to the bathroom!
 
Our new lake house.
With our daughters both grown now, we don't need quite as much room as before, and health troubles with my feet make living in a one-story home a blessing. We've already done a little painting, and I hope to do LOTS more as the months and years go by, but we'll see what God allows. His timing is perfect, so I'll keep all plans flexible. :)
 

We have a fireplace!


Our new kitchen. Needs some love.


Our new living room with built in bookshelves and a window seat. This room needs love, too.


Can't beat the view!

Sunset on our lake.


Sunday, August 7, 2016

Fall Farmhouse Tea Towel Pillows


It's almost fall, ya'all! What better way to celebrate the season of cool breezes, crisp apples, colorful leaves and plump pumpkins than with some cozy farmhouse style pillows?

Step 1: Tea Towels
I bought some awesome white towels from Walmart in the kitchen towel section. They are Mainstays
brand Flour Sack Towels in white. The fabric has an awesome farmhouse look and feel. The first step is to IRON your towel. They are very wrinkly, which isn't a bad thing since the look I was going for was casual, but I wanted my image transfer to be crisp.

Step 2: CitraSolv
There is a handy, delicious smelling orange cleaner out there called CitraSolv. It is heavenly! And it's awesome for transferring inkjet printed images onto fabric! **This transfer method does not work with laser printers. Only inkjet. Grab a little glass jar and a small housepaint brush for this.

Step 3: Print your picture... backwards!
I always mess up this step. I printed the entire image on four different sheets of paper before I realized I had forgotten to flip it. I use Photoshop to create a document the same size as my pillow. (In this case, around 22x22 inches). Then I crop each section to fit an 8.5 x 11 sheet of paper and print them, line them up and tape them. I'm sorry if this is confusing. You may want to start with an image that can fit a standard sheet of paper... just don't forget to flip it backwards! If you don't have Photoshop, you can do this in MS Word by inserting Word Art, choosing Rotate and Flip Horizontal. You can do it with pictures, too.

Step 4: Transfer the image.
Once you have your (backwards) image place it on the tea towel so the ink is touching the fabric. Make sure it's centered. Tape the corners in place. Then lightly brush the CitraSolv onto the back of the image. Use a tablespoon to rub the image and transfer it to the fabric. After rubbing the entire image, gently lift it to be sure it transferred. It's very difficult to line it up again. I've never been successful doing it.


Step 5: Sew & stuff your pillow! And then repeat and make a few more! :)


The files for these designs are available on my Etsy shop:
 
https://www.etsy.com/shop/MyPorchPrints

Resize as needed and remember to FLIP them so they are backwards before you print! :)


Sunday, May 1, 2016

Junky Toy Truck

 
So, this weekend was my birthday. Yes, thank you. :) To celebrate, Hubby took me to an event called Junk Jubilee. It's held twice each year at the Iowa State Fairgrounds in a big ole building. The place is just teeming with vendors. So much junk. So many antiques. My mind was exploding from vintage-junky-shabby overload.
 
We took daughter #2 with us and explored aisle after aisle, row upon row of everything from handmade jewelry to farmhouse finds, pristine antiques to dumpster treasure... and even some fried cheese. Which is awesome, BTW.
 
I didn't have an agenda. I wasn't looking for anything in particular, but I did manage to find a few things and get a few new ideas (stamped white feathers=LOVE).
 
My first find was a cute little metal ampersand or "and" sign. It's tiny and gray and perfect. The next find was even better... a chippy metal toy truck. I picked it up and walked around with it for a few minutes. Then set it back down. Then picked it up again to show Hubby and daughter #2.
 
Twenty-five bucks. I mean, it wasn't a bad price, but with such a cornucopia of antiques at my fingertips, surely I could find one I liked as much.... maybe for less? Right?
 
My dilemma: one year I went to Junk Jubilee and found an old rusty scale for twelve dollars. I didn't get it, and I'm still kicking myself... even though I now own two rusty antique scales. It's a hoarder thing. And a deal-finder thing.
 
So, here is this truck. All last Christmas I'm Pinning photos of little metal toy trucks with tiny Christmas trees in the back and thinking, "I'm going to DO that!" Just as soon as I get my mitts on a toy truck.
 
Now, back to Junk Jubilee. Little toy truck. Just right. But is it too much?
 
I set it down and decide to look around. If you love something let it go, right? Well, I made it two aisles before we spot a huge display of trucks. Hubby saw it first, and we both rush over for a closer look. They are all cute little metal trucks. I have my pick of any!
 
New dilemma: I don't really like the color on these. But, they're still in the running. We flip one over to check the price tag. Sixty bucks. OUCH. SIXTY. BUCKS! 
 
The rest are all similarly priced, and by that time my feet were really killing me. So, I turn a frantic face to Hubby, and he just knows. (Bless that man!)
 
"I'll get it," he says.
 
A few minutes later, he came back with a bag carrying my new (old) toy truck.
 
I regret nothing.
 
Except the cheese. :)


Sunday, March 20, 2016

Why I'll Never Make Another 3-Tiered Tray. Probably.


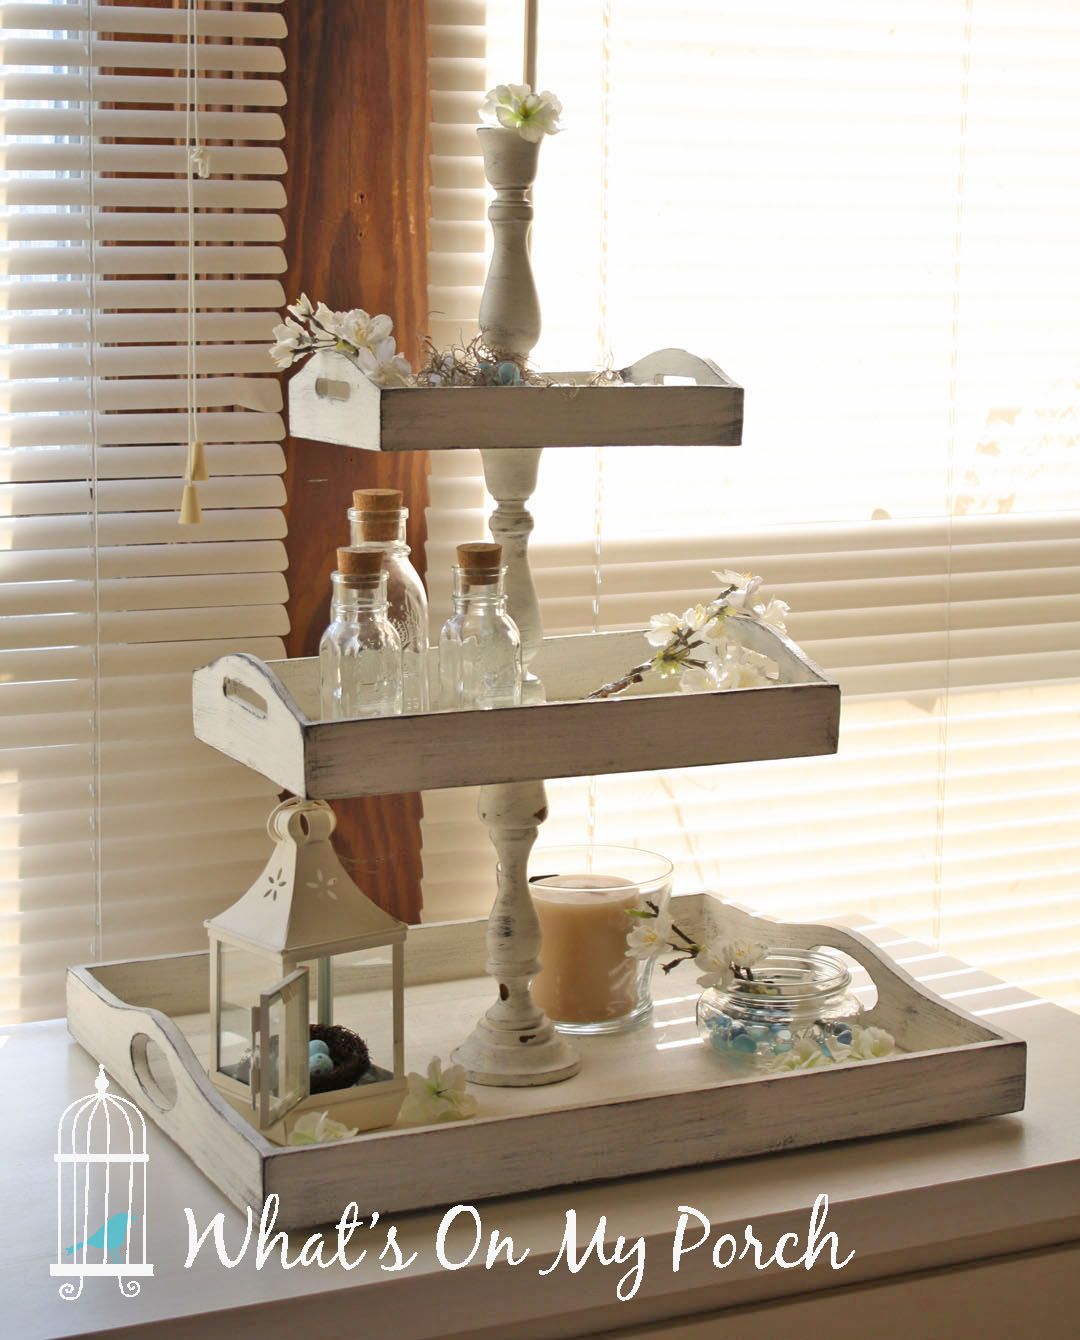
My Attempt at Making a Three-Tiered Tray
You've likely been to the home décor stores and seen all the cute little three-tiered trays. Some are round, some are rectangular. Some are metal, some are wood. But pretty much all of them are... expensive!

For years now, I've been under the impression that I can make/fake just about anything, and I can do it CHEAPER. So, why wouldn't this concept apply to a three-tiered tray? Right?

Wrong. So, so wrong.

When I set out to make my very own farmhouse style tray, I thought it would be very straightforward and simple. Not to mention sooooo much cheaper than the $50-$100 these things cost in stores.

The Trays
The first thing I needed was, of course, the trays. In various sizes. Three of them. First, I searched and searched the thrift stores. I knew I'd seen trays there before. Heck, I'd even bought a couple and made them over. But could I find any this time? No. Not a one. Okay, there was one, but it had ceramic tiles glued to it. Bleck.

So, on to my never-fail source for everything... the Internet! There were LOTS of trays for sale there. On Amazon, Walmart, Ebay. Of course, the new ones were EXPENSIVE. Just to buy three of them, I might as well have purchased the finished product at Hobby Lobby. I needed something CHEAPER!

So, I found a cute set of nesting trays on Ebay. They had a sunflower pattern painted inside and were green outside, but who cared! They were PERFECT. I ordered them and waited for the mail to arrive with my oh-so-awesome thrifty nesting trays.

Well, they arrived. In a very tiny box. We're talking smaller than a piece of printing paper. Hmmm. Yep, upon opening them, I realized they might work for the top and middle tiers of my stand, but definitely not the bottom one. Back to the Internet.

I found another set of nesting trays on Amazon. They were big and got good reviews. A little pricey, but hey, now I was INVESTED. I ordered the trays.


Looking for similar trays?
Take a look at these nesting trays on Amazon


The Middle Pieces
Next, I needed the middle pieces. And what could work better than wooden candlesticks? Now, I
know I'd seen these at the thrift stores at least a hundred times. But could I find any? Yes. Two, in fact.... but that was after I'd already ordered four on Amazon.


Candlesticks on Amazon

This venture was getting awfully pricey. And it was about to get worse. I talked to Hubby about my awesome plan, and told him his role... to make the whole thing stick together in a way that was sturdy and could be carried around. We bought lots of hardware stuff. Metal rods that looked like giant screws and some kind of other screw-thingy for the top and a couple nuts and bolts and what not.


Then Hubby tried to drill a hole through the first, biggest candlestick... and cracked it. We realized drilling a perfectly straight, teensy hole through the middle of three candlesticks requires special equipment that we neither had nor could afford.


So, Hubby came up with method 2. The dowel method. He drilled out the tops and bottoms of the candlesticks and used a dowel to connect them, gluing the whole thing to the trays. See photos because I have no idea how to explain this.

As for the "pretty" bit, I just primed the trays with Zinsser primer. (Except the trays I ordered on Amazon. Those suckers were SHINY. So, I sprayed them with a thin layer of black spray paint first, hoping to add a little adhesive power, then I primed them.) And I painted them in an antique white.  I did the same to the candlesticks. I tried sanding for a distressed look, but because all the trays were different colors, textures, materials, this did not look good. So, I opted to do a dry brush technique.

 Using a dark, charcoal gray acrylic paint (just a Walmart craft paint called "Pavement") I dipped a rough paint brush, wiped it almost dry on a paper towel, then light brushed the trays, letting their texture pull small bits of paint off my brush.

Hubby assembled my trays. They are quite wobbly, but will likely hold together as long as I'm not too hard on them. I AM very happy with the result, but I would NOT do it again. Here's why.
  • This was a lot of work and did not turn out very sturdy.
  • Cost.
A breakdown of the cost:
Small sunflower trays on Ebay: $16
Amazon trays: $20
Candlesticks on Amazon: $16
Candlesticks from thrift store: $4
Dowel: $2
Pricey Hardware: Planning to return. I hope.
Paint and other stuff I had on hand already.

So, in total, this project cost almost $60. Now, granted I could make another tray. I have enough materials. But the price was enough I could have saved lots of time and headache just buying a new one that was sturdy and already assembled.

Lesson learned.

Well... maybe. :)


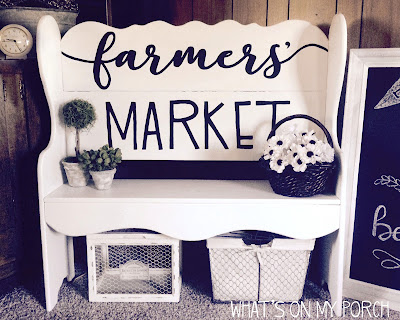
Read about this Farmers' Market Bench Makeover

https://whatsonmyporch.blogspot.com/2017/12/farmers-market-bench-makeover.html