Showing posts with label house. Show all posts

Thursday, December 28, 2017

Update Your Home for the New Year!

Resolutions.

We've all got 'em. Mine is pretty much always to lose weight. It lasts for a week or two until the willpower fizzles out and chocolate starts sounding way better than skinny jeans.

But one resolution we CAN keep is to update our house! You might have visited your parents or grandparents this holiday season. Maybe their homes make you jealous... or maybe you look at the same old wood paneling and dusty, outdated curtains and wonder why they never change their style. Of course, if you're like me, you go home and look at your own dusty curtains and wonder why you never change YOUR style.

Enter the Home Update Resolution!

This is the year. You can do it. It starts with some simple baby steps.

Home Update: Baby Steps

1. Clean. I know. It's no fun, but put away your pouty face and get out those rubber gloves. Wipe, vacuum, pick up. You can do it. I believe in you.

2. Declutter & Organize! Now that you've got some space on your dining table, use it as a command center. Start emptying out your kitchen cabinets and drawers. Make piles for "Keep" "Junk" and "Donate".  Anything you haven't used lately, or items that are broken... toss them. Now is NOT the time to be sentimental. Just because your great-aunt Mabel passed down that cracked ugly cookie jar does NOT mean you have to keep it. Take a photo and start a donation box.
 
Need some ideas on how to organize? Check out my Pinboard:
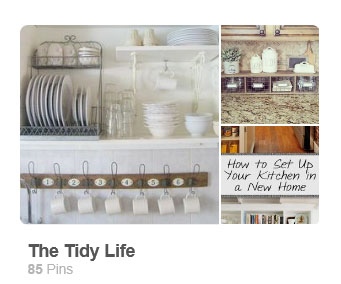
https://www.pinterest.com/thegoodvillain/the-tidy-life/
Here is a link to my Pinboard for organizing and decluttering.

3. Paint the Wood. Some of you will cringe when I say this. I know it is a fad right now to have white painted wood. So, you don't HAVE to do this, but if you have 70s wood paneling that isn't even real wood. Please. FOR HUMANITY. Paint that stuff white! But start with a good cleaning and some Zinsser primer first. And if you're feeling really feisty... paint your outdated wood cabinets, too!

Here is what our dining room looked like after painting the bookshelves and wood paneling.
So much brighter!


4. Change Your Curtains. Maybe they came with the house. Maybe you just don't think about them, but curtains can be like wrinkles for your house... they make it look OLD. Take a look at your favorite rooms on Pinterest. What do they have in common? I bet many of them have simple white curtains or NO curtains at all. I realize naked windows are not always practical, so if you need curtains, make them simple and clean. For our curtains, we used a package of twin flat sheets we bought on Amazon. In white. We clipped them with black curtain rings and saved a TON of money by using electric conduit instead of curtain rods (cost was around $3/rod!). Plus the conduit is WAAAAY less flimsy.

In our daughter's room, we used sheer lace curtains and metal electrical conduit for the curtain rods.
It is much cheaper and stronger than regular curtain rods!
This was our daughter's room before. No lie.


5. Paint Furniture. This is like the wood dilemma above (see #3). I know your orange-ish cabinet and your dark brown buffet and your honey blonde dining table all came from Grandma so-and-so, and she'd roll over in her grave if you painted them, but honestly... they look weird together. So many different wood tones. And they make your house so dark. Take another look at your favorite Pinterest homes. What color are the cabinets, the tables, the buffets? If they're white or gray, then you might want to consider painting your own furniture white or gray, too. Just a suggestion.

 
https://whatsonmyporch.blogspot.com/search?q=dresser

See what this dresser looks like after a coat of paint.


6. Update Your Art. Not ready to leap into painting furniture or rooms just yet? Try something smaller. Make a family name sign. It will add some quick and easy farmhouse charm to your home. And maybe it will even give you the redecorating bug, who knows?
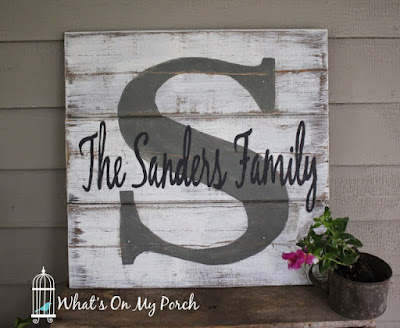
 
https://whatsonmyporch.blogspot.com/2015/05/monogram-pallet-family-name-sign.html


Good luck decluttering and updating your house. Here's to a clean, fresh and beautiful NEW YEAR!

Want more farmhouse style décor? Check out this post about Galvanized Farmhouse Finds from Hobby Lobby.

http://whatsonmyporch.blogspot.com/2017/12/galvanized-farmhouse-from-hobby-lobby.html

Want an even EASIER way to redecorate your house? Get printable art in my Etsy shop!

https://www.etsy.com/shop/MyPorchPrints?section_id=19861674


Friday, December 15, 2017

New Year, New House, New Projects

Hey Porch Fans! I'm back! As some of you know, our family spent the last year in Wisconsin living in an apartment. Hubby's job needed him to work in the Badger State for a spell, so my home projects were put on hold. Also, due to some health issues, I've been unable to do much this year, but I'm hoping to get back into the swing of things in 2018!
 

Our old house.

 
The old porch where I worked on furniture projects.
  

Before our move to Wisconsin, we spent 10 years in Iowa raising our two girls in a rickety, old 2-story home built in 1894. It was a labor of love, constantly working to make the house a home. There was no room inside for my favorite work: furniture makeovers. So, I took my projects out onto our wrap-around front porch to sand and paint and stain. That was how "What's On My Porch" began. It was literally a blog about the projects on my porch. It was sad to see the old home get sold, but it has opened the door for new projects and new decorating endeavors!

I loved our old open staircase!
 
Currently, we live in a single story home on a beautiful lake in central Iowa. I never envisioned myself in a house like this. In fact, I used to hate everything about these kinds of homes. I thought they had no character or charm. But I'm starting to realize that charm is something you can add to ANY space. And while I miss our big, open staircase, I don't miss climbing those stairs ten times a day to get to the bathroom!
 
Our new lake house.
With our daughters both grown now, we don't need quite as much room as before, and health troubles with my feet make living in a one-story home a blessing. We've already done a little painting, and I hope to do LOTS more as the months and years go by, but we'll see what God allows. His timing is perfect, so I'll keep all plans flexible. :)
 

We have a fireplace!


Our new kitchen. Needs some love.


Our new living room with built in bookshelves and a window seat. This room needs love, too.


Can't beat the view!

Sunset on our lake.


Sunday, March 29, 2015

How to Change Your Home to Look Like Your Pinterest Boards

Also, How to Declutter, Lighten & Brighten Your Home.

Also, How to COMPLETELY Change Your Home Decorating Style

 
See if this sounds familiar to you.
 
I was looking at my Pinboards--two in particular. One was titled A Home: Shabby, Vintage & Timeworn. The other was A Farmhouse Home. These boards are where I collect all the photos of homes that I admire. THESE are what I want MY life to BE like!

As I was looking through them, I noticed something. Something disturbing. These photos did not look much like my own home. In fact, my house didn't look like these at all.

Now, I understand that my modest under-100k house is not going to look like a castle or mansion, but a lot of these photos were not unattainable. In fact, a few simple changes, a coat of paint, and I could probably DO this. I was surprised at all the changes that I COULD make... but just never did.

That's when I decided to look up things like, "How to Change Your Decorating Style" and "How to Lighten and Brighten Your Home." While I found a few interesting articles, there really just wasn't much out there. I wanted REAL advice. I wanted BEFORE & AFTER photos of someone who had done this. What I got were lots of text-heavy articles with no proof, no pictures. Or else I got lots of lovely "after" photos without much explanation of how to get there.

That's when I decided to CHANGE things myself... and write about it. And post pictures. You are benefiting from my breakdown. Enjoy!


Find these photos and their links here


So, how DO you turn those pinboards into reality? I began by asking myself a few questions. And I was surprised by the answers.

http://fadedcharmcottage.blogspot.com/2015/02/
sweet-scents-in-bedroom.html
1. Take a look at your favorite pins of rooms you admire. What color are the walls?
In almost all my favorite pins, I was surprised to find the walls were white. Not only the walls, but also the trim around doors and windows. "But I like color!" I said to myself. "I like natural hardwood floors and trim." And yet, all my Pins told another story. Apparently, I like white more than I realized. It makes a nice, neutral backdrop for adding subtle color. It also lightens and brightens a room! Who knew?
 

2. What are 5 features/items that you like about your pin rooms?
These were my answers:
-Textures: stone, worn wood
-Linen - raw, homespun, natural fibers
-Beadboard/Weathered Wood - natural, white and clean
-Light/Airy Feeling - from the walls to the curtains, to the slipcovers.
-Space Open but Cozy - light and airy, but also cozy (not cluttered!) showcasing vintage pieces
Find these photos and their links on my pinboards: https://www.pinterest.com/thegoodvillain/

3. What DON'T you like about your current space? 
For me, this was primarily my dining room. My computer is also in this space, along with six (yes SIX) cupboards. I don't like the clutter (although I love all my knick knacks, but a girl has to choose). I don't like the dark wood floor and trim (but painting isn't an option as we might very soon be moving to another state, and I don't want to put that much work/time/money into it).

My dining room had a LOT of orangy wood in it. Not to mention serious clutter.

4. What DO you like about your current space?
I'd already begun the Great Pinboard Revolution in my dining room. I'd traded out our old, dark wood dining table for a thrift store fixer-upper, which I refinished myself. I'd also painted our walls five different times before settling on a vanilla latte color--it wasn't exactly white, but it was close. Finally, I'd traded in my heavy, dark draperies for sheer whites. (Click here for my post about rag garlands for curtains.) It was a good start, but my work wasn't done yet!


This was my dining room after PHASE 1. I updated the table and cleared some clutter. This was a good look for me, but I had to get rid of that desk and fake tree.

5. Now COMBINE these to make yourself a plan!
So, what can we learn here, kiddos? Apparently, I like white walls and trim. Unfortunately, this isn't an option for me right now, but I CAN bring more white into my space. Also, I like stone and worn wood. I like raw linens, beadboard, a light airy feeling and above all... a clutter-free space.

I took a look around my dining room and made a plan. First, I vowed to eliminate ONE of those SIX cabinets. This would help cut down on clutter. I also vowed to BOX UP some of the stuff in my room. I didn't have to donate it (although I probably should). But I could STORE it in neat little plastic tubs and cycle it out as the year went by, switching out one candlestick for another. You get the idea.

Also, why not paint one or two of those SIX cabinets white? It would add some white to the space, tone down those heavy woods and also lighten and brighten! Sadly, there's not much room for linens in my dining room, so I would need to save those for the living room. I would REALLY love to put up a beadboard celing with some reclaimed wood beams, but time and budget won't allow. Still, I have a plan!

My Plan:
-Declutter. Pack away extra items.
-Eliminate one of those cabinets.
-And paint one or two of them WHITE. I can DO this!

I'm hoping to implement my "plan" after our move. I'm looking forward to that clean slate, and I intend to do things differently this time.
  • I vow to take charge of my own space. If I want light, airy, painted wood, then I'm going to GO for it. No more of mom's voice in my ear saying, "You can't paint WOOD!"
  • I will remember how I like a few vintage showcase pieces, not eight-million knick knacks cluttering up my house.
  • And I won't let myself be lazy and just let a space sort of... happen. I will decide! I can DO this!

So can you.


BEFORE (or actually, mid-makeover).

AFTER (or actually, as much as I can do in my current home).


Vintage elements (not clutter): old suitcase (hiding all my books) and of course, my signature birdcage. ;)


I eliminated a cabinet! I am SO proud of me! I get a cookie.

Things are still a bit cluttered, but one step at a time, right? :)


https://whatsonmyporch.blogspot.com/2017/12/update-your-home-for-new-year.html


Sunday, March 22, 2015

Easy Spring Flowering Branches


Easy Spring Flowering Branches
If you're like me, you LOVE the look of flowering trees... those bare branches with the tiny, perfect flowers--no leaves to get in the way, just pretty perfection! However, I've tried cutting a few to bring into the house. Sometimes they are perfect and wonderful and last for days. Most times, though, they die quickly, are hard to work with and usually come with little "residents" in the form of spiders and other nasty visitors.


Solution? Make your own! It wasn't hard to find a few broken branches in our yard after a long, snowy winter. I went to the thrift store and bought a couple old bouquets of white flowers. They even came with some mossy grass that made a very nice faux bird nest! Some hot glue and voila! Spring has sprung!


Saturday, September 20, 2014

Autumn At My House 2014

Here's a look at how I decorate for autumn in my own house! I hope you are inspired! Enjoy!
The space above my computer printer cabinet is all prettied up for fall! I found an old drawer and painted it white, then used it like a shelf to hold pumpkins, apples and my homemade chalkboard.

This cabinet was a $5 find at our church fundraiser sale. It was brown and dirty, but a few appliques, a coat of paint and a couple of pendant pulls transformed it! I simply added a small bunch of autumn leaves to my sewing drawers to "autumn-up" this space.

Old thrift store bottles and jars make great "potions". A few dollar store cobwebs (and raven) and some mini apples make my candlesticks and vintage tea set look a whole lot spookier!

This vintage suitcase was another thrift store find. Only $3!!! It looks great all dressed up for fall atop my cabinet.

Here's a close up of this paper pumpkin made from the pages of an old song book.

This hutch was a $30 Craigslist find! I removed the doors (and by "I" I mean Hubby removed the doors). Then I painted it white and distressed it. It makes a beautiful TV hutch! A sprinkle of fall leaves and a pinecone and pumpkin add the
autumn look.


This was another thrift store find. This bookshelf was painted in green camouflage. A coat of simple white transformed it into the perfect backdrop for my lanterns and other knick knacks. A few pumpkins, gourds, pinecones and apples jazz it up for fall.

The "Love Grows" sign was hand-painted by me. The wood was from the barn on my dad's farm. On the back, I've written the names of our family members and will pass it on to my children. Some red and a white pumpkin add a touch of autumn here.

Our staircase paneling is beautiful, but so dark! I lightened it up with my handmade Fruit of the Spirit sign and a rag garland, dressed up for fall with some apples and twigs.

Our cat, Pudge, stalks birds from the window above this handmade "Nevermore" sign.


This shelf makes a great display area on my porch! Two-tone baskets, fall leaves and an apple garland add texture and color for fall!


Summer still lingers here with my pink impatiens.