Showing posts sorted by date for query dresser. Sort by relevance Show all posts

Thursday, December 28, 2017

Update Your Home for the New Year!

Resolutions.

We've all got 'em. Mine is pretty much always to lose weight. It lasts for a week or two until the willpower fizzles out and chocolate starts sounding way better than skinny jeans.

But one resolution we CAN keep is to update our house! You might have visited your parents or grandparents this holiday season. Maybe their homes make you jealous... or maybe you look at the same old wood paneling and dusty, outdated curtains and wonder why they never change their style. Of course, if you're like me, you go home and look at your own dusty curtains and wonder why you never change YOUR style.

Enter the Home Update Resolution!

This is the year. You can do it. It starts with some simple baby steps.

Home Update: Baby Steps

1. Clean. I know. It's no fun, but put away your pouty face and get out those rubber gloves. Wipe, vacuum, pick up. You can do it. I believe in you.

2. Declutter & Organize! Now that you've got some space on your dining table, use it as a command center. Start emptying out your kitchen cabinets and drawers. Make piles for "Keep" "Junk" and "Donate".  Anything you haven't used lately, or items that are broken... toss them. Now is NOT the time to be sentimental. Just because your great-aunt Mabel passed down that cracked ugly cookie jar does NOT mean you have to keep it. Take a photo and start a donation box.
 
Need some ideas on how to organize? Check out my Pinboard:
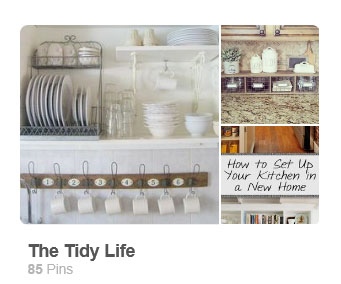
https://www.pinterest.com/thegoodvillain/the-tidy-life/
Here is a link to my Pinboard for organizing and decluttering.

3. Paint the Wood. Some of you will cringe when I say this. I know it is a fad right now to have white painted wood. So, you don't HAVE to do this, but if you have 70s wood paneling that isn't even real wood. Please. FOR HUMANITY. Paint that stuff white! But start with a good cleaning and some Zinsser primer first. And if you're feeling really feisty... paint your outdated wood cabinets, too!

Here is what our dining room looked like after painting the bookshelves and wood paneling.
So much brighter!


4. Change Your Curtains. Maybe they came with the house. Maybe you just don't think about them, but curtains can be like wrinkles for your house... they make it look OLD. Take a look at your favorite rooms on Pinterest. What do they have in common? I bet many of them have simple white curtains or NO curtains at all. I realize naked windows are not always practical, so if you need curtains, make them simple and clean. For our curtains, we used a package of twin flat sheets we bought on Amazon. In white. We clipped them with black curtain rings and saved a TON of money by using electric conduit instead of curtain rods (cost was around $3/rod!). Plus the conduit is WAAAAY less flimsy.

In our daughter's room, we used sheer lace curtains and metal electrical conduit for the curtain rods.
It is much cheaper and stronger than regular curtain rods!
This was our daughter's room before. No lie.


5. Paint Furniture. This is like the wood dilemma above (see #3). I know your orange-ish cabinet and your dark brown buffet and your honey blonde dining table all came from Grandma so-and-so, and she'd roll over in her grave if you painted them, but honestly... they look weird together. So many different wood tones. And they make your house so dark. Take another look at your favorite Pinterest homes. What color are the cabinets, the tables, the buffets? If they're white or gray, then you might want to consider painting your own furniture white or gray, too. Just a suggestion.

 
https://whatsonmyporch.blogspot.com/search?q=dresser

See what this dresser looks like after a coat of paint.


6. Update Your Art. Not ready to leap into painting furniture or rooms just yet? Try something smaller. Make a family name sign. It will add some quick and easy farmhouse charm to your home. And maybe it will even give you the redecorating bug, who knows?

 
https://whatsonmyporch.blogspot.com/2015/05/monogram-pallet-family-name-sign.html


Good luck decluttering and updating your house. Here's to a clean, fresh and beautiful NEW YEAR!

Want more farmhouse style décor? Check out this post about Galvanized Farmhouse Finds from Hobby Lobby.

http://whatsonmyporch.blogspot.com/2017/12/galvanized-farmhouse-from-hobby-lobby.html

Want an even EASIER way to redecorate your house? Get printable art in my Etsy shop!

https://www.etsy.com/shop/MyPorchPrints?section_id=19861674


Tuesday, December 26, 2017

Farmers Market Bench Makeover

Farmers' Market Bench Makeover by What's On My Porch


I find real pleasure in taking something unwanted and old and turning it into something beautiful and useful. This Farmers' Market Bench was no exception.


I found this bench in a thrift store. I knew as soon as I saw it that it would be perfect for an entry way: a place to store shoes or toss a bag or coat. It just needed a little updating.


First, I cleaned and primed the wood with Zinsser primer. This makes it ready to take on paint. You could also sand, but that takes a lot of work, and it's not necessary as long as you prime first. It's easy to think you can skip this step, but I don't recommend it. The paint just won't stick well without it.


Next, I measured the bench and found some cute fonts and printed the words "Farmers' Market" in large letters and taped them together. (Fonts: Mottona and Twiggy Pop).


I colored the backs of my words with willow charcoal and placed the words on my bench. Then I traced them onto the wood with a pencil. I removed the paper and outlined the tracing, again with pencil. Then I filled it in with black acrylic craft paint and a small paintbrush. I extended the "f" and "s" at the beginning and end of "Farmers'".

I love how it turned out! How about you?


Want MORE makeovers?
Check out this Antique Dresser Makeover!

 
https://whatsonmyporch.blogspot.com/2013/08/antique-dresser-makeover.html


Friday, May 23, 2014

Markets & Shows: A How-To Guide for your Booth


I just finished doing my second ever market booth/stall. And while it is fresh in my mind, I wanted to share my experience with all the first-timers out there who are thinking of selling their wares at a market or show.

First of all, a little background: What's On My Porch is my part-time, home-based business. I spend the warmer months junking for items to fix up and sell - mainly furniture and home decor. As I was growing this business, I received an offer from a nearby shop asking if I'd like to be part of their Spring Market - a gathering of vendors selling everything from furniture to jewelry and goat's milk soap to alpaca rugs. Yes, seriously.


I thought, "This is a great opportunity!" So I junked like I'd never junked before, went into a furniture-refinishing frenzy and ended up with LOTS of items to sell. Along the way, I made lots of mistakes but also had lots of triumphs. Here are a few nuggets of wisdom I have to pass on to you:

1. Get Ready

You will need plenty of inventory, yes. Whether you're selling handmade jewelry or candles or big ole furniture, you  need stuff to sell. But you also need ways to DISPLAY those items. Think outside the box. Pinterest is chock-full of ideas for this. For instance, hang your jewelry on a potted tree-branch. Use vintage furniture (wink, nudge) - like a chippy dresser to display your cupcakes. Price tags are also a good idea. If you sell beauty accessories, bring a MIRROR. Or buy one from me. :)


2. Get Ready Some More

You have items and a way to show them off, now you need a few more things. If your show is outside, you NEED a canopy. Yes, need. The sun is merciless and so is the rain. Wind can END you. So, anchor your canopy with a couple cinder blocks or bricks. Be prepared for the weather. You also need a cash drawer or pouch. I keep my prices in dollar increments. No messing around with a roll of quarters for me! Also: calculator, blankets, chairs, SNACKS, more snacks, water, sunscreen, a book or i-pad, etc. If you have access to electricity, bring a string of white lights. Paper/Markers. You want to make "Sold" signs and mark whether or not that person paid. (Hint, if you mark it SOLD, they should have paid.) Nobody wants to haul a dresser around while they're shopping. Save it. Mark it as sold. And write that person's contact info down.


3. Haggle Happens

People expect a little haggling at a fair. Often they will bring a pile of items up to you and offer $___ for the whole pile. I'm usually a little flexible, especially if someone is buying a pile.

Hint: Don't shout at people. I let people peruse at their leisure. No pressure. If someone seems interested I might say, "Feel free to make me an offer on that." But that's all. I don't like to be badgered when I'm buying items. If I want it, I buy it. If not, then being harassed by a seller is not going to change my mind.


4. Decorate Your Booth

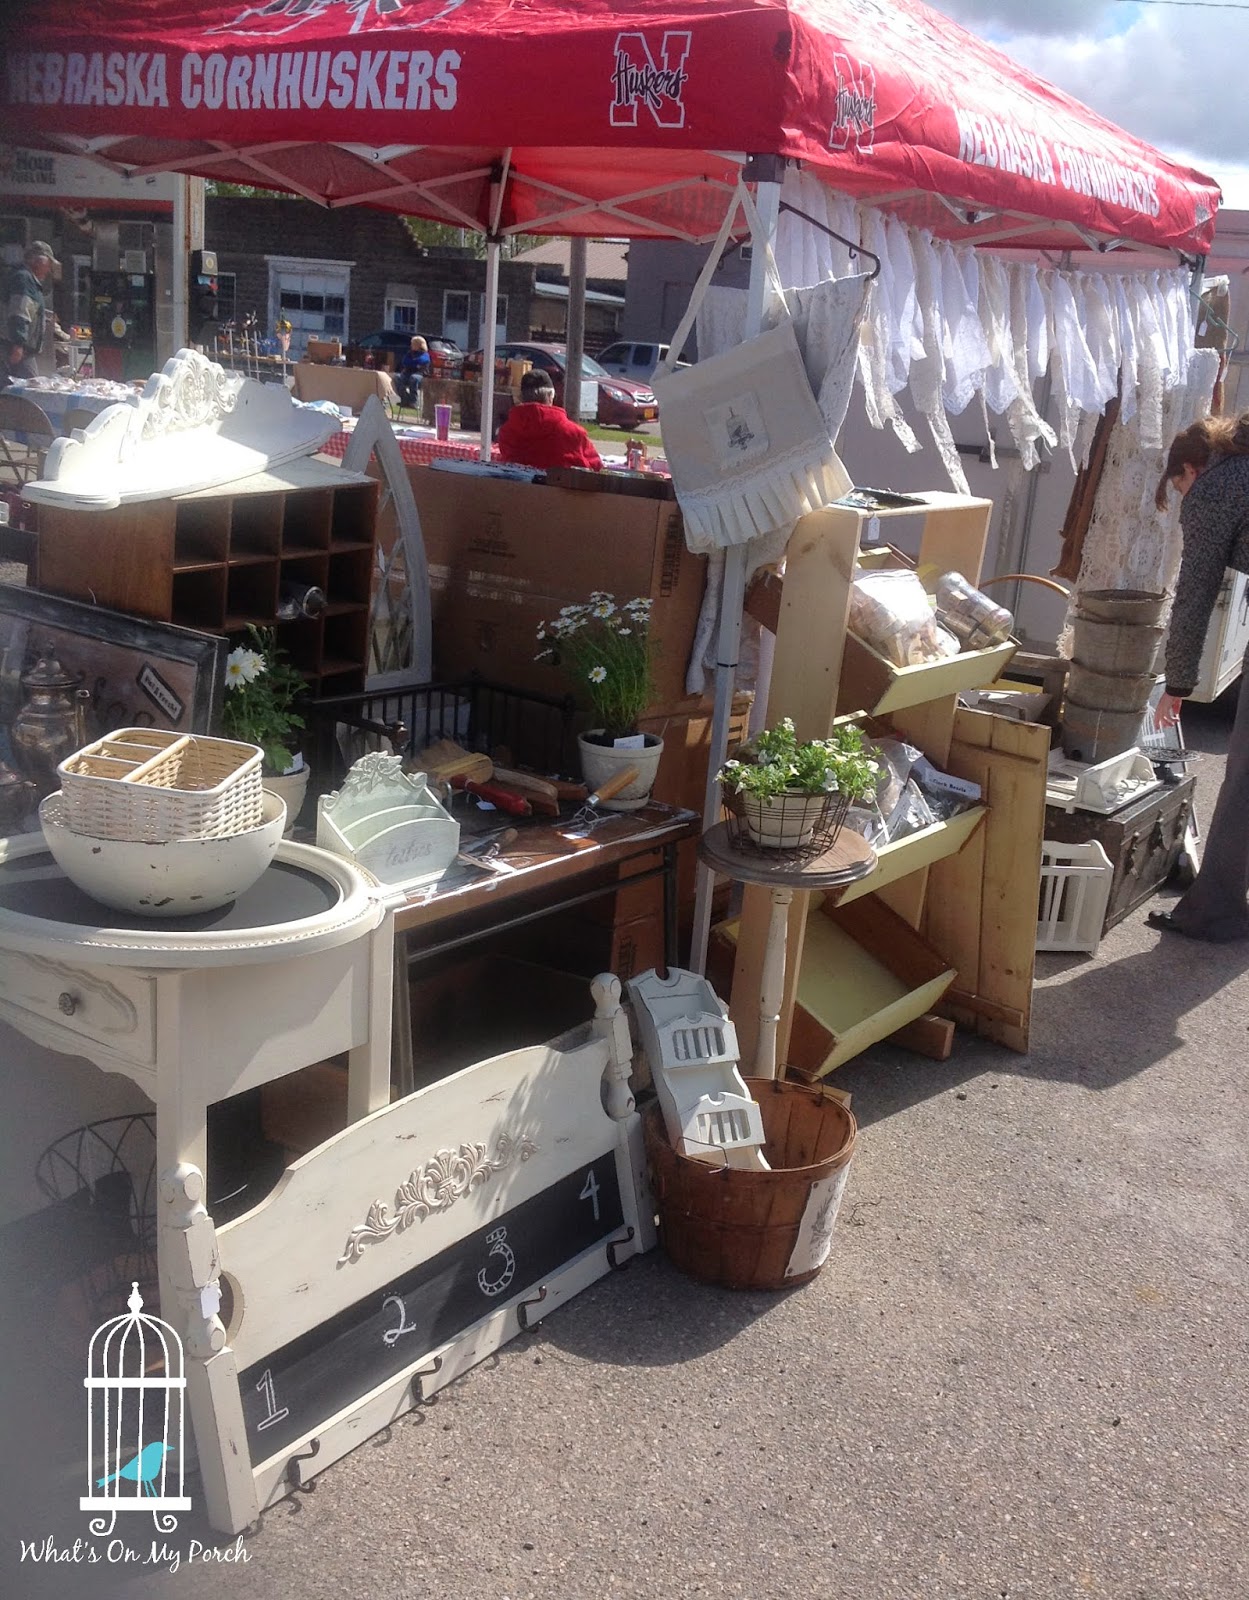
Make it pretty and keep in theme with what you are selling as well as the season. My market had a "spring" theme. I came with pots of flowers with little signs saying "for display only." Also, I made a pretty lace garland to draw attention and decorate my red Nebraska Cornhuskers canopy which brings me to...


5. Disasters Happen, Don't Freak Out

We could not find our regular canopy and were forced to use alternative options: mainly a big red one advertising a sports team from a rival state. Yay. We got a little flack for it, but we laughed it off, and hey... It kept the rain and sun off, so I was happy. If you face similar dire circumstances, remember it's only STUFF. If the wind blows over your glass display, it will suck. You will want to cry. But try to keep a smile on. People will think you are brave, and that's better than hearing you blurt out a nasty word in front of a soccer mom and her brood of little ears.


6. Pricing

This is so tricky. I usually keep my prices pretty reasonable. You can get an idea by walking around the fair and seeing what others are pricing their items for. Also, keep in mind the market. Mine was in smalltown Iowa. These are quilting ladies, moms, farmers... We don't usually sell $8,000 coffee tables here. It's more like sixty bucks, max.


7. Bring a Buddy

Help is invaluable. I was lucky enough to have my kiddos and hubby to help me through. This could not have happened without them. I can't lift furniture alone. I can't load and unload a truck myself. And when you have to go to the little girls' room... you really need someone to watch your money drawer for you.


8. Finally, Have Fun

Bad things will happen. Good things will happen. But your attitude makes all the difference. Try to relax. Hopefully you'll make a little cash and have some stories to share. Like I did. :)


Friday, February 21, 2014

Painting Old Books: Yes, It's OKAY!

Today I am working with only one arm. Well, mostly. I somehow managed to injure my right wrist about a week ago, but I thought I could get away with using it lightly. After shoveling snow, lifting a dresser and numerous painting, prying, scraping, sanding, mixing, etc., I realize I have no concept of what it means to use it "lightly." And I'm in throbbing pain if I so much as use a computer mouse. So, today I am blogging (mostly left-handed)! 

Here is a project that did further injury to my wrist yesterday (but thankfully not too much).

I bought these vintage books at a secondhand store. They are not exactly classics of literature, so I didn't feel guilty about painting them. I've seen other bloggers paint books and wanted to give it a try. After all, most of my "vintage" (AKA old) books are not the kind I read. They are for decorating. They make pretty shelf displays or bases for candles and other knick-knacks.These were adorable in red and green, but not really the look I wanted. I felt a tiny twinge of guilt about painting them, but since there were about a dozen other colored books at the store, I didn't feel all that bad.

So, I began with a coat of country white satin latex paint on the outside cover, followed by another. I found I could paint the whole thing at once, front and back, if I set the book upright to dry, using the inside pages as a kind of handle to hold while I painted. Afterwards, I realized I could still see the red and green covers that folded around to the inside of the books. So, I painted just a little inside the covers, too.

When they were dry, I added a teensy bit of black to make a dove-gray paint shade. I dipped in my sponge brush, dried most of the paint off by wiping it on a paper towel, then lightly brushed the gray over the white to bring out the linen texture on the cover and embellish the edges.

I think they turned out beautiful! The perfect gray-white base for my little ceramic bird. Very shabby chic!


Sunday, August 25, 2013

Antique Dresser MAKEOVER

I was surfing Craigslist when I saw an ad for an amazing wooden radio cabinet. I knew I just had to have it!
I talked hubby into driving two hours with me to go get it. When we arrived at the store where it was being sold, I LOVED it and bought it. Then I started looking around and wow! There were LOTS of items in that store that I could have come home with! But I didn't. I was very restrained. I only bought a few books, some small hardware pieces and THIS!

 
You would have done the same. Trust me. The beautiful moldings, the pretty curves and character, character, character! This antique wood dresser with its dovetailed drawers and awesome hardware was mine. It had just been waiting for me to come and buy it and make it into a shabby chic masterpiece! I got to work sanding, priming, painting, sanding some more and glazing with a dark walnut stain. Here's the result. The hardest part was selling it!

This shabby chic dresser turned out beautiful! Elegant lines, pretty moldings and graceful curves. LOVE.


Yes, I painted the hardware. I used to leave it natural or replace or spray paint it on lots of my other pieces, but
then I saw someone else paint it and realized how incredibly charming it looked!


Friday, August 16, 2013

Dresser Makeover: A Story

Everyone has one--an old piece of furniture that you've had for YEARS. You don't really love how it looks, but you can't bring yourself to do anything about it because:
  1. You're too lazy.
  2. It was your grandma's/aunt's/mom's/Mary Todd Lincoln's. And painting it would be a sin/make you an outcast at reunions/get your name and your children's names scratched off the family tree, etc.
  3. You've never found time in the last sixteen-and-a-half years to DUST it, let alone FIX it. (This is mine.)
  4. Insert excuse here_____.


You KNOW that piece. Maybe it's more than one. Maybe it's a whole dining room. The point is, everyone has one. This was MINE, and this is its story.

It was about a bazillion years ago. Hubby and I were shopping at a trendy spot called Valley Junction, where antiques abound and anything cool can be had for the right price. Including a jar of buttons, but that's a story for another time.


Another "before" shot of our little curvy dresser. Yes. That IS a lot of dust.

We were in one of those shops where stuff is piled on top of other stuff when we spotted it... a cute little curvy antique dresser. Solid wood. Dovetailed drawers. I had to have it!

"How much?" Hubby asked because I'm an introvert.

"$130," said one of the two guys who followed us around the store, spouting off the merits of each item as we passed it.

"Will you take $5?" I asked.

Okay, I didn't really, but I should have because $130 was just a wee bit out of our price range back then. In fact, it still is.

I'm going to give you the abridged version here since you can probably guess the ending. We bought it. We took it home. I put lamps on it and gushed over it and NEVER dusted it again.

Fast forward fifteen years, several dogs and about six houses later. The little wooden dresser is sitting in our upstairs hall because I don't know where else I can fit it. It doesn't actually work as a dresser for any of us because with two teenage daughters, we have enough clothes to build a suspension bridge to the moon.

I suddenly have an epiphany.

"Hey!" I say to myself, "I am pretty handy with a paintbrush these days. I should make over that old dresser that we paid too much for all those years ago!"

I started with a coat of Zinsser primer. You will hear that product name a LOT from me. If you hate sanding as much as I do, then you should get to know Zinsser. Then I followed with a coat of white paint. Any old latex will do. Satin finish. I used sandpaper to rough it up and give it that worn-in, chippy look.

For the top, I did have to crack out the old orbital sander. After it was sanded, I mixed white latex paint and water (about half and half, I'm not very mathy). And brushed it over the sanded top. When it was dry, I went over it with a coat of stain. I brushed the stain on, then wiped it off with a rag. Walmart sells these white kitchen tea towels in packs of 10 that are perfect for this and many other projects as well. This stain-over-white-wash technique gives the wood a grayish driftwood finish that I just love!

And that is pretty much all there is to know. If you are wondering about the end of this story, have a look at the photos. I think it was a happy ending. And I promise to dust it this time. Seriously.


The end.