Showing posts with label upcycle. Show all posts

Tuesday, November 10, 2015

Red Radio Cabinet


You may have seen a similar cabinet on Pinterest. Like me, you may have even pinned it. Twice. And you might have also thought, "I NEED that." Of course, radio cabinets aren't all that easy to come by, but when you do find one on Craigslist. In your town. You BUY it! And then you paint it RED.

Okay, so that's what happened. One dark and stormy night, the ever-beleaguered Hubby went out and brought home this bad boy: an antique wood radio cabinet.

I seriously thought about painting it white. "White goes with everyone's décor," I said. But my daughter convinced me to go for the red. "Not too many people can fit red into their house," I said. "Yes," she answered, "but that means the ones who can will be REALLY excited to find something in red."

Okay!

Here's a quick rundown of the process. First, Hubby removed the fabric "speaker" in the front. Then I sanded a few of the rough spots. Not enough, though. After I painted, some of the dents showed through, but we'll call that "character."

Then I primed it with Zinsser primer. This step may or may not have been necessary. I was going for a bit heavier distressing than usual, so I could have probably gone without the primer.

Then I painted the whole piece red. (Acrylic craft paint, Walmart craft section.) After that, I sanded it with a sanding block.The red was a tad on the orangey side, but I didn't mind because I knew I'd be going over it with a dark stain, which is the last process: to brush on stain and wipe it off. The stain helps bring out the sanded wood, essentially staining it again. It also adds depth and a little shine to the piece while giving it a layer of protection.


I really love how she turned out! Once again, I wish I had a bigger house, because I'd keep this one! Alas, it is moving on to greener pastures.


Wednesday, May 7, 2014

Desk Makeover With French Wreath Graphic


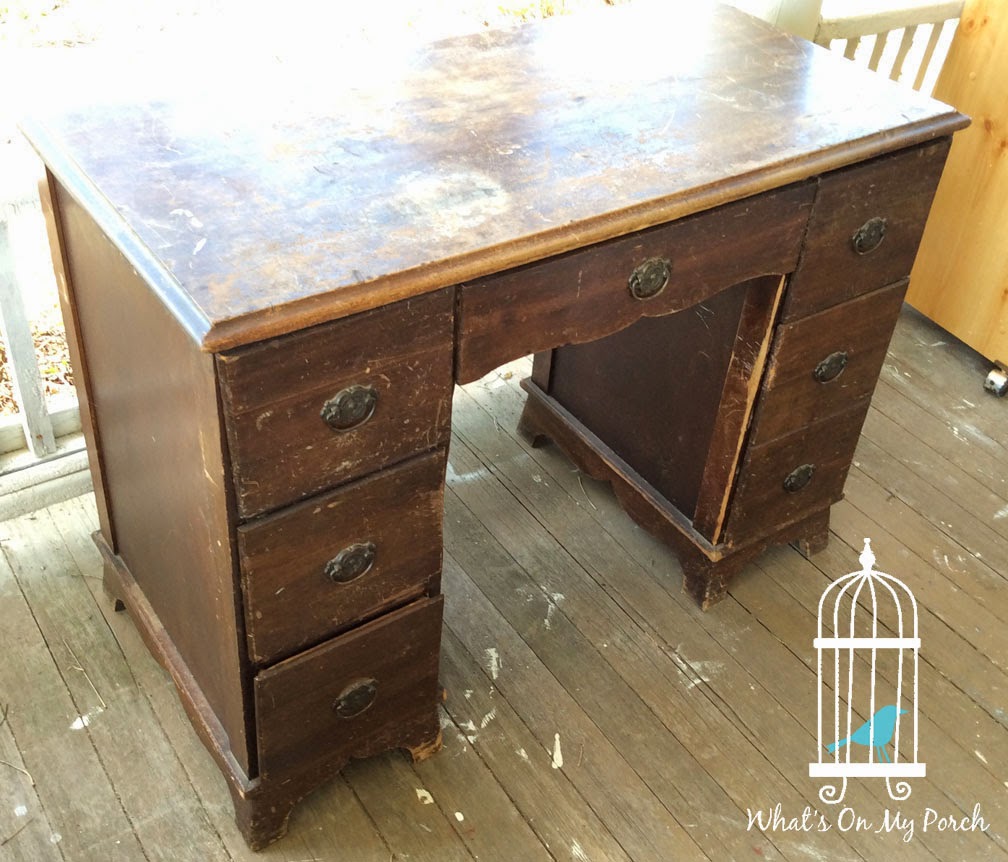
Hubby picked up this desk for me. It was a Craigslist find. I wasn't sure what exactly I was going to do with it. I only knew that it was abused and needed love. :)


I began by sanding the top down to the bare wood. It wasn't hard. The finish was practically begging to come off. I didn't sand out all the imperfections though. I like them. Next, I primed/painted the bottom portion of the desk (hardware, too!), then sanded the edges for a rough/chippy look. Finally, I stained the bottom (over the paint), wiping it away to leave behind an antique sheen.


On top, I did a white wash of watered-down latex paint. When it was dry, I also stained over that. It gives the top that driftwood look.Then I traced the graphic on and painted it. 
Thank you Graphics Fairy (see link in sidebar).

 
Here it is with the left side "distressed" so you can see the difference.

I think it turned out gorgeous. Could be used as a desk, vanity or even a TV stand! Lots of shabby-chic, cottage loveliness!


Tuesday, May 6, 2014

Chair & Foot Stool

Pretty chair and stool makeover! I found both of these beauties at the thrift store. They don't exactly match, but the color and grain sack theme tie them together.

For the stool, all I had to do was tighten the legs with some wood glue and sew this pretty, shabby tuft for the top. I basically sewed a rectangular pillow (adding some pre-made graphic patches). Then I stuffed it and tufted it by sewing on buttons. I attached it to the stool using a few upholstery tacks.


 The chair I primed/painted and distressed with a sanding block. Then I sewed some graphic pillows, even adding a pretty graphic to an existing cushion.


 They make a fine pair! Don't you think? :)