Vintage Christmas Loaded Envelope Tutorial*May contain affiliate links.
Okay, confession time. This is my very first loaded envelope. You're probably wondering why you should take advice from me on how to make one of these. I have no answer, except to say that I've done a bit of crafting in my time, and this is the kind of project I love! And I did do a little research. I don't think there is a right and wrong way to make a loaded envelope. But there are some things I learned in the process, and that's really what I want to share with you.

What You'll Need
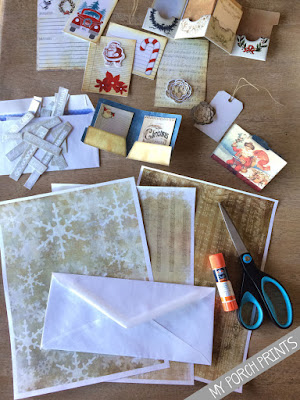
You can use almost anything to make a loaded envelope. But for this particular one, I used Christmas-themed printables from my Etsy shop. I will list the items you'll need along with shop links for the printables.
#10 Envelope (4.13 x 9.5 inches)
Craft supplies: glue stick, glue, scissors
From My Porch Prints on Etsy:
Christmas Sheet Music
Christmas Phrases Papers
Christmas Recipe Cards
Christmas Mini Folders
Red Christmas Truck Tags
Christmas Countdown Flip Cards
Choose A Theme
First, you'll need to choose a theme for your loaded envelope. I chose Vintage Christmas. But you could do anything. Some ideas: roses, holidays, colors. I even saw a rainbow one that had a package of Skittles candy in it! Decide who will be your recipient and build a theme around that person. Gift them with tags, crafts, stickers, candies, etc. Or use as part of a junk journal, December Daily or flowish journal (a journal where the pieces can be taken out and used for crafting).
Cut Papers
Using your envelope as a guide, trace & cut papers to fit. Cover the inside of the envelope, the flap and also the back as shown. Leave the flap open. It will become a pocket.
Ink Edges
After your front, back & flap are covered with paper, you can choose to ink the edges. You can use Distress Ink or a marker & make-up sponge as shown. Color on the sponge with your marker, then dab the sponge along the edges of your envelope to create an aging effect.
Next, fold the bottom of the envelope up over the flap to form a pocket as shown. Only glue the sides, leaving an opening to create your pocket.
Add Small Pocket
Next, cut a piece to use as an extra pocket on the front. I used this Christmas sheet music piece printed on cardstock. ONLY glue the sides & bottom. Leave the top open to create the pocket.
Cut Top Of Envelope
Cut the top off your envelope to create a pocket as shown. Ink the edge if desired.
Fill Your Pockets
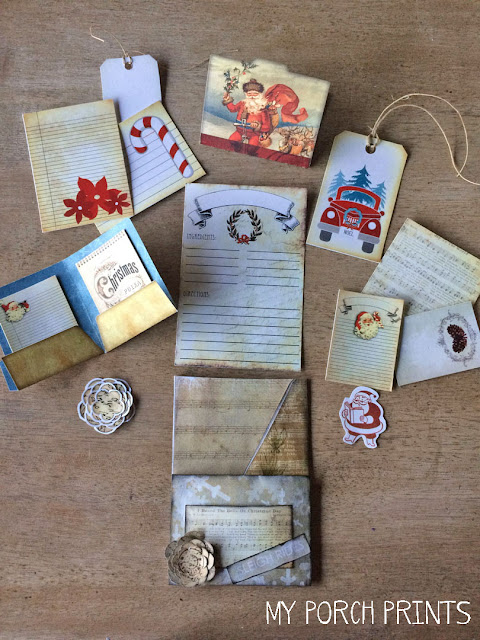
Next add your "goodies". These can be tags, small cards, mini folders, etc. You can also add lace, ribbons, buttons, tea bags, gifts, stickers, embellishments... whatever you want to fill up your pockets and "load" your envelope. All of my goodies came from My Porch Prints on Etsy.
I added a Christmas Recipe Card to my largest top pocket. I filled the smaller pockets with tags & folders. And the littlest pocket holds a tiny Santa and a layered flower. I glued "Sleigh Rides" to my tiny pocket as well and added another layered flower as an embellishment.
That's it! Now who's going to make a loaded envelope? Visit my Crafting Ideas Facebook Page and share your creations.


No comments:
Post a Comment
Note: Only a member of this blog may post a comment.