Transfer Images to Flower Pots
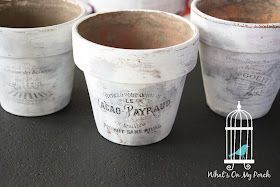
I recently saw a tutorial on transferring images using Mod Podge and I wanted to try it. The perfect opportunity came in the form of three old terra cotta flower pots that I found on sale at a thrift store. They already had a pretty, timeworn quality, but I was looking for more white and less red.
Paint
So, I began by painting them with a thin, dry-brushed layer of white. After that I added another layer of gray--just here and there where the red was still poking through.
So, I began by painting them with a thin, dry-brushed layer of white. After that I added another layer of gray--just here and there where the red was still poking through.
Applying the Graphic
After they were dry, I printed some Graphics Fairy (see link in sidebar) images backwards and then cut them out. I sponged over them with Mod Podge (matte finish) and stuck them to the pots. I messed this part up just a little. I should have cut the paper around the graphic, not just in square, straight lines. I figured this out on the last one.
After they were dry, I printed some Graphics Fairy (see link in sidebar) images backwards and then cut them out. I sponged over them with Mod Podge (matte finish) and stuck them to the pots. I messed this part up just a little. I should have cut the paper around the graphic, not just in square, straight lines. I figured this out on the last one.
Dry Overnight
The tough part came next: letting them dry overnight without touching or peeking.
Lightly Wet & Peel
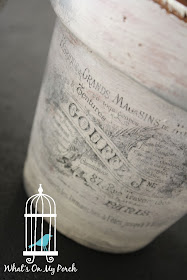
The next day I took them to the sink and lightly dampened the paper with water until I could see the image through it. Then, ever-so-gently, I peeled it away and also rolled it. Peeling seemed to want to take off the image, but rolling away the paper little by little worked, leaving the image behind and (mostly) intact.
The finished product turned out very pretty and has a kind of shabby, vintage, French look that I love! Can't wait to pot some herbs in these pretty planters!
Wire Basket
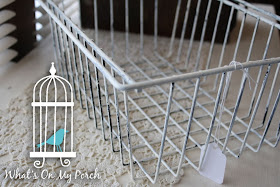
 I also found this cutie patootie wire basket. It wasn't much to look at, but a quick coat of white paint (leaving some black showing through for that chippy look) makes it perfectly shabby!


No comments:
Post a Comment
Note: Only a member of this blog may post a comment.